
Page 1 OF 7
Label Picture Description QTY
A Table Top
1
B Table Leg
3
C
Leg Support Bar
3
GLASS COFFEE TABLE
Picture
Caution : You must read this before you proceed

Page 2 OF 7
Label P
icture Description QTY
1 Stud
4
2 Allen Key
1
3 Flat Washer
7
4 Nut
4
5 Socket Wrench
1
6 Socket Head Screw
4
7 Spring Gasket
4
Before Beginning
Assembly:

Page 3 OF 7
Step 1
Step 2
Carefully lay the Table Top(A) facedown on a clean, non-marring surface.
Note: The Aluminum Slots should be facing upward.
Screw the Stud(1) into the Mounting Position of the Aluminum Slot with Allen
Key(2), tightening completely in a sequential manner.
Note: Both ends of the Stud(1) are different, be sure that the recessed
Allen head is facing outwards.
Caution: The Table Top is heavy, two Adults are required whenever lifting
or moving it.
Place the Flat Washer(3) through the Stud(1).
A
2
1
Aluminum
Slot
3
1

Page 4 OF 7
Step 3
Step 4
Step 5
Place the first Table Leg(B) and Leg Support Bar(C) through the Stud(1), and
Attach them using Flat Washer(3), Spring Washer(7) and Nut(4) with Socket
Wrench(5).
DO NOT tigthen.
Place the second Table Leg(B) and Leg Support Bar(C) through the Stud(1),
and Attach them using Flat Washer(3), Spring Washer(7) and Nut(4) with
Socket Wrench(5).
DO NOT tigthen.
3
7
4
5
3
4
5
7
B
C
1
B
C
6
1
C
B
6

Page 5 OF 7
Step 6
Step 7
Step 8
Place the third Table Leg(B) and Leg Support Bar(C) through the Stud(1), and
Attach them using Flat Washer(3), Spring Washer(7) and Nut(4) with Socket
Wrench(5).
DO NOT tigthen.
Insert Socket Head Screw(6) into the Mounting Position between the first Table
Leg(B) and second Leg Support Bar(C) with Allen Key(2).
DO NOT tigthen.
Insert Socket Head Screw(6) into the Mounting Position between the second
Table Leg(B) and third Leg Support Bar(C) with Allen Key(2).
DO NOT tigthen.
C
B
2
6
5
4
7
3
B
c
1
B
c
6
2
6
B
C
Page 6 OF 7
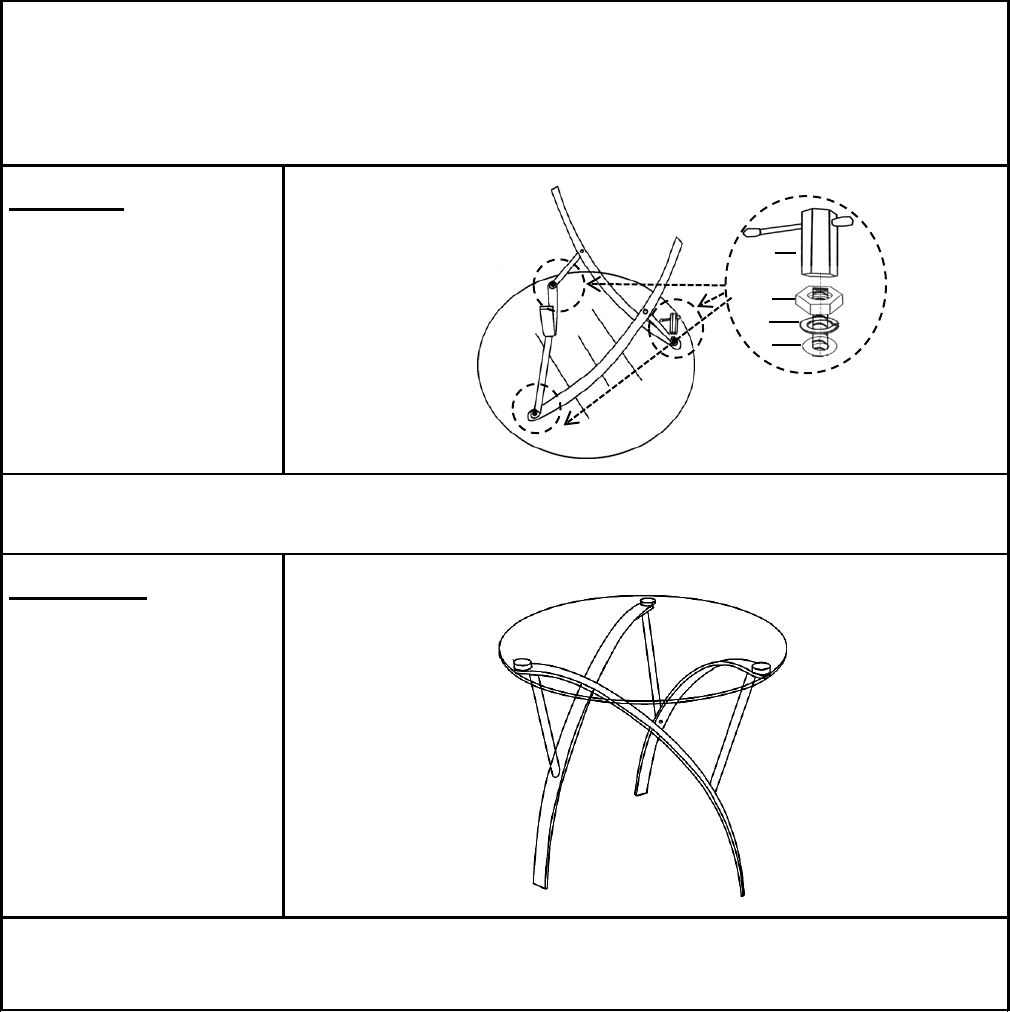
Step 9
Step 10
Turn over the Glass Coffee Table.
Your Glass Coffee Table is ready for use.
Tighten all Nuts(4) with Socket Wrench(5) in a sequential manner.
Insert Socket Head Screw(6) into the Mounting Position between the third Table
Leg(B) and first Leg Support Bar(C) with Allen Key(2).
Tighten all Socket Head Screws(6) in a sequential manner with Allen
Key(2).
4
5
7
3

Page 7 OF 7
