
EasyLink Services International Corporation | Customer Documentation
Page 1 of 49
Fax2Mail User Guide
Welcome to Fax2Mail. This guide is designed to provide new users with complete instructions on how
to use this exciting service. Additional information can be found on our website at www.fax2mail.com.
Thank you for choosing Fax2Mail.
About Fax2Mail
As a global leader and pioneer in multimedia messaging solutions, EasyLink uniquely combines the
best features of fax technology and the convenience of email into one powerful and easy-to-use
solution.
Our Fax2Mail solution enables customers to seamlessly integrate the power of fax into their existing
email service. Users can send, receive, save, file, forward and track faxes in seconds--right from their
desktops--without having to convert file formats. Work is accomplished faster, with added security and
total reliability.
Fax2Mail works with our clients' existing platforms for Internet access and email. Traffic is forwarded
through EasyLink Service's high-speed, high-volume network of servers with total transparency to end
users. Virtually all common document files, spreadsheets and graphic image files are automatically
converted to outbound faxes. Users also have the option of storing custom cover sheets for outbound
fax deliveries. When a fax is received over our system, it is automatically forwarded to an assigned
user's email box as a TIFF or PDF attachment with notification in the subject line.
Clients maintain total control over administration of their accounts through Web-based user
registration, coversheet selection/storage, billing and report options. Just choose the documents you
want to transmit and attach them to email as you would normally. Send your message to
faxnumber@fax2mail.com and we'll do the rest--converting the files for instant delivery as crystal-clear
faxes!
There are a variety of methods in which you can send and receive electronic faxes. They include:
1. Your email client such as Outlook or Lotus Notes
2. Our online User Interface located at www.fax2mail.com
3. Our integrated MS Office Toolbar
4. Our Virtual Fax Machine
5. Our proprietary Print Driver
6. Our Blackberry Applet
Sending, Receiving and Viewing Faxes in your Email Client
Receiving your Faxes
To receive a fax, simply provide the sender with your Fax2Mail fax number and request he or she send
the document in the traditional manner. The Fax2Mail system receives the fax and instantly converts
the document into either PDF or TIFF format before forwarding it to your email box.
The converted fax arrives in your email box in the same fashion as all of your other emails. The
subject line of the email clearly identifies it as a fax and the original document is stored in an easy-to-
open attachment. If you use the blackberry or Motorola Q, you will receive your faxes in the same
fashion and can print to any nearby fax machine.

EasyLink Services International Corporation | Customer Documentation
Page 2 of 49
Viewing your Faxes in e-mail client
Each user can choose to receive their electronic faxes in either PDF or TIFF formats. Both of these
formats are industry standards and in most cases the viewer application comes preloaded on the PC.
If you do not have a viewer loaded on your PC, choose PDF as your fax format and download the free
Adobe Acrobat Reader software at www.adobe.com.
To view a fax from your email client, simply select and open the email attachment. Your PC will launch
the viewer necessary to read the document. Once you have received and viewed your fax, you can
perform all standard document operations, including saving, filing, printing, and forwarding it to other
users.

EasyLink Services International Corporation | Customer Documentation
Page 3 of 49
Sending Faxes through your email client
The Fax2Mail solution uses your existing email client to send documents to a recipient as a fax.
To send a fax:
1. Create a new email document
2. Attach the documents you wish to send as faxes. Multiple documents can be attached to a
single email and they will all be delivered to the recipient as a single transmission.
3. In the "TO:" field in the email enter the recipient's fax number followed by @fax2mail.com. The
complete address should appear as in this sample: 404333123[email protected] Notice that
there are no dashes between numbers; no spaces or additional characters.
4. Send the email
Delivery Reports
Delivery reports can be made available at customer request. If delivery reports are requested, once a
faxed message has been delivered, Fax2Mail will provide you a delivery report via email. The delivery
report will reflect the same subject line as the fax you had sent. The delivery report will also contain
other important information, such as Job Number, Page Count, Summary and Detail data. The detail
data section of the delivery report contains the status of a fax. Delivery reports can also be customized
to include variable subject lines from outbound fax job data. A status of "SENT" indicates that the fax
was successfully delivered to a fax number. See the below status values/codes and descriptions for
more.
Fax Status Codes
Value/Code
Description
BLOC
Fax number is blocked or invalid. A number may be invalid if it has non-numerical
characters in it. The fax was not delivered.
BUSY
The fax was not delivered because the fax machine was busy each time Fax2Mail
dialed.
DISC
The fax machine disconnected, usually because of a fax protocol error, or because the
receiving fax machine ran out of paper. The fax was probably not delivered.
ERR
This code is used for unknown errors in faxing. The fax was not delivered.
FRM
Invalid ―from‖ name specified. The message was not delivered.
ICPT
The fax was not delivered. This indicates that the fax number is probably wrong or has
changed, or there was a phone line issue. An operator or a recording may have
intercepted the call to indicate the call could not be completed. This is occasionally a
problem in calling overseas locations, where phone lines may be few and in great
demand.
NOAN
The destination fax machine did not answer. It could have been turned off, or it may
have been out of paper. Also, the number may be wrong, or a person or answering
machine picked up upon each attempted delivery.
NOFN
The fax was not delivered. You will see this code if you have tried to send a fax in fine
mode to a machine that cannot receive fine print quality faxes.
NOFX
The fax was not delivered. The machine that answered the call did not provide a valid
fax machine response, or the fax machine disconnected — usually because of a fax
protocol error or because the receiving fax machine ran out of paper.
PAGC
After Fax2Mail sends a fax page, the receiving machine is expected to respond with a
confirmation that the page has been received. If you see this code, it means that the
receiving fax machine did not respond. Fax2Mail will not consider a fax to be sent
unless such a signal has been received for every page. However, it is possible that the
recipient has received the fax, especially if the receiving fax machine failed to signal a
confirmation on the last page.
PRO
There was a processing error. The fax was not delivered.

EasyLink Services International Corporation | Customer Documentation
Page 4 of 49
PVOC
The fax was not delivered. Fax2Mail detected a human voice answering the phone
rather than a fax machine sequence. Even if you are sure that the fax number is valid,
we suggest dialing the number on your phone to double-check. Many fax machines
share a voice phone line. Busy circuits could cause an operator recording to come on
line instead of the call getting through. Alternately, the fax modem may have
interpreted the signal it received as being within the range as that of a human voice.
SENT
The fax was delivered successfully.
TFDD
The fax number has too few dial digits. The fax was not delivered.
TMDD
The fax number has too many dial digits. The fax was not delivered.
TRAN
Translation error. The fax was not delivered.
UNCC
Unknown country. The fax was not delivered.
Outbound File Formats
The following is a list of document formats that are currently supported for sending outbound faxes:
Applications
Versions
File Extension
Microsoft Word
Win 95, 97, 2000, 2003, 2007 Mac 4, 5.x, 95,
98, 2001, X
DOC, DOCX
Microsoft Excel
Win 95, 97, 2000, 2003, 2007
XLS , XLSX
Microsoft Visio
Win 2002, 2007
VSD,VSX, VSS, VSX
Microsoft PowerPoint
Win 2003, 2007
PPT, PPTX
Microsoft Project
Win 2000, 2003, 2007
mpp
Microsoft Publisher
Win 98, 2000, 2003, 2007
PUB
Adobe Acrobat
All Versions
PDF
File Formats
Rich Text Format
Version 1.x
RTF
Plain Text
Text does not have a version
TXT
JPEG
All Versions
JPG
Windows Bitmap
All Versions
BMP
GIF
All Versions
GIF
PostScript
All Versions
PS
Printer Control Language
PCL5
PCL
PNG
All Versions
PNG
Tagged Image File
(stored as an XAR)
All Versions
xar
HTML
All Versions — includes support for
encrypted documents
Fax Handling Options
Special handling options are supported by entering one or many of the following parameters on the
subject of the outbound email message:
Parameter
Description / Value
//CP=
Cover Page Control - possible values include "None" or
MailMerge.- Cover Page Object Name
//CREF=
Customer Reference String

EasyLink Services International Corporation | Customer Documentation
Page 5 of 49
//BC=
Customer Billing Code String
//FINE
Fax document rendered in Fine output mode
//STD
Fax document rendered in Standard output mode
//NOREPORT or
//REPORT=NONE
//REPORT=DETAIL
//REPORT=SUMMARY
//REPORT=CONDITIONAL
//REPORT=EXCEPTION
Overrides the setting of the report type in user profile
//NOBODY
Ignore the email body (first MIME type)
//D=MM/DD/YYYY (US)
//D=DD/MM/YYYY (UK)
Fax job release date
//T=hh:mm
Job release time (hour, minute) in military time format (ex.
13:30)
Managing your account through the Fax2Mail Website
(Includes 30 days of activity)
Log into www.fax2mail.com with you user name and password:
• Enter your Username and Password in the fields provided.
• (Optional) Select the language in which you want Fax2Mail screens to be displayed from the
drop-down menu above the Username field.
• (Optional) Select the Theme (i.e., primary color) in which you want Fax2Mail screens to be
displayed from the drop-down menu below the Password field.
• Click on the LOGIN button. Your My Homepage screen is displayed.
Note: After a period of inactivity, you will be automatically logged out of the Fax2Mail Website. To re-
access your My Homepage screen, you will need to re-enter you login credentials in the fields
provided.

EasyLink Services International Corporation | Customer Documentation
Page 6 of 49
My Homepage Tab
Top Toolbar (Fax2Mail toolbar):
• User Name field – identifies who is logged in
• Logout – End your session.
• Buttons for My Homepage, Contact Books, Reports, My Preferences, Administrator,
Downloads
• Dashboard buttons for Send Fax (green), Inbox (blue), Outbox (purple), Sent Faxes (orange),
Deleted (red)
• View the Fax2Mail Features panel – Features which are available to use with the Fax2Mail
service.
• Did You Know panel - New items that are happening with Fax2Mail.
• Monthly Usage panel – Tells you how many faxes and pages you sent for the month.
• Coming Soon panel – Features which are being developed for use with the Fax2Mail Service.
You can access all of your faxes through your personal folders on the left frame.
• Send Fax – Allows you to send a fax directly from the website
• Inbox – All of the faxes that have been sent to you
• Outbox – Are pending faxes that you have recently sent
• Sent Faxes – Lists all of the faxes that you have sent
• Deleted – Hides all of the faxes that you do not want to view in your mailboxes
Send Fax Page
Allows you to send faxes directly from the website
• Once you enter the recipient information, be sure to click the add button to be loaded into the
dialog box.
• Campaign Name /Customer Reference (optional) – This helps you to easily identify your
faxes.
• Type in the Billing Code (optional) – This will appear on your monthly invoice for easily
categorizing among faxes.

EasyLink Services International Corporation | Customer Documentation
Page 7 of 49
• Upload the document you would like to fax (required) – This is what will print out on the
recipients fax machine and be sure to click upload.
• Click Add Cover Sheet to use a cover sheet (optional) – This will insert an additional page
before the document you are faxing. Enter from name and comments.
• Select the Cover Sheet Template of your choice – There are default cover sheets that you can
use or you can edit those to create your own. (See Edit your coversheet)
• Choose the character set that will be displayed. The choices are: Chinese Simplified, Chinese
Traditional, Japanese (EUC), Japanese (Shift-JIS), Korean (EUC), UTF-8, Western European
• Choose the Fax Resolution. Standard or Fine
• Preview your document prior to sending – Allows you to view your fax before sending.
• Report Type – Will send you a confirmation report of the either as a Detail, Summary,
Conditional, Exception and None
Summary Report
Provides totals of delivered and non-delivered items
Detail Report
Provides delivery status of each item on the recipient list
Exception and Conditional Report

EasyLink Services International Corporation | Customer Documentation
Page 8 of 49
Provides complete information on non-deliverable items
• Number of Retries – You can choose either Short or Standard.
o Standard Method
Busy: A total of 4 attempts, with 3 retries after 5 minutes, 10 minutes and 15
minutes.
Error: 1 retry after 10 minutes.
o Short Method
Busy: A total of 4 attempts, with 3 retries after 4 minutes, 2 minutes and 2
minutes.
Error: 1 retry after 2 minutes.
• Sending faxes can be either sent right away (express) or scheduled for a future time.
• Now you are ready to send your fax, click ―Review and Send‖ at the top. This will review all of
the choices you made and allow you to view your fax Click on the here hyperlink to view your
fax in Adobe Reader (pdf) or Photo software (tiff) prior to sending. Click ok to send or Cancel
to cancel the job.

EasyLink Services International Corporation | Customer Documentation
Page 9 of 49
Inbox – Your received faxes (stored up to 30 days)
The inbox contains all of your received faxes. When you click on the Inbox button, a list of all of your
received faxes is displayed. The Inbox screen enables you to search for faxes that meet certain
criteria, and to access a variety of reports and other information related to the fax jobs listed.
• For details of each individual fax, click on the plus sign (+). This will provide you with additional
information such as: Subject line, List size, Number of Retries, RCSID, Delivery type, Job
Type, Status, Pages, Job Started Date/Time, and Received by User ID.
• Additional actions for each individual fax include the actions to the right of the fax within the
fax list.
• Viewing your fax - Click on the binoculars of the fax you have received
• A pop up box will appear, click here to download data. This will launch Adobe Reader if you
receive your faxes in pdf or will launch your default photo editor if you receive faxes in .tif
format. Click open to view your fax or save it locally.
EasyLink Services International Corporation | Customer Documentation
Page 10 of 49
• Reprocess your fax – This refers to changing the language character set.
• When using our Enhanced PDF option, you will be able to make comments on your faxes, this
will enable to you utilize one of eight different language character sets.
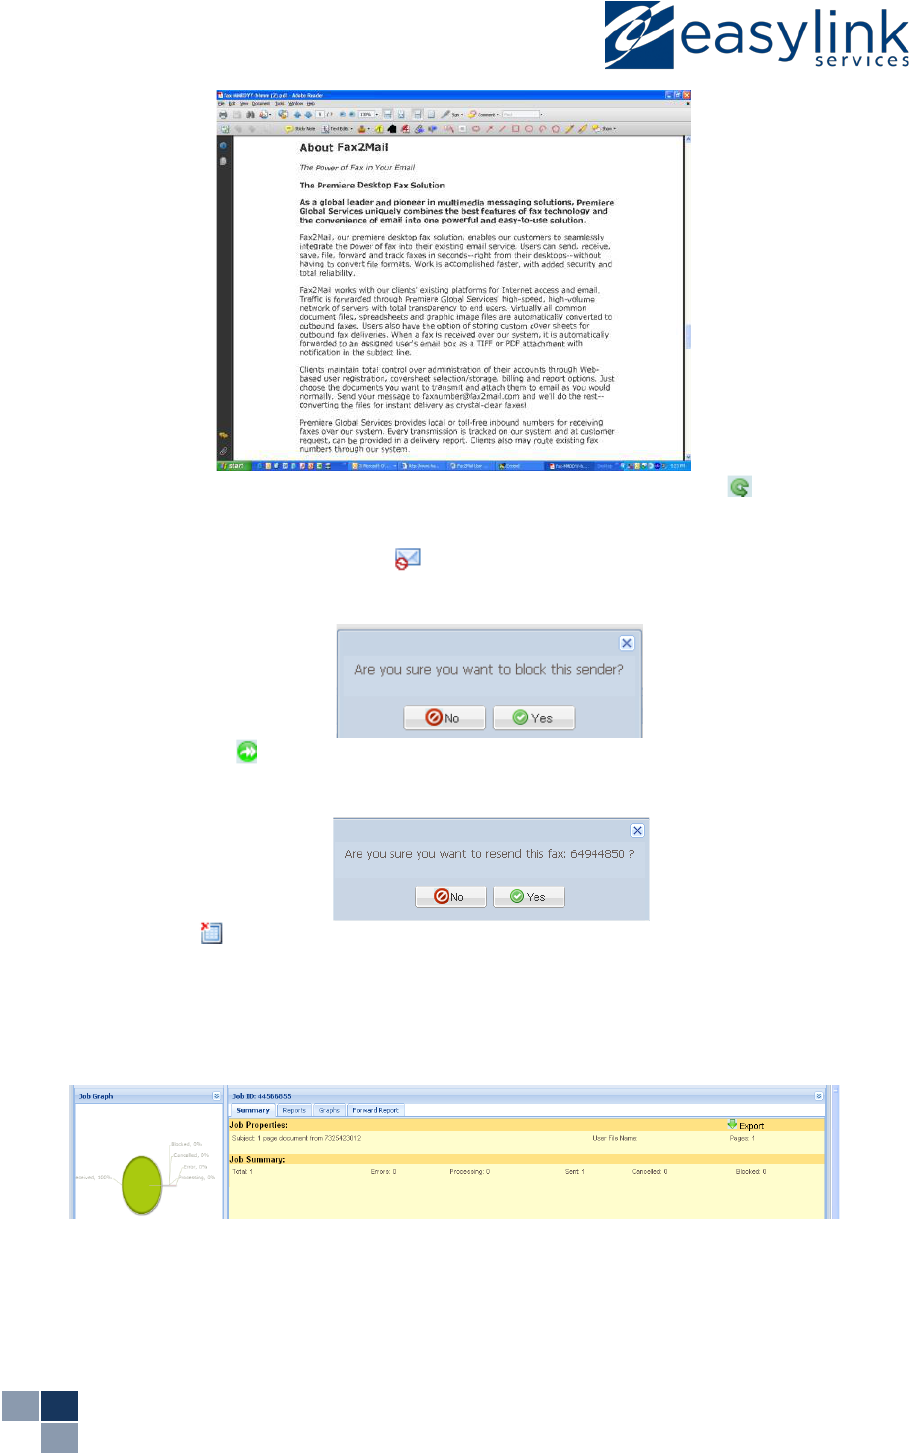
• Block Faxes from being sent to you.
If you are receiving unwanted faxes, you can easily block faxes by clicking the Block Faxes
button and that fax number will be added to your block list which you can unblock at any time.
• Resending a Fax
Clicking on the resend button from this section of the website will resend the job exactly how it
was sent to you. You will receive the fax again in your inbox.
• Hiding a Fax
Hiding a fax from your Inbox is like deleting it from your view and the fax will be added to your
Deleted Folder but not deleted from the Fax2Mail system.
• To view more details about each fax, click on the fax and scroll through the tabs below
o Summary Tab – Provides information of the Job properties such as the subject line
and number of pages. You can export the details of this fax into excel by clicking
export.
o Reports Tab
Export will download what you see on the screen into an excel file.
Resend will allow you to send your fax to another recipient’s fax number or
email address.

EasyLink Services International Corporation | Customer Documentation
Page 11 of 49
• Graphs – Graphical view of the results of the fax
• Forward Report Tab – Allows you to send a report to a list of email addresses. Choose
between Detail, Summary or Exception report.
• The top buttons on the header row within your inbox dashboard will allow you to take action on
more than one fax by clicking the box in each row for each fax job. The action options include:
o Hide – This allows you to hide the fax from your view and will be stored in your Hidden
Items Box
o Cancel – This will only be available is your job is in a processing state for Send Items
o Resend – This will Resend your fax exactly the way it was sent/delivered to the same
recipients. This will generate a report immediately viewable in excel.
o Previous – If you have many faxes, that take up more than 1 screen in the website
view.
o Next – If you have many faxes that take up more than 1 screen in the website view.
o Export – Will export what you see on the screen in an excel file.
o Download – Will download the PDF or TIFF files of the faxes that are in your inbox.
o Advanced Search – Will allow you to search for all faxes by:
Fax ID – Job Number
Destination – Fax Number Delivered to

EasyLink Services International Corporation | Customer Documentation
Page 12 of 49
Fax Number – Fax Number
Sender – Sender Number
Fax Type - F2M-recieved, M2F-sent
Fax Status - Active, Complete or Scheduled
Date – Search in the last 30 days
Bill Code – Defined text by sender for sent faxes
Customer Reference - Defined text by sender for sent faxes
Job ID - Job Number
Job Type - F2M = Received fax and M2F = Sent fax
Received Date/Time
Receiving fax number
Note: Only received faxes that have completed processing in the last five days
(relative to the current date), are displayed on the Inbox screen. For more faxes you
can do an advanced search to view the past 30 days of faxes.
Outbox – For pending faxes that you have just sent
If your faxes (jobs) are scheduled to be delivered as express, they will not remain in your outbox for
long, they usually are sent very quickly. You also have the option of scheduling your fax to be
delivered for a future time by scheduling the job. These jobs can be canceled as well.
• To view a summary of your fax in the outbox, click on the job in question, and click on the
Summary tab to see additional details.

EasyLink Services International Corporation | Customer Documentation
Page 13 of 49
• Cancel Job - Should you access your outbox in time to cancel the job, simply click the Cancel
button and confirm what you want to cancel, the fax sent and the report or just the fax sent.
Click Submit.
• To resend, export or request a report of the processing or scheduled fax, click on the Reports
tab.

EasyLink Services International Corporation | Customer Documentation
Page 14 of 49
• To see the status of your fax, click on the job in question and view the Graphs tab below.
• To forward a report of the scheduled fax, click on the Forward Report tab, choose the report
type (see report types in section 2.2.10) and type the email addresses and click Forward.

EasyLink Services International Corporation | Customer Documentation
Page 15 of 49
Sent Items – Your sent faxes (stored up to 30 days)
The Sent Items box contains all of your sent faxes. When you click on the Sent Items button, a list of
all of your sent faxes is displayed. The Sent items dashboard enables you to search for faxes that
meet certain criteria, and to access a variety of reports and other information related to the fax jobs
listed.
• For details of each individual fax, click on the plus sign (+). This will provide you with additional
information such as: Subject line, List size, Date/Time Entered System, List Name user,
Delivery type, Job Type, Date/Time Job Started.
• Additional actions for each individual fax include the actions to the right of the fax within the
fax list.
• Resending a Fax
o Resending multiple faxes by checking the boxes of the jobs in question and click the
Resend Button.
o Resending a single fax, under actions, click on the resend button, this will ask you to
choose what you would like to resend:
Resend to all undelivered destinations
Resend only to those fax numbers that were busy
Resend only to those fax numbers that did not answer
Resend to All undelivered destination
o Resend to new destinations – Allows you to resend your sent fax to the original
recipient(s) or new recipients. You can add a new Billing Code, Customer Reference,
Subject Line and Choose your report. This resend can be sent immediately or
scheduled for a future delivery.

EasyLink Services International Corporation | Customer Documentation
Page 16 of 49
o Hiding a Fax
Hiding a fax from your Sent Items is like deleting it from your view and the fax
will be added to your Deleted Folder but not deleted from the Fax2Mail
system.
• To view additional details about each fax, click on the fax and scroll through the tabs below
o Summary Tab – Provides information of the Job properties such as the subject line
and number of pages. You can export the details of this fax into excel by clicking
export.
o Reports Tab
Export will download what you see on the screen into an excel file.
Resend will allow you to send your fax to another recipient’s fax number or
email address.
o Graphs – Graphical view of the results of the fax

EasyLink Services International Corporation | Customer Documentation
Page 17 of 49
o Forward Report Tab – Allows you to send a report to a list of email addresses.
• The top buttons on the header row within your sent items dashboard will allow you to take
action on more than one fax by clicking the box in each row for each fax job. The action
options include:
o Hide – This allows you to hide the fax from your view and will be stored in your Hidden
Items Box
o Cancel – This will only be available is your job is in a processing state for Send Items
o Resend – This will Resend your fax exactly the way it was sent/delivered to the same
recipients. This will generate a report immediately viewable in excel.
o Previous – If you have many faxes, that take up more than 1 screen in the website
view.
o Next – If you have many faxes that take up more than 1 screen in the website view.
o Export – Will export what you see on the screen in an excel file.
o Download – Will download the PDF or TIFF files of the faxes that are in your inbox.
o Advanced Search – Will allow you to search for all faxes by:
Fax ID – Job Number
Destination – Fax Number Delivered to
Fax Number – Fax Number
Sender – Sender Number
Fax Type - F2M-recieved, M2F-sent
Fax Status - Active, Complete or Scheduled
Date – Search in the last 30 days
Bill Code – Defined text by sender for sent faxes
Customer Reference - Defined text by sender for sent faxes
Job ID - Job Number
Job Type - F2M = Received fax and M2F = Sent fax
Received Date/Time
Receiving fax number

EasyLink Services International Corporation | Customer Documentation
Page 18 of 49
Note: Only received faxes that have completed processing in the last five days
(relative to the current date), are displayed on the Inbox screen. For more faxes you
can do an advanced search to view the past 30 days of faxes.
Hidden Items Folder
The hidden items folder allows you to organize your fax messages by being able to hide jobs from your
view of the Inbox or Sent Items folder. You can unhide any previously hidden messages by simply
clicking the unhide button under Actions.
My Homepage Tab
• Monthly Usage – this section of the homepage will give you a give overview of your usage in
pages for Sent and Received faxes.
• PDF Editing Package – Click on the link to find out more information about our partnership
with Adobe Systems Incorporated, and how our service can deliver a fully functional,
interactive PDF that provides you with a secure and reliable file for editing, signing, searching
and storing your fax documentation.

EasyLink Services International Corporation | Customer Documentation
Page 19 of 49
Contact Books – Only available when using the Fax2Mail Toolbar
• Contact Lists Tab - This is where you can store lists of fax recipients.
o Delete Button - To delete a list from the system, locate the list you want to delete, Click the
checkbox in the Delete column next to your list. Click on the Delete button. You are
prompted to confirm the deletion of your list. Click on the Yes button to delete the selected
list. The pop-up closes and the selected list is deleted. Click on the No button to close the
pop-up without deleting the list.
o Quick Search - To locate a specific list, type the name of the list in the Quick Search field.
You can perform a partial search by using the wildcard value (*). For example, if
you enter ab*, the search results will include any list beginning with ab (e.g., abc
consulting, abbott inc., etc.). As you type, the number of lists in the Contact Lists
table decreases. It displays only list names that match the string you are entering.
Click on the Search (labeled with a magnifying glass icon) button. If you have
entered a complete, unique list name, the list you are looking for is displayed
alone in the Contact Lists table. If you have entered a partial name (character
string), all lists that match your entry are displayed.
o Upload New List Button – to upload a new list, follow the steps below:

EasyLink Services International Corporation | Customer Documentation
Page 20 of 49
Create your new distribution list in Excel. Be sure to ―Save‖ the file in a .CSV
format. Do NOT use spaces in the file name.
Create the list using the following columns: REF, ADDR and INS_1
The ADDR the destination ADDRESS and will depend on the type of broadcast
you are doing.
INS_1 is the name of the person (or Dept) that you want the fax directed to. It will
appear on the Cover Sheet in the ―To‖ field
Save As a .CSV file format.
To upload your list into the user interface, click ―Upload New List‖, browse for your
list and type the list name and click Upload
o The Mapping Wizard
Fax2Mail provides immediate feedback on list values that are missing or
unknown. Use the Mapping Wizard that is displayed in these situations to map
your list file headings to field names that are acceptable to Fax2Mail.
Required and Recommended Fields must be mapped correctly. Use the drop-
down menus that correspond to the required/recommended field names to select
the headings in your file that will be mapped to those fields. Use the menus
provided in the Optional Fields area to map headings in your file to optional
Fax2Mail headers in the same way.
Make a selection from the Start import from the row drop-down menu to specify
the row number in your list file which will be used as the starting point for the
upload. If you select "2" from the menu, the header row (i.e., row 1) will be
skipped, and only the data in rows 2 through the end of the file will be uploaded.
When you are finished entering mapping selections, click on the Map Fields
button to implement them. The headers in your file will be mapped to the Fax2Mail
headers, and the selected file will be uploaded.
Note: Click on the Preview button to view the results of the mapping process
before saving your selections. A preview of your selections is displayed in the
Mapping Preview area of the wizard.
Click on the Close button to close the wizard without saving your selections. The
Upload process is terminated, and the selected list is not uploaded to Fax2Mail.
The results of the mapping process will be displayed in a pop-up window. Click on
the Close button to close the pop-up. Your list is included in the Contact Lists
table, and is available for use with Fax2Mail.

EasyLink Services International Corporation | Customer Documentation
Page 21 of 49
o Export All - To Export your list of lists, click Export All and you will be able to open an
excel file that contains all of your list names as shown on the screen.
o Show All - Will clear any search criteria you have chosen
o Advanced Search - Will allow you to search for a list by name or by date modified.
o Sync Contacts - Use this button to overwrite a selected Contact List with your MS-Outlook
Contacts that include fax numbers.
To use this feature, click on the selection checkbox that corresponds to the list
you want to overwrite.
Note: If you click on the Sync Contact button without selecting a list (i.e., without
having clicked on a selection checkbox), a pop-up will be displayed that prompts
you to enter the name of the list you want to overwrite with Outlook Contact
information.
Next, click on the Sync Contact button.
Note: If Outlook is not running, it will be started automatically when you click on
the Sync Contact button. The default Outlook profile will be used to synchronize
contacts.
You will be prompted to indicate whether (or not) you want to overwrite the
contents of the selected list with the Outlook Contact List.
Note: Successful use of the Sync Contact feature replaces the information in the
selected Fax2Mail Contact List with the Outlook Contact information. As a result,
information that was previously in the Fax2Mail Contact List will be lost.
Click on the OK button to continue. The results of the synchronization process are
displayed in the Outlook Sync Result pop-up window, in the following categories:
Total Contacts, Accepted, and Rejected.
The following table shows the relationship between Outlook Contact information
and Fax2Mail Contact List headings. Use this table to determine how and where
information in a selected Contact List will be replaced with Outlook Contact
information when you use the Sync Contact feature.
The table also indicates the value used to populate the Type heading field (i.e.,
Fax), and the relative priority given to the Business, Home and Other fax numbers
contained in the Outlook list (i.e., first, second and third, respectively).
Outlook Contact Header
Fax2Mail List Header
Value and priority
Type
Fax
Business Fax Number
Addr
First priority
Home Fax Number
Addr
Second priority
Other Fax Number
Addr
Third priority
First Name + “ “ + Last
Name
To_1
Company Name
To_2

EasyLink Services International Corporation | Customer Documentation
Page 22 of 49
Note: If a value is not found for all three fax numbers (i.e., Business, Home and
Other) in an Outlook Contact, it will not be used to overwrite the selected Fax2Mail
Contact List.
o Print - When you click on this button, a Manage Lists screen is displayed that includes the
List Name and Modified Date of each of your Contact Lists. Click on the Manage Lists
screen's Print button to print a copy of this information, or click on Close to close it without
printing.
o Table Column headings
List name - that begin with a "#" sign are customer-level lists (e.g., created for
use by everyone in your company's Fax2Mail account). List names that begin
with "!" were created by individual users in the account. To view the contents
of a list, click on the list name (link). The contents of the selected list are
displayed in the View List pop-up. You can change the sort order of the
information displayed in the List Name column by clicking on the column
header. You can also change the sort order by moving your mouse pointer
over a column heading, then clicking on the down-arrow button that is
displayed to the right of the heading. A menu is displayed that includes "Sort
Ascending" and "Sort Descending" options.
Modified Date - This column lists the date and time (including time zone)
when a list was last modified. You can change the sort order of the
information displayed in the Modified Date column by clicking on the column
header. You can also change the sort order by moving your mouse pointer
over a column heading, then clicking on the down-arrow button that is
displayed to the right of the heading. A menu is displayed that includes "Sort
Ascending" and "Sort Descending" options. When searching for a list, if you
know when the list was last modified, it may be helpful to switch the display
order according to Modified Date (i.e., most recent to least recent or the
reverse).
Download - To download a list in text, comma-delimited (.csv) format from
Fax2Mail to your local computer, click on the Download button that
corresponds to the list you want to download. The List Download pop-up is
displayed. Click on the link that is displayed in the List Download pop-up. A
second pop-up is displayed, prompting you to indicate whether you want to
open the selected list file, or save it to disk.
Note: The appearance of the second pop-up, and the selections you are
required to make to save the list file, vary according to the browser you are
using (e.g., Internet Explorer, Firefox, etc.).
Rename List - Click on the Rename icon that corresponds to the list name
that you want to change. The List Rename pop-up is displayed. Change the
current name of the list to the new name, then click on the OK button. The List
Rename pop-up closes, and a new pop-up, indicating that the name has been
changed, is displayed. Click on the OK button to close this pop-up. The new
list name will be displayed in the Contact Lists table.
• Contact Editor - The Contact Editor allows you to create lists on the fly.

EasyLink Services International Corporation | Customer Documentation
Page 23 of 49
o Contact Button and drop down menu - Move your mouse pointer over the ―New‖ menu
item to display a sub-menu that shows the kinds of new contacts you can create with
the Contact Editor: To create a new contact, select ―New‖ and the type of contact you
want to create (Email, Fax, SMS, and Voice). A blank spreadsheet is displayed in the
Contact Editor, with a heading that indicates the type of contact you have selected.
Enter your contact data in the cells, and save the contact when you are finished.
o Import Menu - You can import a contact list from your local system to edit online.
Complete the following steps to import a contact:
Click on "Contact" → "Import." The UPLOAD NEW LIST pop-up is displayed.
Click on the Browse to Add a File button. The File Upload window is
displayed
Click on the Browse button. A window is displayed that enables you to
choose the file you want to upload.
Select a file to be imported, then click on the Open button. The window closes
and the path to the selected file is displayed in the Select the file field.
Click on the Upload button. A message indicating completion of the upload is
displayed in the lower left-hand corner of the window.
Click on the Close button. The File Upload window closes, and the path to the
selected contact is displayed in the Choose File field. Note: Click on the red X
to the left of the uploaded filename to delete it, if necessary.
Select parameters in the Select Delimiter, List Type and Character Code
fields, as appropriate. Enter a contact name in the Contact Name field.
Click on the "Create List" link. If the system recognizes the fields in your list,
the upload will proceed to completion. However, if the system cannot
recognize the fields, a contact mapping wizard is displayed. Complete the
fields in which you a prompted to provide information, then click on the
"Upload Contact" link.
Click on the "Close Window" link. The pop-up closes, and the new contact
name is displayed in the editor.
o Save - To save changes that you have made to your contact list, click on Save. The
Save pop-up is displayed. Select a character set, as appropriate/necessary, from the
drop-down menu, then click on the "Save" link. The Contact Status pop-up is
displayed. Click on the "Close window" link to close the pop-up.
o Save As - To save changes to your contact under a new contact name, click on Save
As. The Save As pop-up is displayed. Enter the contact name you want to use for this
contact, and select a character set from the drop-down contact, as necessary.
o Open - To edit a contact stored in your account, click on Open. The OPEN STORED
LIST pop-up is displayed. Depending on the number of contacts in your account it may
take several seconds to display all of them. Click on the name of the contact you want
to edit. The contact content is displayed in the editor. "Fetching Contact Contents" is
displayed in the pop-up while the selected contact is being retrieved.
o Export - To export a contact from the editor to your local system, click on Export (.csv).
The Export pop-up is displayed. Click on the "Export (.csv)" link. A pop-up is
displayed, prompting you to indicate whether you want to view the contact or save it to
disk. The appearance and functionality of the pop-up varies by browser (e.g., the
Internet Explorer pop-up is different from the Firefox pop-up). Save the contact file to
your local PC. Note: A link will be displayed in the pop-up if any records have been
rejected during the save process. Click on the link to view rejected records.
o Edit Tab

EasyLink Services International Corporation | Customer Documentation
Page 24 of 49
Cut Button - To cut information out of the Contact Grid, highlight the selection
to be removed, then click on the Cut button. The highlighted information is
moved to the clipboard. Refer to the information below to learn how to paste
the selection into a new location.
Copy Button - To copy information from the Contact Grid, highlight the
selection to be copied, then click on the Copy button. The highlighted
information is copied to the clipboard. Refer to the information below to learn
how to paste the selection into a new location.
Paste Button - To paste information that has been cut or copied from the
Contact Grid, click in the location where it is to be inserted (i.e., pasted), then
click on the Paste button. The information is inserted at the location where
you clicked.
To Drop Down Menu - Use this contact to add "To" columns to the Contact
Grid. To add an "To" column, click on To, then click on the entry in the drop-
down menu that you want to use as a column heading. A new column, headed
by your selection, is added to the Contact Grid.
From Drop Down Menu - Use this contact to add "From" columns to the
Contact Grid. To add a "From" column, click on from, and then click on the
entry in the drop-down menu that you want to use as a column heading. A
new column, headed by your selection, is added to the Contact Grid.
Inserts Drop Down Menu - Use this contact to add "insert" columns to the
Contact Grid. To add an "insert" column, click on Inserts, then click on the
entry in the drop-down menu that you want to use as a column heading. A
new column, headed by your selection, is added to the Contact Grid.
Contact Grid – The Contact Grid is a spreadsheet-like table that you can
populate with information taken from imported contact files or via manual entry
to create distribution contacts for your jobs. It can also be used to view and
edit previously-created contacts. By default, the following columns are
provided: Ref, Addr, Header, TO_1, FROM_1, Attn_1, AltType, AltAddr, and
INS_1. Additional columns can be included via the To, From and Inserts drop-
down menus (described above).
o Search Tab
Column Headings drop down menu - Click on the down arrow button to the
left of the Column Headings field (displayed on the left-hand side of the
Search tab) to access this drop-down menu. To locate information in a
particular column of the currently-displayed contact, select the column name
from the drop-down menu, and then enter your search string in the field to the
left of the Search button.
Search Button - After you have selected a column name from the Column
Headings drop-down menu (described above) and entered a search string in
the field to the left of the Search button, click on the Search button. The first
field in which your search string is found is highlighted.
Replace Button - To search and replace specific data in your contact, click on
the Replace button. The FIND/REPLACE pop-up is displayed. Select the
name of the column you want to search in from the drop-down menu. Enter
your Find and Replace criteria, and click on the "Replace" link. Your Find

EasyLink Services International Corporation | Customer Documentation
Page 25 of 49
string is replaced by your Replace string, and you are prompted to indicate
whether you want to continue finding and replacing in the rest of the
document.
Contact Grid - The Contact Grid is a spreadsheet-like table that you can
populate with information taken from imported contact files or via manual entry
to create distribution contacts for your jobs. It can also be used to view and
edit previously-created contacts. By default, the following columns are
provided: Ref, Addr, Header, TO_1, FROM_1, Attn_1, AltType, AltAddr, and
INS_1. Additional columns can be included via the To, From and Inserts drop-
down menus (on the Edit tab - described above).
Print Link - To print a copy of the current contact, click on the "Print" link in the
upper right-hand corner of the Contact Editor window. Specify your print
options in the pop-up that is displayed.
o Reports - Account Activity Reports are generated only for deliveries to/from email
addresses.
o If you are logged into Fax2Mail as an account administrator, this table will display
reports for all users in your account. If you are logged in as a non-administrator user,
only reports for your activity will be listed.
Note: Monthly Usage and Activity data may be delayed up to 48 hours.
o Column Headers
Activity Date - The report date (i.e., the date for which activity is reported) is
listed in this column.
Email Address - The address to which a message was sent is listed here.
Page IN- The number of pages received on the corresponding report date,
from the corresponding sender, is listed here.
Page OUT- The number of pages sent on the corresponding report date, to
the corresponding recipient, is listed here.
Faxes IN - The number of fax messages received on the corresponding report
date, from the corresponding sender, are listed here.
Faxes OUT - The number of fax messages sent on the corresponding report
date, to the corresponding recipient, are listed here.
Show Detail - Click on the "Show Detail" link that corresponds to an email
address to view the activity details for that address (e.g., each fax sent or
received).

EasyLink Services International Corporation | Customer Documentation
Page 26 of 49
o Quick Search - To locate a specific activity report, type the search criteria (e.g., an
Activity Date or Email Address) and click the Search button (magnifying glass). You
can perform a partial search by using the wildcard value (*).
o Export All - Use the Export All button to display a pop-up that enables you to open or
save a CSV copy of the currently-displayed screen.
o Print - Click on the Print button to print a copy of the information currently displayed on
this screen.
o Show All - When you first access the Account Activity Reports screen, all of the
reports that are stored on the system for your account are displayed. When you
conduct a search, only reports that meet your search criteria are displayed when the
search is completed. To redisplay all stored reports, click on the Show All button.
My Preferences Tab – User Profile
• User Information Tab
o User Name - Enter or update your name, as appropriate.
o Fax Number - The fax numbers available for your account are listed on this menu. If
only one fax number is available, it will be listed in a read-only text field.
o Email Address - Enter or update your email address, as appropriate.
o Time Zone - Make a selection from the drop-down menu to specify the time zone that
will be applied to your Fax2Mail transactions.
o Date/Time Format - Your choices are English (US), English (United Kingdom),
English (Australia), German and French.
o Address - Enter/update your street address.
o Town/City - Enter/update the name of the town or city in which you live.
o State/Region - Enter/update the name of the state or region in which you live.
o Country - Select the name of the country in which you live from the drop-down menu.
o Zip/Postal Code - Enter/update the zip or postal code for your location.
o Contact Phone - Enter/update your contact phone number in this field.
o Billing Code - The Billing Code is an optional code (e.g., a department code) that you
can apply to your job. If you enter a billing code, your monthly invoice will be sorted by
billing codes, and all jobs with the same billing code will be subtotaled. The billing
code you enter can be up to 20 characters long.
o Customer Reference - The Customer Reference is an identifier that is applied to your
jobs. It is displayed on the delivery reports you receive after a job completes. The
Customer Reference can also be used to help you locate a job on the Fax Dashboard,

EasyLink Services International Corporation | Customer Documentation
Page 27 of 49
and to determine its status. When you enter a Customer Reference in your profile, it
will be applied to all jobs that you send unless you delete or change it when
creating/submitting a job.
o Comments - Enter comments (if any) in this field, as appropriate.
• Change Password Tab
o Current Password - Enter your current password in this field.
o New Password - Enter your new password in this field.
o Retype Password - Re-enter your new password in this field.
o You must click on the Save Changes button after making entries in these fields to
update your profile.
My Admin Tab
• Admin Name – This is the Administrator of your account
• Email – This is the email address of your administrator.
• Modify List - Add/Delete Columns - You can specify which columns are included in the My
Admin list by moving your mouse pointer over a column heading, then clicking on the down-
arrow button that is displayed to the right of the heading. A menu is displayed that includes a
"Columns" option. When you click on "Columns," you can add or remove columns from the
table by clicking on the checkboxes to the left of each column name. Column names that are
checked will appear in the table.
• Modify List - Horizontal Order - You can also change the order in which columns are
displayed, using a "drag-and-drop" approach. Move your mouse pointer over the heading of
the column you want to move, then depress the left mouse button and hold it down while
dragging the selected column to its new destination (i.e., to the left or right of its current
location). When you have moved it to the desired place, release the left mouse button to
position the column there. While "dragging" the column, a red circle with a slash through it is
displayed to the right of the column heading. When this symbol is present, you will not be able
to "drop" the column in the current location. When the red circle changes to a green circle that
contains a checkmark, you can "drop" the column in the current location.

EasyLink Services International Corporation | Customer Documentation
Page 28 of 49
• Modify List - Ascending/Descending Order - You can change the sort order of the information
displayed in the Template Name column by clicking on the column header. You can also
change the sort order by moving your mouse pointer over a column heading, then clicking on
the down-arrow button that is displayed to the right of the heading. A menu is displayed that
includes "Sort Ascending" and "Sort Descending" options.
Manage Fax Number Tab
• Country Code - Select a code from the menu. Select ALL to select all codes.
• Area Code - Select a code from the menu.
• Filter button - Click on this button to display only the numbers that match your Country Code
and Area Code entries.
• Available Numbers - Available fax numbers are displayed in this field. Use the Previous and
Next buttons to navigate through the information in this field.
• Selected Numbers - Selected fax numbers are displayed in this field. Note: Removing all
assigned fax numbers will convert your user account to Mail2Fax-only.
• Arrow buttons - Use the Arrow buttons displayed between the Available Numbers and
Selected Numbers fields to move numbers from one field to the other, move numbers up or
down within a field, etc.
My Preferences – Send Preferences
• Send Preferences Tab

EasyLink Services International Corporation | Customer Documentation
Page 29 of 49
o Coversheet - To use a cover sheet with your fax jobs, make a selection from the drop-
down list. In order to include a cover sheet by default, you must click on the Add Cover
Sheet checkbox. You can edit your cover sheet with the Create Cover Sheet Tab
below.
o Retry Method - Select a retry method to be used when difficulty is encountered in
delivering a fax. Your choices are Standard or Short.
o Standard Method
o Busy: A total of 4 attempts, with 3 retries after 5 minutes, 10 minutes and 15 minutes.
o Error: 1 retry after 10 minutes.
o Short Method
o Busy: A total of 4 attempts, with 3 retries after 4 minutes, 2 minutes and 2 minutes.
o Error: 1 retry after 2 minutes.
o Report Type - Make a selection from the drop-down list to specify the kind of
information you will receive regarding your Fax2Mail transmissions.
o Detail: A report specifying the final delivery or non-delivery status for each of your
recipients. The information for each recipient will specify the results for that recipient
(including the number of attempts and the elapsed time to deliver).
o Exception: A report specifying only recipients to which your message could not be
delivered (including the number of attempts made and the reason delivery failed).
o Summary: A report specifying the total number of delivered and undelivered
messages.
o Conditional: If you select Conditional, an exception report will be delivered to you only
when there are undelivered destinations for a job.
o None: Select ―None‖ if you do not want to receive reports.
o Attach Original Fax to Confirmations email - Click this checkbox to specify that a copy
of the original fax will be attached to confirmation-of-receipt email messages when
sending faxes.
o Fax Header - A global fax header is an optional field that is applied to the entire job
and appears on the top of every recipient’s fax. The Fax Header can be up to 20
characters long. When a header is entered in this field, header information that is
normally pulled from your distribution list is replaced by this value. Note: This field is
generally used when you want identical ―From‖ information printed on all delivered fax
pages.

EasyLink Services International Corporation | Customer Documentation
Page 30 of 49
o PDF Editor Outbound – If using the PDF Editor, and want to ensure any changes or
comments you have made to your fax are able to be faxed out, you will need to turn
this feature on.
o None - This will prevent any comments edits or stamps from being included in your fax
. Digital Signatures will still appear.
o Stamps & Edits - This will enable stamps, edits and digital signatures in your fax. This
will not include any notes or comment pop up windows.
o Stamps, Edits & Comments - This will enable all edits your make to your fax.
o Update - Click on the Update button to save the entries you have made in this window
and apply them to your account.
• Create Coversheet Tab
o Sample Cover Sheet - Choose the cover sheet template you would like to edit.
o Download Button - Click the download button to open the template you would like to
edit. A dialog box will appear, click open in MS Word or Save As. NOTE: Some users
may be prompted to find the data source from the SQL command, makes sure you
press "No" to proceed. You can make your changes in MS Word but be sure not to
remove any of the tokens shown below and save the file to your local drive
<ins1> - This will be populated by the ―To‖ field addressed in your fax.
<from> - This will be populated by the ―From‖ field within your profile.
<ins2> - This will be populated by the ―Company Name‖ field addressed in
your fax.
<sdate> <time> - This will be populated by the date/time of the fax.
<phone> - This will be populated by the ―To Fax Number‖ addressed in the
fax.
<fax number> - This will be populated with your fax2mail fax number.
<subject> - This will be populated with the subject field.
o Cover Sheet Name – Type the cover sheet name that you would like to add to your
account.
o Select Word file – Select the browse button to search for your newly created fax.
o Upload Button – Click the upload button to install your new coversheet into your
account.
o Note: All users within your account will be able to view this newly created coversheet.
o Mapped Fields - You will see all the mapping fields that are available, you cannot do
anything with this data as it is for informational purposes only and may display hidden
merge fields.
o Create button – You must click Create and the cover page will appear as a selectable
cover page. It is highly recommended you test the cover page before you start using it.

EasyLink Services International Corporation | Customer Documentation
Page 31 of 49
My Preferences - Receive Preferences Tab
• Received Fax Settings Tab
o Email Subject - A default Fax Subject line is applied to your inbound faxes. It includes
the number of pages and the caller ID of the sending fax machine (e.g., 1 page fax
from 7323809306). To use another Subject line, make a selection from the drop-down
list.
o Email Body - Make a selection from the drop-down list to specify the email body that is
applied to your inbound faxes.
o Filename Format - Make a selection from the drop-down list to specify the filename
format that will be applied to faxes received by the Fax2Mail service and delivered to
your email client. Your choices are fax-MMDDYY-hhmm, fax-YYMMDD-hhmm and
fax-DDMMYY-hhmm.
o Fax From - The name/address that will appear on the ―From‖ line of your messages is
listed here. If only one name/address is available, this field will be a non-modifiable
text field. If more than one name/address is available, this field will be a drop-down
menu.
o TIFF, PDF (radio buttons) - Click on the appropriate radio button to select TIFF or
PDF.
o Encrypted PDF (checkbox) - To select Encrypted PDF, click on the PDF radio button,
and then click on the Encrypted PDF checkbox. Specifying Encrypted PDF enables
you to create a password that will be used to encrypt all of the PDF files sent to you.
Your Encrypted PDF password is distinct from the password used for logging into the
Fax2Mail Service. Note: If you forget your Encrypted PDF password, you can reset it.
Received faxes can be re-sent, and will be automatically encrypted with the new
password.
o PDF Editor Package - Upgrade your Fax2Mail service and get the power to search,
edit and sign your electronic faxes. Flag PDFs with comments, action stamps and
status marks and make the most of electronic faxing. Attach a digital signature,
highlight and underline important text and even search faxed PDFs for keywords.
o Comments - Select this checkbox to be able to add comments to PDF received faxes.
o Signable - Select this checkbox to be able to add an electronic signature to PDF
faxes.
o Searchable plus Language drop-down - Select this checkbox to enable the user to
search your PDF faxes. When the Searchable checkbox is selected, choose the
language in which the document can be searched from the drop-down menu. The
choices are English, French, German, Italian, Spanish, Japanese, Simplified Chinese,
Traditional Chinese and Korean. Note: When you select this feature you subscribe to
the PDF Editor Package. Additional charges will apply. Click on the link provided on
the screen for current rates.

EasyLink Services International Corporation | Customer Documentation
Page 32 of 49
• Recipient Settings Tab
o Deliver to Alternate Address - When you select this checkbox, the Alternate Email
Address text field is displayed. Enter the alternate address to which deliveries should
be made.
o Deliver Inbound Faxes to Additional Recipients - Click on this checkbox to ensure that
inbound faxes will be directed to additional recipients. Click on the "Show/Modify
Additional Recipients" link to view and/or change these recipients.
o Update Button - Click on the Update button to save the entries you have made on this
screen and apply them to your account.
Downloads Page – Download various tools to improve your faxing.
• Fax2Mail Toolbar - Users can now fax documents directly from Microsoft Outlook, Word, Excel
and PowerPoint. Simply click on the "New Fax" icon in the Outlook Toolbar, attach the file,
select recipients from the Address Book and send.
• Fax2Mail Mobile for BlackBerry and Windows Mobile 5 devices - If you receive e-mail on a
BlackBerry or Windows Mobile 5 device, this application makes using Fax2Mail more
convenient.
• Adobe Acrobat Reader - Faxes can be viewed in Portable Document Format (PDF) to retain
the original format. The free Adobe Acrobat Reader allows you to view, navigate, and print
PDF files across all major computing platforms. Acrobat Reader is free and available directly
from Adobe's website with full installation instructions.
• Microsoft Office Software - To keep your Microsoft Office software up-to-date, be sure to install
the latest service packs.
• Virtual Fax Machine – Makes it easy to send faxes right from your desktop through our online
or installed version.

EasyLink Services International Corporation | Customer Documentation
Page 33 of 49
The Virtual Fax Machine
Virtual Fax Machine - The Virtual Fax Machine enables you to quickly send, receive and manage
faxes right from your desktop.
1. Set Preferences
o Click on the round, red Settings button, displayed below the 9 key, to set or update
your fax preferences. When you do, the Fax Settings pop-up is displayed. Enter or
update information in the fields provided on the Settings and/or Customize tab as
desired. When you are finished, click on the OK button (on the Settings tab) or the
Apply button (on the Customize tab) to close the pop-up and put your settings into
effect.
2. Settings Tab
o Email//Fax # (text field) - Enter your Fax2Mail login ID here.
o Password (text field) - Enter your Fax2Mail password here.
o Billing Code (text field) - You can use a billing code to help manage costs associated
with this account. If you would like to use a billing code, enter it here. The use of a
billing code is optional.
o Campaign Name (text field) - If you would like to use a campaign name (i.e., customer
reference) to track your jobs, enter it here. The use of a campaign name is optional.
o Report Address (text field) - Enter the address to which job reports should be
delivered in this field.
o Report Type (drop-down menu) - Select the type of job report you would like to receive
from the drop-down menu. Your choices are None, Detail and Exception.
If you select None, no job report will be generated/delivered.

EasyLink Services International Corporation | Customer Documentation
Page 34 of 49
Detail reports specify the final delivery or non-delivery status for each
destination included in your address list(s). Results for each destination are
provided (including the number of attempts and the elapsed time to deliver).
Exception reports provide information on destinations to which your message
could not be delivered (including the number of attempts made and the reason
the delivery failed).
o Fax Mode (drop-down menu) - You can adjust the print quality of your fax document
by specifying the resolution. The available options are Standard (the default selection)
and Fine. Standard mode has a resolution of approximately 100x200 lines per inch.
Fine mode has a resolution of approximately 200x200 lines per inch.
Note: Fine mode deliveries may increase the cost of your job because they take
longer to deliver than Standard mode faxes.
o Time Zone (drop-down menu) - Make a selection from the drop-down menu to specify
the time zone that will be applied to your Fax2Mail jobs.
o Version (read-only text field) - This field displays the version number of the Virtual Fax
Machine you are using.
o Change Password (button) – Use this if/when you want to change your current
Fax2Mail password.
o OK (button) - Click on the OK button to save the information you have entered on the
Settings tab, and to apply them to your account. The Fax Settings pop-up will close
when you do.
3. Customize Tab
o Enable Cover Sheet Selection – Click on this box if you want to enable choosing
different coversheets.
o Updates - Click on the checkbox to receive updates.
o Status Frequency - Enter a number to specify, in minutes, how often you would like to
receive status notifications (e.g., enter 10 to be notified every ten minutes).
o Default Period - Enter a number to specify, in days, the length of the default period.
o Alerts - Select an alert audio signal from the drop-down list, or by clicking on the
Browse button to choose a file on your local system.
o APPLY - When you are finished entering information in the fields on the Customize
Tab, click on this button to apply them to your account and close the Fax Settings pop-
up.

EasyLink Services International Corporation | Customer Documentation
Page 35 of 49
Notes: You must be logged on to use the Virtual Fax Machine. Enter your Login and
Password in the fields provided, and then click on the OK button, to log on to the Virtual Fax
Machine. Click on the Change Password button to replace your current password with a new
one. When you do, the Reset Password pop-up is displayed. Enter your old and new
passwords in the fields provided, then click on the OK button to close the pop-up and begin
using the new password. You must enter your new password twice: in the New Password and
Confirm New Password fields.
Send a Fax
Complete the following steps to create and send a fax job using the Virtual Fax Machine:
1. Specify the file you want to fax. You can do so by "dragging" the file to the location indicated
on the Virtual Fax Machine and "dropping" it there, or by clicking on the Browse button to
select it from a folder. The name of the file you have specified is displayed in the "virtual IN
tray" on the Virtual Fax Machine. You can delete files that you have added to the "virtual IN
tray" by clicking on the X that is displayed to the right of the filename.
Notes: The following file types can be faxed to recipients via the Virtual Fax Machine. If you
specify a file that is of an unsupported file type, your document may be delivered as garbled
text.
o Postscript (Adobe PS files; .ps)
o Adobe Acrobat (.pdf)
o Text (.txt)
o Printer Language – PCL5 (.prn)
o Tiff (.tif, .tiff)
o Word (.doc, .docx)
o Rich Text Format (.rtf)
o Excel (.xls)
o Hypertext Markup Language (.htm, .html)
o JPEG (.jpg)
o PowerPoint (.ppt)
o GIF (.gif)
o Bitmap (.bmp)
o Visio (.vsd)
o Publisher (.pub)
o Project (.mpp)
o Comma-separated values (.csv)
o Excel Autorecover (.xar)
2. Enter fax numbers/addresses in the location indicated (i.e., in the "virtual display screen" on
the Virtual Fax Machine). You can enter a number by clicking on the number keys, by cutting

EasyLink Services International Corporation | Customer Documentation
Page 36 of 49
the number from a file and pasting it where indicated, or by clicking on the Address Book
button to select an address list file.
Note: Faxes can be addressed to multiple recipients by using semicolons ( ; ) to separate fax
numbers or addresses, and Name and Ref values can be separated by pipes ( | ), as in the
following example: 999999|John Hancock; 88888888|Joe User.
3. (Optional) Click on the Cover button to add a cover sheet to your fax job, if desired.
4. (Optional) Click on the Settings button (i.e., the round red button below the 9 key) to add or
revise job preferences (e.g., add/remove a Billing Code or Campaign Name, select a job
report type, specify a report delivery address, etc.).
5. Click on the Send button. A Job Status pop-up will be displayed, indicating whether or not
your job has been submitted for transmission. A Job Number is provided, which you can use
to track your job.
6. Click on the OK button to close the Job Status pop-up.
The Address Book –
The Address Book pop-up provides the following information for each address: Company Name, First
Name, Last Name, and Fax Number.
• To sort information in ascending or descending order (with respect to a selected column
heading), click on the desired heading. The current display order will be reversed, according to
the selected column, and an arrowhead that points in the direction of the sort (i.e., ascending =
up, descending = down) will be displayed to the right of the heading.
• Use the Import button to upload an address list file to your Address Book.
• The Virtual Fax Machine provides immediate feedback on list values that are missing or
unknown. Use the Mapping Wizard that is displayed in these situations to map your list file
headings to field names that are acceptable to the Virtual Fax Machine.
• To deselect mapped fields please click/select "Select" option in the drop down.
• Only CSV files can be imported to the Address Book.
• To delete an address from your Address Book, highlight the address to be removed (by
clicking on the row that contains it), then click on the Delete button.
• To add a new address to your Address Book, enter information in the text fields that
correspond to the column headings in the list (i.e., Company Name, First Name, Last Name,
Fax Number), then click on the Add button.

EasyLink Services International Corporation | Customer Documentation
Page 37 of 49
Fax Cover Sheet –
The Fax Cover Sheet pop-up enables you to add a cover sheet to your fax job that includes the
following information:
• Subject - the subject of the fax message
• Use Cover Page - Select (click on) the checkbox to use a cover page with your fax job. De-
select it (i.e., click to remove the check mark) if you don't want to use one.
• From - Enter the sender's name.
• To/Attn - Receiver's Name in the
• Coversheet
• Click on the OK button to close the pop-up and add a coversheet, containing the information
you've entered, to your fax job.
Resend a Fax
To resend a fax:
• Double-click on the row in which it is listed in the Sent Faxes or Received Faxes lists.
• When you do so, the Resend Fax pop-up opens, displaying the Job Id of the fax you have
selected.
• Click on the ―Busy, No Answer and Not Sent” checkboxes, as appropriate, to indicate the
status of the selected fax.
• You must select at least one of the checkboxes in order to resend the fax.
• When you are finished, click on the Resend button. A pop-up is displayed, indicating that the
selected fax has been resent. Click on the OK button to close the pop-up.

EasyLink Services International Corporation | Customer Documentation
Page 38 of 49
View Sent Faxes
To view a list of the fax jobs you have sent:
• Click on the Log button.
• When you do, the Sent Fax Log pop-up will be displayed.
• The list of sent faxes provides information in three columns:
o Job #
o Completion time
o Status
• To sort information in ascending or descending order (with respect to a selected column
heading), click on the desired heading. The current display order will be reversed, according to
the selected column, and an arrowhead that points in the direction of the sort (i.e., ascending =
up, descending = down) will be displayed to the right of the heading.
• Click on the + at the left end of a row to view additional information on a job (i.e., the Billing
Code and/or Customer Reference, if any; the Received date and time; the No. of Destinations;
the Subject, if any). When you click on the +, it changes to - as the information is displayed.
Click on the - to hide this information and return to the original view.
• Search tools are provided at the top of the Sent Fax Log pop-up, that enable you to locate and
display only jobs that meet your search criteria. The following "search by" text fields and drop-
down menus are provided:
o Job #
o Status (Complete, Active or Error)
o From/To - Define a time interval by clicking on the calendar icons and choosing dates.
Use the drop-down menu below the From/To fields to specify the selected dates as
Start or Completion dates.
• Click on Detail Job Status - To get Detailed job status for e.g. Summary, Report and Graph
• To view sent faxes that match the criteria you have entered/selected, click on the Search
button. The results are displayed in the sent faxes list. When you are finished reviewing this
information, click on the Show all button to redisplay all sent faxes.

EasyLink Services International Corporation | Customer Documentation
Page 39 of 49
View Received Faxes
To view a list of the fax jobs you have received:
• Click on the Received button.
• When you do, the Received Fax Log pop-up will be displayed. The list of received faxes
provides information in four columns:
o Job #
o CSID
o Status
o No. of Pages
• To sort information in ascending or descending order (with respect to a selected column
heading), click on the desired heading. The current display order will be reversed, according to
the selected column, and an arrowhead that points in the direction of the sort (i.e., ascending =
up, descending = down) will be displayed to the right of the heading.
• Click on the + at the left end of a row to view additional information on a job (i.e., the Start
Time; the Completion Time; the No. of Destinations; the Subject, if any). When you click on
the +, it changes to - as the information is displayed. Click on the - to hide this information and
return to the original view.
• Search tools are provided at the top of the Received Fax Log pop-up, that enable you to locate
and display only fax jobs that meet your search criteria. The following "search by" text fields
and drop-down menus are provided:
o Job #
o CSID
o From/To - Define a time interval by clicking on the calendar icons and choosing dates.
Use the drop-down menu below the From/To fields to specify the selected dates as
Start or Completion dates.
• To view received faxes that match the criteria you have entered/selected, click on the Search
button. The results are displayed in the received faxes list. When you are finished reviewing
this information, click on the Show All button to redisplay all received faxes.
• Click on the "View" link to open or save a selected fax. To open the fax, click on the Open
button that is provided in the pop-up. The selected fax is displayed in a browser window, using

EasyLink Services International Corporation | Customer Documentation
Page 40 of 49
the appropriate plug-in (i.e., Adobe Reader for PDF; your TIFF viewer for TIFF files). To save
the selected fax, click on the Save button that is provided in the pop-up. The MS-Windows
Save File pop-up is displayed. Navigate to the desired location, enter a filename, and click on
the Save button. The file is saved in the selected location, with the filename you have entered.
• Click on Detail Job Status - To get Detailed job status for e.g. Summary, Report and Graph
View Saved Jobs
To open the Saved Jobs pop-up:
• Click on the button on the right-hand side of the Virtual Fax Machine (labeled with a red, right-
hand arrowhead).
• Saved jobs are listed in the Template column.
• Click on the Delete icon that corresponds to a saved job to remove it from the list.
Access Help Information
To access a list of commonly-asked questions about the Virtual Fax Machine:
• Click on the button on the left-hand side of the Virtual Fax Machine (labeled with a red, left-
hand arrowhead).
• Refer to this information as necessary to enhance your use of the Virtual Fax Machine.

EasyLink Services International Corporation | Customer Documentation
Page 41 of 49
Using the PDF Editing Feature
In order to utilize the benefits of searching and signing your faxed documents, you will need to be sure
that you have Adobe Reader 8 or higher installed on your computer. If you do not have the current
version of Adobe Reader, please download the reader from www.adobe.com.
Setting up your toolbar in Adobe Reader
To ensure your toolbar is setup properly to utilize the searching, signing and editing capabilities, Click
View, Toolbars and make sure Tasks and Find are checked, as shown below. For additional toolbars,
click View, Toolbars, More Tools and check any additional shortcuts you would like on your toolbar.
Setting up your Fax2Mail account to utilize PDF editing
In order to utilize PDF editing, you have to configure your Fax2Mail account by logging into the website
with your username and password. You can access the website by going to www.fax2mail.com.

EasyLink Services International Corporation | Customer Documentation
Page 42 of 49
• Click on My Preferences and choose Receive Preferences.
• Scroll down to the Fax Type section and choose the options you would like to begin using.
Click Update to save.
• Choices include:
o Comments – Allows you to add comments to your fax using Adobe Reader (see
instructions above)
o Signable - Allows you to sign your document
o Searchable – Allows you to search the fax for key words or phrases
Searching text in your PDF fax
Open your faxed PDF document and you can begin to search for text within the document. Use either
the Search Window (Edit > Search) or the Find Toolbar to search page content. Simply type the
characters that you would like to find in the search box on your toolbar and click the Find Next as
shown below:

EasyLink Services International Corporation | Customer Documentation
Page 43 of 49
Comments and markups
When you receive a PDF to review, you can comment on it by using the commenting and markup
tools. You can highlight, underline, cross out and draw on any text within the document.
Comment & Markup toolbar:

EasyLink Services International Corporation | Customer Documentation
Page 44 of 49
Add a comment
• Click the Comment button and Click Add Sticky Note (Ctrl+6).
• Simply type in your comment in the yellow sticky box on the screen, as shown below:
• For additional options, click the Options arrow on the sticky note.
• These options include:
o Set Status - Identifies if the comment was accepted, cancelled, completed or rejected
o Remove Checkmark – Used as an indicator tool for example, you can use them to
keep track of which comments you have read
o Minimize Pop-Up note – Hides the sticky note
o Reset Pop-Up Note Location – Resets the sticky note to the default location
o Delete – Delete the comment and sticky note
o Reply – Allows you to reply to a comment
o Make Current Properties Default – Will reset the properties to the default
o Properties – Allows you to change the appearance, author, subject and view the
history of the comments
Reply to comments
You can reply to comments in two ways:
• Open the pop-up note and choose Reply from the Options menu.
• Click the Comments button in the navigation pane, select a comment, and then click the Reply
button. To delete a reply, right-click your reply, and click Delete This Reply. Or select the reply
in the Comments list, and then click the Trash icon in the Comments List Toolbar.

EasyLink Services International Corporation | Customer Documentation
Page 45 of 49
Highlighting, underlining and striking text
• Using the Comment & Markup Toolbar, click on the Highlight Text Tool and
highlight the text to be highlighted.
• Using the Comment & Markup Toolbar, click on the Underline Text Tool
and
highlight the text to be underlined.
• Using the Comment & Markup Toolbar, click on the Cross Out Text Tool
and
highlight the text to be crossed out.
Stamps
Stamps allow you to mark up your faxed document with a variety of options as shown below:
• Dynamic Stamps – Include Revised, Reviewed, Received, Approved and Confidential
• Sign Here Stamps – Witness, Initial Here, Sign Here, Accepted, Rejected
• Standard Business Stamps – Approved, Not Approved, Draft, Final, Completed,
Confidential, For Public Release, Not For Public Release, For Comment, Void, Preliminary
Results, For Information Only

EasyLink Services International Corporation | Customer Documentation
Page 46 of 49
Sign your fax PDF
Click the Sign button in the Signature Panel, or choose Document > Sign > Sign Document.
• Using your mouse, click and drag to draw the area where you would like the signature to
appear.
• Once you finish dragging out the desired area, you will be taken to the next step for the
signing process.
If you are signing a document for the first time, you
will need to create a new digital ID.

EasyLink Services International Corporation | Customer Documentation
Page 47 of 49
• You will have a choice to create a .pfx or .p12 format for your signature; this allows you to use
this with other software applications.
• Complete the form with your information.
• Now you can sign your document.

EasyLink Services International Corporation | Customer Documentation
Page 48 of 49
•
Use the Preview Document feature to view and sign the document by right clicking on your
signature.
Create the signature appearance
You can set the appearance of your digital signature by selecting Options in the Security section of the
Preferences dialog box. For example, you can include an image of your handwritten signature, a
company logo, or a photograph. You can also create alternate signature appearances that you use for
different purposes.
A signature appearance can also include information that helps others verify your signature, such as
reason for signing, contact information, and more. Set these options by using the Preferences dialog
box. By selecting these preferences, you add options to the Sign Document dialog box that appears
each time you sign a PDF:
• Text signature
• Graphic signature
(Optional) If you want to include an image of your handwritten signature in the digital signature, please
follow these steps:
1. Scan your signature, and save it as an image file. Place the image in a document by itself, and
convert the document to PDF.
2. You can also create an appearance using the Security section of the Preferences dialog box.
In the Appearance section, select one of the available options or click New to create an
appearance.
3. From the Appearance Menu in the Sign dialog box, select Create New Appearance.
4. In the Configure Signature Appearance dialog box, type a title for the signature appearance.
When you sign a document, you select the signature appearance by its title, so use a short,
descriptive title.

EasyLink Services International Corporation | Customer Documentation
Page 49 of 49
5. For Configure Graphic, choose an option:
o No Graphic - Displays only the default digital signature icon and other information
specified in the Configure Text section.
o Imported Graphic - Displays an image with your digital signature. Select this option
to include an image of your handwritten signature. To import the image file, click File,
click Browse, and then select the image file.
o Name - Displays only the default digital signature icon and your name as it appears in
your digital ID file.
6. For Configure Text, select the options that you want to appear in the signature. Distinguished
Name shows the user attributes defined in your digital ID, including your name, organization,
and country.
7. For Text Properties, specify the writing direction and type of digits used, and then click OK.
8. (Optional) If the dialog box includes the Additional Signature Information section, specify the
reason for signing the document, the location, and your contact information. These options are
only available if you selected them using the Advanced Preferences section of the
Preferences dialog box (Security > Advanced Preferences > Creation tab).
