
Cub Scout Shooting Sports GUIDE
A Guide to the Cub Scout Shooting Sports Awards for Unit
Leaders, Councils, Districts, and Range Masters

Cub Scout Shooting Sports GUIDE
A Guide to the Cub Scout Shooting Sports Awards for Unit
Leaders, Councils, Districts, and Range Masters

A WORD ABOUT YOUTH PROTECTION
Child abuse is a serious problem in our society and,
unfortunately, it can occur anywhere, even in Scouting.
Because youth safety is of paramount importance to
Scouting, the Boy Scouts of America continues to strengthen
barriers to abuse through its policies and leadership
practices; through education and awareness for youth,
parents, and leaders; and through top-level management
attention to any reported incidents.
KEY TO SUCCESS: LEADERSHIP EDUCATION AND TRAINING
Registered leaders are required to complete Youth Protection training
within 30 days of registering.
Parents, guardians, and any adults working with youth (whether in
Scouting or not) are also encouraged to take the training.
To take the training online, go to www.myscouting.org and establish
an account. If you do not yet have your membership number, be sure to
return to MyScouting later and enter your number for training
record credit.
The training must be taken every two years to remain current. If a
volunteer does not meet the BSA’s Youth Protection training requirement
at the time of recharter, the volunteer will not be reregistered.
BSA YOUTH PROTECTION TRAINING
The BSA created Youth Protection training to address the needs of
different age groups as follows.
• Youth Protection Training for Volunteer Leaders and Parents—
Adults come away with a much clearer awareness of the kinds of
abuse, the signs of abuse, and how to respond and report should a
situation arise.
• Youth Protection Guidelines: Training for Adult Venturing Leaders—
Designed to give guidance to the leaders in our teenage coed
Venturing program. Supervision and relationship issues have a
different focus regarding personal safety with this age group.
• It Happened to Me—Developed for Cub Scout–age boys and girls
from 6 to 10 years old and their parents. It addresses the four rules of
personal safety: Check first, go with a friend, it’s your body, and tell.
• A Time to Tell—A video for Scouts BSA–age boys and girls from 11
to 14 years old—the target group for most molesters. It stresses the
three R’s of Youth Protection: Recognize, Resist, and Report.
• Personal Safety Awareness for Venturing—Developed for youth ages
13 through 20 in the coeducational Venturing program. It deals with
issues pertinent to this age group.
The BSA has Youth Protection policies to protect youth, and these same
policies help protect adult volunteers. These and other key policies are
addressed in the training:
• Two-deep leadership is required on all outings.
• One-on-one contact between adults and youth members is prohibited.
• Privacy of youth is respected.
• Separate accommodations for adults and Scouts are required.
• Units are responsible for enforcing Youth Protection policies.
To find out more about the Youth Protection policies of the BSA and how
to help Scouting keep your family safe, see the Guide to Safe Scouting at
www.scouting.org/HealthandSafety/GSS/toc.aspx and the Parent’s Guide
in any of the Cub Scouting or Scouts BSA handbooks, or go to
www.scouting.org/Training/YouthProtection.aspx.
510-322
©2020 Boy Scouts of America
2020 Printing

cub scout shooting sports guide5
PREFACE
Cub Scout shooting sports programs may be conducted only on a district
or council level. Archery, BB gun shooting, and slingshot shooting are
restricted to day camps, Cub Scout/Webelos Scout resident camps,
council-managed family camping programs, or council activities where
there are properly trained supervisors and where all standards for BSA
shooting sports are enforced. All shooting ranges in the Cub Scout
program must be supervised by a qualified range master who is at least
18 years of age and meets the minimum requirements. See specific
qualifications and training requirements for Cub Scout shooting sports
range masters in the Boy Scouts of America National Shooting Sports
Manual, No. 430-938.
USING THIS GUIDE
• Archery, BB gun shooting, and slingshot shooting are not
approved unit activities.
• The use of pellet air rifles is restricted to Webelos Scouts in a Boy
Scouts of America resident camp setting only.
• Kindergarten–age youth in the Lion program may participate in
Cub Scout archery or slingshot activities.
• The Multi-Gun Airsoft Experience introduced in August 2015 was
not designed for participation in this award. Airsoft guns are not
approved for use in the Cub Scout shooting sports program.
• All local, state, and federal laws for BB guns, archery, and
slingshot shooting must be followed.
This Cub Scout Shooting Sports Guide is intended to assist leaders
in helping their Cub Scouts earn the shooting sports awards. It is not
a substitute for authorized range master training or for the safety
procedures called out in the Boy Scouts of America® National Shooting
Sports Manual, No. 430-938, which is the reference for any shooting
sports activities in the Boy Scouts of America.
All volunteers participating in official Scouting activities
should become familiar with the Guide to Safe Scouting.
The Guide to Safe Scouting may be found online at
www.scouting.org/scoutsource/HealthandSafety/GSS.

CONTENTS
SECTION 1
07
Introduction
07
Purpose of the Cub Scout Shooting Sports Awards
07
Structure of the Cub Scout Shooting Sports Awards
SECTION 2
09
Award Requirements and Explanations
09
BB Gun
16
Archery
24
Slingshot
APPENDIX
29
Resources for the Cub Scout Shooting Sports Awards
29
Posters
49
Additional Activities

cub scout shooting sports guide7
SECTION 1: INTRODUCTION
The goal of the Cub Scout Shooting Sports Guide is to support shooting
sports directors, range masters, on-range adult volunteers, and unit
leaders as they assist Cub Scouts in meeting the requirements of the Cub
Scout shooting sports awards according to Boy Scouts of America policy
and practice. This resources supports—but does not replace—the Boy
Scouts of America National Shooting Sports Manual (No. 430-938).
The Cub Scouting shooting sports disciplines of archery, BB gun shooting,
and slingshot shooting are restricted to day camps, Cub Scout/Webelos
Scout resident camps, council-managed
family camping programs, or council
activities held on or off BSA property where
there are current and properly trained BSA
shooting sports range masters and where
all standards for BSA shooting sports
are enforced.
Purpose of the Cub Scout Shooting Sports Awards
As decades of Cub Scouting have shown, most youth love to shoot!
Beyond capturing that enthusiasm, the BSA created the Cub Scout
Shooting Sports Awards program to encourage in Cub Scouts the
development of safe shooting practices and proficiency in shooting
sports. As Cub Scouts participate in shooting sports activities and
work toward an award, they not only build confidence in their abilities,
but also develop self-reliance, sportsmanship, and conservation
awareness—all elements of good character
valued in Scouting.
Through experiential learning guided by a
knowledgeable adult, Cub Scouts will learn
the safe and responsible use of BB guns,
slingshots, and archery equipment. The
goal is for the Cub Scout to have fun in a
safe environment, not to become an expert
marksman, range master, or hunter.
Archery, BB gun
shooting, and slingshot
shooting are not
approved unit activities.
Structure of the Cub Scout Shooting Sports Awards
Cub Scout shooting sports awards may be earned for any of the three
following disciplines:
• Archery
• BB guns*
• Slingshots
A Cub Scout may choose to participate in only one of the disciplines or
may choose to participate in all three disciplines. The requirements for
each of the disciplines are structured similarly.
*BB guns are available only for Tiger through Arrow of Light ranks.
In the spirit of Cub
Scouting, remember to
“Keep It Simple, Make
It Fun!” and guide Cub
Scouts to follow their
motto, “Do Your Best!”
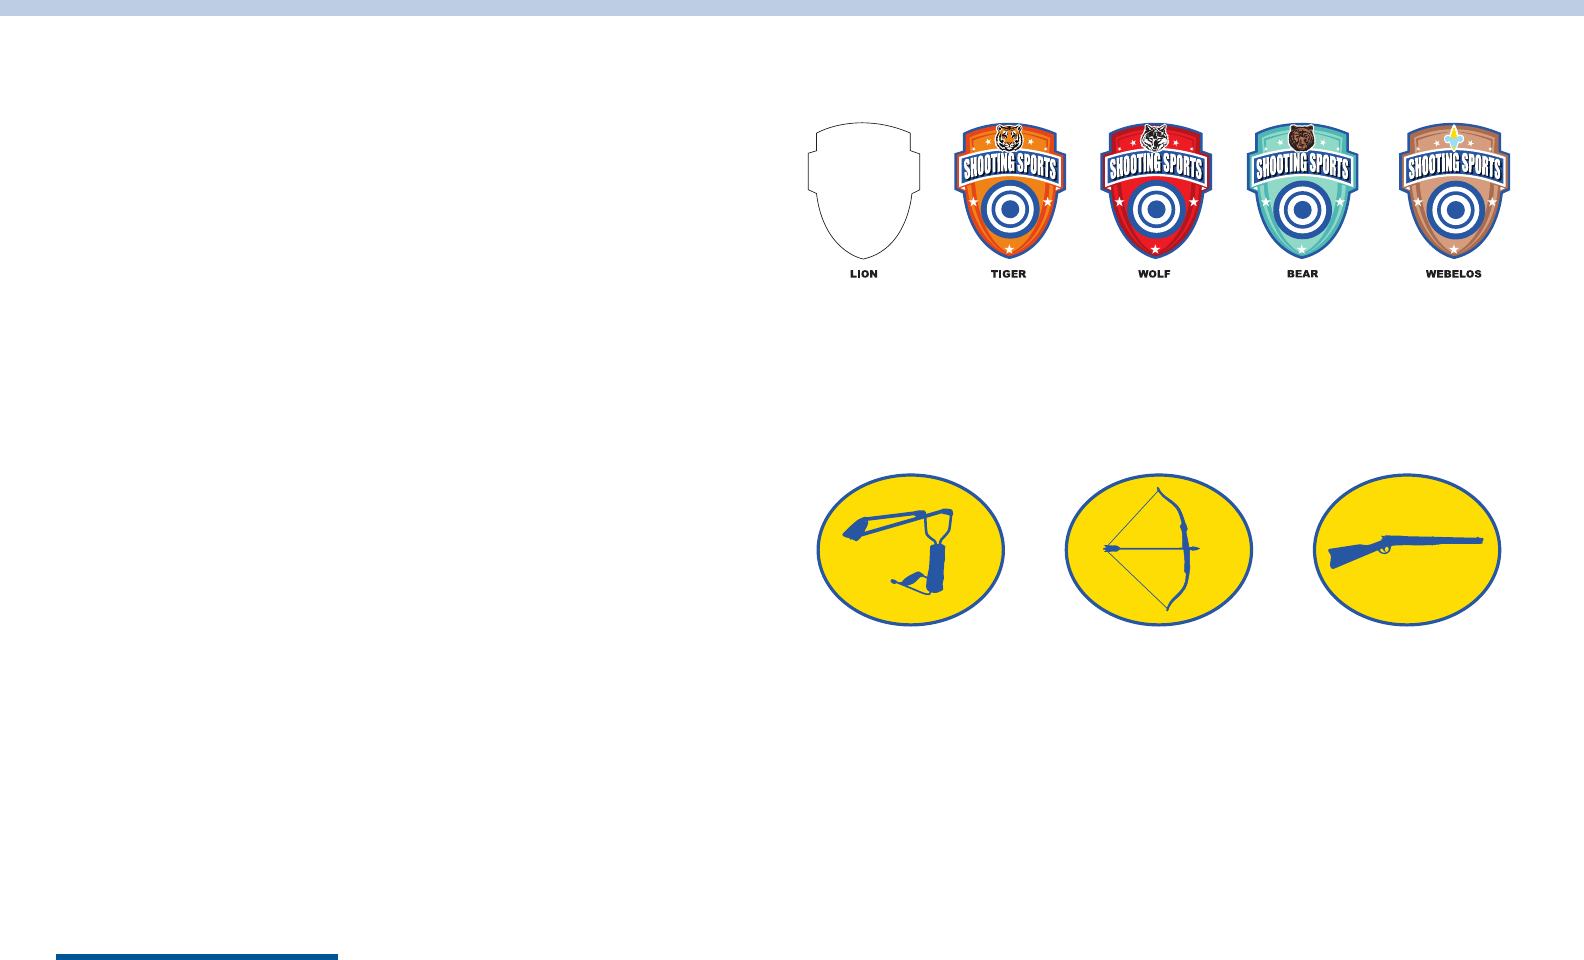
Lions, Tigers and Shooting Sports
Lions and their adult partners may participate in archery
or slingshot shooting sports activities. Tigers and their
adult partners may participate in all Cub Scouting
shooting sports activities. The adult partners must be
included in all shooting activities. Each Lion/Tiger must
be paired with their adult partner before being allowed to
shoot. In most cases, Lions/Tigers and their adult partners
will participate in shooting sports activities at a day camp.
Keep in mind that youth of this age have very short
attention spans (20 to 30 minutes, maximum) and tire
easily. They probably have little experience working as a
group and may require more time to understand how the
range operates. Lions/Tigers have a wide range of ability
and experience levels, so be ready for anything!
cub scout shooting sports guide8
Level 1 involves participation in a discipline and acquiring basic
knowledge of proper technique, safety, and operations in that discipline.
Level 2 is designed to help a Cub Scout develop and demonstrate
further skills, proficiency, and knowledge in a shooting discipline.
Level 2 requirements are rank-specific and provide a progression of
skills appropriate to each age and rank of Cub Scouting.
Earning the Awards
Cub Scouts earn the shooting sports awards in the following order:
1. Rank-level patch. Choose a discipline: BB gun, archery,
or slingshot. Complete the level 1 requirements for that
discipline. The patch is awarded only once per program
(rank) year.
2. Discipline device (pin). Complete the level 2 requirements for
the same discipline in which the patch was earned.
3. Additional discipline devices. Earn pins for the remaining
disciplines by completing the level 1 and level 2 requirements
in those disciplines. (NOTE: Requirements for both level 1 and
level 2 must be completed for each successive discipline.)
Disciplines: BB gun, archery, slingshot
Program years/ranks: Lion, Tiger, Wolf, Bear, Webelos/Arrow of Light
Sample situation:
A new Tiger completes the level 1 requirements for BB guns and
earns the Tiger shooting sports patch at a day camp in the district.
The Scout later attends another day camp and completes the level 2
requirements and earns the BB gun pin to attach to the patch. Later
that year, the district holds a Cub
Scout shooting sports day at the
local park. This time the Cub Scout
completes both the level 1 and level
2 for archery. He or she earns the
archery pin, which will be worn on
the Tiger shooting sports patch.
See section 2 for more
information on awards
and requirements.
TO BE
DETERMINED
Councils may choose
to supply an appropriate
recognition during
this period.
Shooting Sports AwardS
Shooting Sports Award Pins
Shooting Sports Award PINS

cub scout shooting sports guide9
BB Gun Level 1 Requirements
SECTION 2: Award Requirements and Explanations
LEVEL 1: PARTICIPATION AND KNOWLEDGE — ALL RANKS (LIONS ARE NOT APPROVED FOR BB GUNS)
1. Explain what you should do if you find a gun. Recite the four safety reminders.
2. On an approved range in your city or state, explain how to use the safety mechanism, and demonstrate how to properly load, fire, and secure the BB gun.
3. On an approved range, demonstrate to qualified leadership good shooting techniques, including eye dominance, shooting shoulder, breathing, sight alignment, trigger
squeeze, and follow-through.
4. On an approved range, show how to put away and properly store BB gun shooting equipment after use.
TRAINING CUB SCOUTS
The objectives of this award are to teach Cub Scouts how to use a BB gun
safely, to teach basic BB gun shooting skills, and to have fun. Cub Scouts
should have the opportunity to fire a BB gun during the first orientation
period. This activity is not intended to produce expert marksmen.
The instructor must always be mindful of his or her responsibility to make
safety thoroughly understood before, during, and after instruction and
practice. At the same time, he or she must have warmth, patience, and
understanding for the Scout who finds the skill difficult to learn.
Teaching tips
The coach-pupil method is effective for all types of skill training and is
particularly effective in shooting sports. To put this method into practice:
• Put the BB gun in the Cub Scout’s hand as soon as possible so he or
she can understand the BB gun while the basics are explained.
• Group participants into pairs (Scout and parent/guardian would
be ideal).
• The instructor demonstrates the activity or action to be followed
before the whole group. When demonstrating techniques, be sure to
do them correctly.
• The instructor then circulates among the pairs, giving a word of
advice or assistance, recognizing good work, correcting errors, and
determining how well the participants understood the method.
• The Scout practices while the parent coaches. Let Scouts shoot
the first round. At a predetermined signal, reverse the roles.
Progressively, participants are learning by observing, by doing, and
by coaching.
• Use a positive approach. Use praise sincerely. Before making a
correction, question the fault to find the cause. Do show a Scout what
they might be doing wrong.
• Avoid long discussions on the parts of the equipment used. Teach just
enough so participants will know how to safely use the equipment.
• Allow each Scout to feel the satisfaction of hitting a target as quickly
as possible.

cub scout shooting sports guide10
Notes on BB Gun Level 1 Requirements
Level 1, Requirement 1
Explain what you should do if you find a gun. Recite the four
safety reminders.
This requirement should be reviewed while the Scouts are preparing for
their turn on the range or in a pre-event activity. A lively chant will help
them memorize the reminders.
The Four Safety Reminders
What should you do if you find a gun?
Level 1, Requirement 2
On an approved range in your city or state, explain how to use the
safety mechanism, and demonstrate how to properly load, fire, and
secure the BB gun.
Safety Guidelines
When training youth to shoot, be sure to have proper equipment, secure
and safe ranges, and clear safety instruction.
Gun safety is a simple but continuous process. Youth must first learn
about safe gun handling. Safe handling skills are developed through
practice. The most important safety element is attitude. All the safety
knowledge and skills are of little value unless they are used. Being safe
means consciously keeping a BB gun under control.
Before handling any gun, a Scout must always get permission from his or
her parent or guardian. If this is their first BB gun shooting experience,
the Scout should sit down with an adult and discuss under what
circumstances the gun can be handled. They must understand that the BB
gun is not a toy.
STOCK
SMALL OF
STOCK
REAR
SIGHT
BARREL
FRONT SIGHT
MUZZLE
FOREARM
TRIGGER
GUARD
TRIGGER
COCKING
LEVER
BUTT
The following basic rules apply to handling a BB gun under any
circumstances. Also review any applicable local, state, and federal laws,
and be sure to follow them on your range.
1. Always keep the gun pointed in a safe direction. This is the
primary rule of gun safety. “Safe direction” means that the gun is
pointed so that even if it were to go off, it would not cause injury
or damage. The key to this rule is to control where the muzzle
or front end of the barrel is pointed at all times. Common sense
dictates the safest direction depending on circumstances.
2. Always keep your finger off the trigger until you are ready to
shoot. When holding a gun, rest your finger along the side of the
gun or the trigger guard. Until you are actually ready to fire, do
not touch the trigger.
3. Always keep the gun unloaded until ready to use. When you pick
up a gun, carefully point it in a safe direction. Check to be certain
the safety is on, and if not, engage the safety if possible. Then,
while keeping your finger off the trigger, open the action and look
inside the chamber(s) to make sure it is clear of ammunition. If
the gun has a magazine, remove it before opening the action and
make sure it is empty. If you do not know how to open the action
or inspect the chamber(s), leave the gun alone and get help from
someone who does.
STOP!
TELL AN ADULT!
LEAVE THE AREA!
DON’T TOUCH!

cub scout shooting sports guide11
4. Know how to use a gun safely. Before handling a gun, learn
how it operates. Know its basic parts and how to safely open and
close the action. Know how to remove ammunition from the gun
or magazine.
5. Be sure the gun is safe to operate. Just like other tools, guns need
regular maintenance to remain in good working order. Regular
cleaning and proper storage are part of the gun’s general upkeep.
If there is any question about a gun’s ability to function, then do
not use it. Get someone to fix it!
6. Use only the correct ammunition for the gun. Only the BB
designed for a particular BB gun can be fired safely in that gun.
Do not shoot the gun without loading the proper ammunition.
7. Wear eye protection. Always wear eye protection. Shooters and
instructors should wear approved safety goggles at all BB gun
ranges. BBs might ricochet.
8. Don’t rely on the safety. Most guns have a mechanism called a
“safety” that helps to prevent the gun from accidentally firing.
However, a safety is a mechanical device, which can—and will—
fail. Shooters must be trained that the safety mechanism is not a
sure, safe way to prevent a gun from firing. Many accidents have
occurred because shooters have relied on the safety mechanism
to work.
9. Wear ear protection. Although not mandatory for BB gun
shooting, ear protection may also be worn. Shots fired from
guns are loud and the noise could damage the hearing of
some shooters.
10. Know your target and what is beyond the target. Be absolutely
sure to identify the target beyond any doubt. Equally important,
be aware of the area beyond the target. Never fire in a direction
where there are people or where any other potential for mishap
might exist. Think first. Shoot second.
11. Store guns so they are not accessible to any unauthorized person.
Deciding where and how to store guns and ammunition depends
on several factors, including security and accessibility. Safe and
secure storage means that untrained individuals (especially
children) are denied access to guns and ammunition.
Level 1, Requirement 3
On an approved range, demonstrate to qualified leadership good
shooting techniques, including eye dominance, shooting shoulder,
breathing, sight alignment, trigger squeeze, and follow-through.
NOTE: The following activities can be taught in advance at a pre-event
meeting or during a separate session.
Eye Dominance
Before shooting a gun, the participants should determine which eye
is dominant. Just as people are either right- or left-handed, one eye is
more dominant than the other. Discovering which eye a shooter favors is
important because it could determine on which side the gun is held.
To find which eye is dominant, have
participants extend both arms in front
of them and form a small hole with their
thumbs and index fingers. Instruct them
to look at a distant object through the
opening and then pull their hands back
to their face. The eye that is in line with
the object is dominant.

cub scout shooting sports guide12
Shooting Shoulder
It is recommended that a shooter use the shoulder that is on the same
side of the body as the dominant eye. If the right eye is dominant, place
the firearm against the right shoulder. If the left eye is dominant, use the
left shoulder. If the shooter has learned to use the opposite shoulder and
eye, it may be more comfortable for them to shoot that way.
Breathing
When shooting, stop breathing before firing a shot. Breathing causes the
body to move and makes it difficult to maintain a steady sight picture.
Before firing, relax and get comfortable. Then exhale and stop breathing.
This technique will help shooters aim by reducing the body and rifle
movement in relation to the target. Do not stop breathing for longer than
8 to 10 seconds while aiming at the target. If you are not able to shoot
within that time, stop, take a breath or two, and repeat the process.
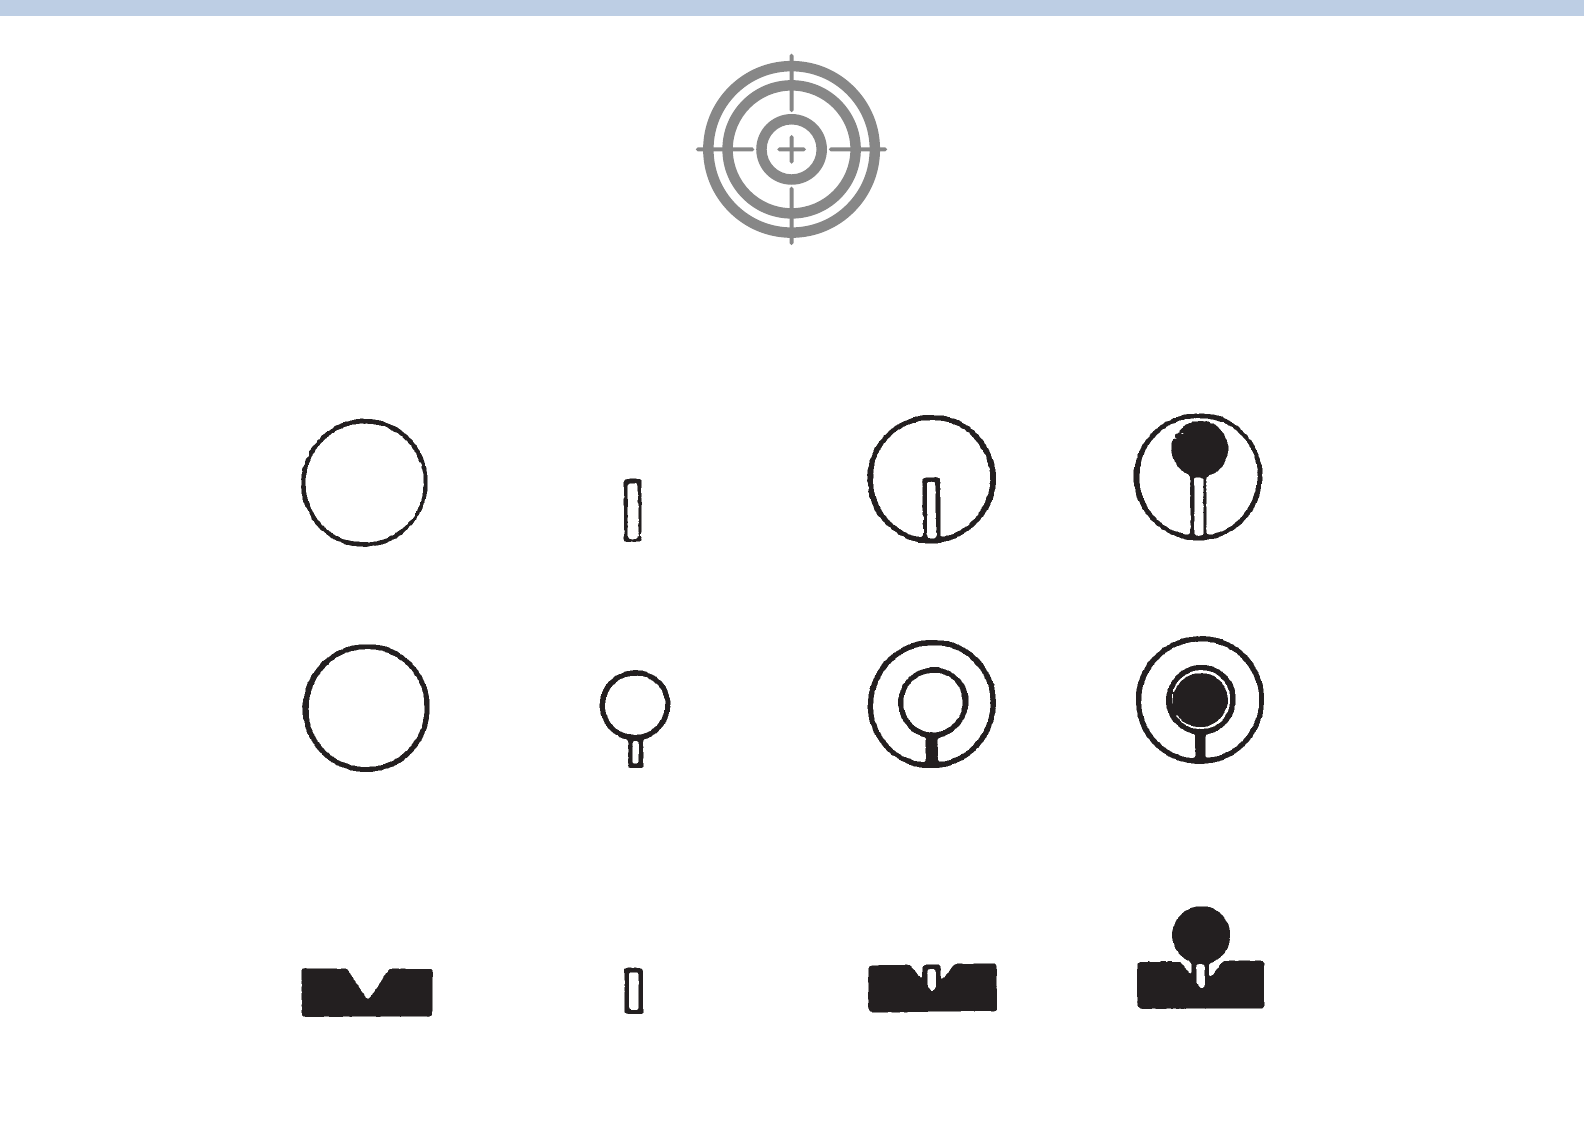
Sight Alignment
The shooter must learn proper sight alignment. This is the relationship of
the front and rear sights to the eye. The shooter’s dominant eye must be
lined up with the front and rear sights, and the sights must be positioned
so that the front sight device is aligned properly with the rear sight.
Sighting Chart
PEEP
REAR SIGHT
POST
FRONT SIGHT
PROPER
ALIGNMENT
PROPER SIGHT
PICTURE
PEEP
REAR SIGHT
APERTURE
FRONT SIGHT
PROPER
ALIGNMENT
PROPER SIGHT
PICTURE
OPEN
REAR SIGHT
POST
FRONT SIGHT
PROPER
ALIGNMENT
PROPER SIGHT
PICTURE
Proper sight alignment is a key to accurate shooting. Any misalignment
of the front sight with the rear sight introduces an angular error that is
multiplied with distance.
A correct sight picture is obtained by achieving the proper alignment and
then putting the aligned sights into their proper relationship with
the target.
Trigger Squeeze
“Trigger squeeze” is the term used to explain the manner in which
pressure is applied to the trigger. Some other terms commonly used are
“trigger pull”, “trigger control”, “trigger press”, and “trigger movement”.
While all of these terms are correct, the preferred term is “trigger
squeeze” because it accurately describes the smooth application of
pressure required.
When ready to begin squeezing the trigger, the index finger should be
located on the trigger so that the trigger is about halfway between the tip
of the finger and the first joint.
The trigger must be squeezed straight back in a smooth, continuous
manner without disturbing the sight alignment. Once trigger squeeze has
begun, keep squeezing smoothly and continuously; do not speed up, slow
down, or apply pressure in a start-and-stop manner. Use the same type of
pressure that would be used to squeeze a drop of liquid from a medicine
dropper—a gradual, steady application of pressure until the drop finally
falls. Just as it would be impossible to predict the instant that the drop of
liquid will fall, it should be impossible to predict the precise instant that
the gun will fire. Each shot should come as a surprise.
For best results, trigger squeeze and sight alignment must be
done simultaneously.
Follow-Through
The shooter must also master proper follow-through. Follow-through
means to continue to do everything that was being done at the time the
shot was fired. In other words, keep aiming until the BB hits the target.
The idea is to prevent any unnecessary movement before the projectile
leaves the barrel. Because an air gun takes longer to send a projectile out
of the barrel, proper follow-through is particularly important.

cub scout shooting sports guide13
Level 1, Requirement 4
On an approved range, show how to put away and properly store BB gun
shooting equipment after use.
Work with your range master according to local practices and procedures.
In most cases:
• The BB gun should be unloaded.
• The safety mechanism should be engaged.
• The BB gun should be protected from scratches and scrapes from
other guns.
• The BB gun should be locked or otherwise secured in a safe place.
BB Gun Level 2 Requirements
LEVEL 2: SKILL AND KNOWLEDGE
To earn the Level 2 Skill and Knowledge recognition, Cub Scouts must complete the Level 1 Participation and Knowledge requirements, and do the following:
• Tigers must complete S1–S3 from the Tiger column.
• Wolves and Bears must complete S1–S4 from the Wolf/Bear column.
• Webelos and Arrow of Light Scouts must complete S1–S4 from the Webelos/Arrow of Light column.
Tiger Wolf/Bear Webelos/Arrow of Light
S1
Demonstrate one of the positions associated with
shooting BB guns.
Demonstrate one of the positions associated with
shooting BB guns.
Demonstrate the prone, bench, and sitting positions
associated with shooting BB guns.
S2
On an approved range, fire five BBs at the “TIGER”
target. Score your target; then repeat and do your
best to improve your score. (Fire a total of 10 BBs.)
On an approved range, fire five BBs at the “CUB
SCOUT” target. Score your target; then repeat twice
and do your best to improve your score each time.
(Fire a total of 15 BBs.)
On an approved range, fire five BBs at the
“WEBELOS/AOL” target. Score your target; then
repeat three times and do your best to improve your
score. (Fire a total of 20 BBs.)
S3
Demonstrate proper range commands, and explain
how and when to use them.
Demonstrate proper range commands, and explain
how and when to use them.
Demonstrate proper range commands, and explain
how and when to use them.
S4
Tell five facts about the history of BB guns. Tell five facts about the history of BB guns.

cub scout shooting sports guide14
Notes on BB Gun Level 2 Requirements
Level 2, Requirement S1: Shooting Positions
Decide with input from your range master the best method and order for
accomplishing this requirement.
Shooting Positions
Proper body position is essential to achieve a good shooting score. When
learning any shooting position, these basic steps must be followed:
1. Study the position.
2. Practice the position without a gun. (Learn to put the feet,
legs, body, head, and arms in the correct position without
holding a gun.)
3. Practice the position with a gun.
4. Align the position properly with the target. Adjust the position so
that the gun points naturally at the target.
5. Shoot from the position.
PRONE POSITION SITTING POSITION
BENCHREST POSITION
FREE-ARM STANDING
POSITION
Level 2, Requirement S2
Tiger: On an approved range, fire five BBs at the “TIGER” target. Score
your target; then repeat and do your best to improve your score. (Fire a
total of 10 BBs.)
Wolf/Bear: On an approved range, fire five BBs at the “CUB SCOUT”
target. Score your target; then repeat twice and do your best to improve
your score each time. (Fire a total of 15 BBs.)
Webelos/Arrow of Light: On an approved range, fire five BBs at the
“WEBELOS/AOL” target. Score your target; then repeat three times and do
your best to improve your score. (Fire a total of 20 BBs.)
Leaders assisting with this requirement should keep in mind the Cub
Scout motto, “Do Your Best,” at all times. The goal is for the Cub Scout
to improve their technique and, as a result, improve their overall
performance. There is NO specific score required for this requirement,
only improvement. This may mean five misses the first time, and one hit
on the target the second time. While it is clearly desired that the Scout
would improve to the point of scoring an actual target, and while it would
be good to work to that goal if time allows, the requirement only requires
improvement.
Using the designated target for each Cub Scout rank allows Scouts of all
ages the opportunity to reach an appropriate proficiency level. There are
three targets for BB guns, as shown below.
TIGER TARGET
1 5 10
_________________________________ ___/___/___ _______
Name Date Score
WEBELOS–AOL TARGET
10 9 8 7 6 5 4
_________________________________ ___/___/___ _______
Name Date Score
WOLF – BEAR TARGET
1 3 5 10
_________________________________ ___/___/___ _______
Name Date Score
TIGER TARGET WOLF/BEAR TARGET WEBELOS/ARROW
OF LIGHT TARGET
These targets are included for reproduction purposes in the poster section
of the appendix. Each Cub Scout should use the appropriate target for
their rank. When reproducing the targets, choose a paper color that
contrasts with the background coloring to make “hits” easier to spot.

cub scout shooting sports guide15
Level 2, Requirement S3
Demonstrate proper range commands, and explain how and when to
use them.
Safety is critical at your event. The actual commands should be taught,
and the Scouts should quiz each other until they acquire a thorough
knowledge level. See the appendix for some common range commands,
but confirm with your range master the actual commands and their
meanings on your range.
cub scout shooting sports guide34
SUGGESTED BB GUN RANGE COMMANDS
Load.
Ready on the ring line.
Commence ring.
Cease ring.
Clear all guns.
LOAD YOUR BB gun.
ALL SHOOTERS ARE READY.
YOU MAY FIRE YOUR BB Gun.
STOP SHOOTING.
Show your bb gun is empty. Lay it down.
Level 2, Requirement S4
Tell five facts about the history of BB guns.
Using the material in this guide or another source, help the Cub Scouts
learn about BB guns and their history.
A Brief History of BB Guns
In ancient history, blowguns began to appear in many different parts of
the world. Although crude, these primitive weapons were very accurate.
They were made from bamboo or other hollowed-out woods. A blowgun
is a tube into which a hunter blows to shoot a projectile out the other
end. This idea was transferred into gun form sometime in the 1500s. The
bellows gun, invented around 1580, is the earliest known
air-powered gun.
A few decades later, the first pneumatic (pump-up) air gun was created
in France for King Henry IV. The nobility usually owned these early guns,
since they were too expensive for commoners.
In the late 1700s, some units of the Austrian army were equipped with
air rifles.
In America, records show that in the 1800s, Lewis and Clark had an air
gun for hunting and for impressing the American Indians. The American
Indians called it “the smokeless thunder stick.”
In 1885, in the United States, the Markham Air Rifle Company became one
of the first companies to sell BB guns. These pneumatic rifles eliminated
bullets and used a small pellet the size of a ball bearing, soon to be called
a “BB.”
A few years later, a company that sold steel windmills decided to also sell
BB rifles. By 1895, this company had stopped producing windmills and
made air rifles full-time and changed the company name to Daisy.
Daisy’s guns were mostly made of steel, which improved the gun’s
strength and design. The Daisy air rifle became popular very quickly, and
within five years Daisy had sold 250,000 BB guns. Soon, Daisy bought out
all of its competition.
Daisy also promoted to youth by making special BB guns associated with
popular historical characters like Davy Crockett.
In 1984, the Olympic Games featured air guns for the first time.
Today, BB guns are still being produced in both rifle and pistol forms and
are very popular among all age groups.

cub scout shooting sports guide16
Archery Level 1 Requirements
Level 1, Requirement 1:
Demonstrate how to follow archery range safety rules and
whistle commands.
Lions or Tigers with their adult partners, and Wolf, Bear, and Webelos
Scouts should learn these simple safety rules. When training youth to
shoot, be sure to have proper equipment, secure and safe ranges, and
clear safety instruction.
Safety Rules for Archers
1. Observe all state and local laws on using a bow and arrow.
2. Shoot only with proper range supervision.
3. Always check your equipment before shooting. Break and discard
all cracked or fractured arrows.
4. Be sure to include all of the safety guidelines and the proper
whistle codes.
5. Bows and arrows should be used only in places set aside for
their use.
6. Always keep your arrows pointed down or toward the target.
LEVEL 1: PARTICIPATION AND KNOWLEDGE (ALL RANKS)
1. Demonstrate how to follow archery range safety rules and whistle commands.
2. Identify and name a recurve bow and/or compound bow.
3. Explain and demonstrate how to apply and use arm guards, finger tabs, and quivers.
4. On an approved range, demonstrate how to safely and effectively shoot a bow and arrow, including how to establish a correct stance, nock the arrow, hook and grip the
bow, raise the bow, draw, anchor, hold, aim, and release/follow through.
5. On an approved range, demonstrate how to safely retrieve arrows after the range is clear and the command to retrieve arrows has been provided.
Notes on Archery Level 1, Requirement 1
This requirement may be taught in advance of the shooting
experience at a pre-event meeting or additional program
station in a camp setting. Be sure to use the actual rules
and commands or whistle codes your range will use!
cub scout shooting sports awards requirements40
ARCHERY RANGE RULES AND COMMANDS
Archery Range Rules
1. Always walk on the range.
.
2.
Keep your arrows in your quiver until you are
told to shoot.
.
3.
Only release the bow string when an arrow is
nocked and safely pointed toward the target.
.
4.
Leave dropped arrows on the ground until
instructed to retrieve them.
.
If there is an emergency on the range, immediately
tell the instructor.
Know the Proper Whistle Codes
Two blasts = Move up
to the line.
One blast = Fire the proper number of arrows.
Three blasts = Cease firing.
Move to the target.
Retrieve and score arrows.
Five or more whistle blasts = Cease firing. Stay
where you are. This is an EMERGENCY. Officials
will tell the archers what action to take either
verbally or by the whistle code.
Remember there is only ONE command to shoot—
ONE blast of the whistle.
For any command of more than one blast, STOP
shooting. Watch and listen for further instructions.
(From USAA Archery Certification Course – Level 1 manual. Used with permission.)

cub scout shooting sports guide17
7. Only release an arrow when you can see its full clear path to
the target.
8. Shoot only at the target in front of you.
9. Keep the arrows in the quiver until everyone is on or behind the
shooting line and the range master has indicated that you may
begin shooting.
10. Archers stand with both feet behind the line.
11. Stop shooting immediately upon signal from the range master
or if anyone crosses in front of the shooting line or in front of or
behind the targets.
12. Use only arrows that have been measured for your proper draw
length. Arrows that are too short may cause personal injury or
damage to the bow and arrow.
13. Always wear an arm guard and finger tab or glove.
14. Always practice courtesy and good sportsmanship.
15. Always walk, never run, when on the archery range or while
carrying arrows.
16. On a target range, leave the bow standing against the target face
while you are looking for lost arrows.
17. Stay on marked paths. Travel the direction in which the targets
are marked.
Safety Rules for Range Masters
1. Know where arrows will go if the target is missed and to ensure a
safety zone is in place.
2. Lock, secure, and affix signs to all access gates and entranceways
downrange of the shooting line to inform people of the activity.
3. Communicate with range officers and other camp personnel
regarding when and where archery activities will take place.
4. Avoid shooting into the sun.
5. Know how many arrows the archers have before shooting to be
sure they are all retrieved.
6. Clear the range of any potential tripping hazards.
(From USAA Archery Certification Course – Level 1 manual. Used
with permission.)
Level 1, Requirement 2:
Identify and name a recurve bow and/or compound bow.
The two bows most commonly used by Cub Scouts are
• Recurve: Recurve bows are the traditional bow for learners. It allows
the archer to better learn proper finger tension. Modern recurve bows
are either made entirely of fiberglass, or are a composite of wood and
fiberglass. Both options are satisfactory for beginning instruction.
• Compound: Compound bows are generally harder to master, but they
will produce more consistent results. The pulley system provides a
mechanical advantage to assist where strength or stamina is an issue.
cub scout shooting sports awards requirements42
types of archery bows
TIP
STRING NOTCH
UPPER LIMB
BACK
FACE
SIGHT WINDOW
ARROWPLATE
ARROW REST
STRING HEIGHT
STRING
RECURVE
GRIP
LOWER LIMB
HANDLE
RISER
SECTION
SERVING
IDLER WHEEL
AXLE
BUSS
CABLE
UPPER LIMB
LIMB BOLT
RISER
GRIP
LIMB BOLT
LOWER LIMB
SHOOTING
STRING
CAM
CABLE GUARD
CABLE GUARD SLIDE
WINDOW
ARROW REST
SERVING
RECURVE BOW COMPOUND BOW

cub scout shooting sports guide18
All archers should be able to identify a recurve bow and
compound bow. If your range uses only one type, obtain
an example of the other for identification purposes to meet
the requirement.
Level 1, Requirement 3:
Explain and demonstrate how to apply and use arm guards, finger tabs,
and quivers.
Use the safety equipment available at your range, and demonstrate how
to wear and adjust it properly. This should include arm guards, finger tabs,
arrows, and quivers. Depending on the size of your shooters, you may
need to adjust which equipment can be used safely. Be sure to cover
loose and oversized shirts, jackets, or other items that may constitute a
hazard when shooting arrows.
Arm Guards
An arm guard is a piece of still material, usually leather or nylon, that
attaches to the inside of the forearm of the archer’s bow arm to protect
it from the bowstring upon release. It also holds down jacket and shirt
sleeves so they don’t interfere with the bowstring’s travel. The larger part
goes toward the elbow. A right-handed archer should wear the guard on
the left arm, a left-handed archer on the right arm.
Care of Arm Guards
Arm guards should have laces or elastic
replaced when needed. Arm guards should
be kept in labeled boxes. All leather goods
will last longer if stored in a cool, dry place
and occasionally cleaned with saddle soap.
Finger Tabs
Finger tabs are preferable to gloves for group instruction because
they present fewer fitting problems. Made of smooth leather, finger
tabs absorb the friction of the bowstring across the fingertips. Without
them, painful blisters can develop. Many designs are available, but for
beginners the simplest and most inexpensive type is satisfactory.
Quivers
For the young beginner, having a quiver to use when returning arrows
from the target to the shooting line will improve safety procedures.
Level 1, Requirement 4:
On an approved range, demonstrate how to safely and effectively shoot
a bow and arrow, including how to establish a correct stance, nock the
arrow, hook and grip the bow, raise the bow, draw, anchor, hold, aim, and
release/follow through.
Step 1: STANCE
Stance is the correct foot position of the archer. The goal is to provide a
solid foundation for the shot. An archer is most stable in an open stance.
1. Stand with both feet behind the shooting line.
2. Feet should be shoulder-width apart.
3. Move the foot closest to the target back about 3 inches.
4. Turn the toes of both feet toward the target about 30 degrees.
Step 2: Nock the Arrow
To nock an arrow is to securely place the
arrow onto a bowstring. When the arrow is
securely placed on the bowstring, the
archer feels and/or hears the arrow “snap”
into place.
1. Grasp the arrow below the nock.
2. Bring the arrow up and over the bow and
place it on the arrow rest.
Every shooter must
use an arm guard and
finger protector.

cub scout shooting sports guide19
3. Spin the arrow so the index vane (usually a different color) points
away from the riser and toward the archer’s body.
4. Push the nock into place on the bowstring directly below the
nocking point.
Step 3: Hook and Grip
Archers touch the bow
in only two places: the
bowstring where they
“hook” it, and at the grip
where they “grip” it. Hook
is when an archer curls
three fingers around the
bowstring directly beneath
the arrow. The grip on a bow
is where the archer places
his or her hand on the bow.
1. Curl the bowstring with the fingertips of the index, middle, and
ring fingers under the arrow.
2. Pull the bowstring back enough to apply a small amount
of tension.
3. Center the meaty part of the thumb on the back of the bow grip.
4. Point the thumb toward the target and angle your knuckles 45
degrees. Check to be sure the grip is relaxed.
Step 4: Raise the Bow
This step gives the archer the opportunity to confirm that all previous
steps have been completed before proceeding. Once that is done, do
the following:
1. Turn the head toward the target.
2. Rotate the elbow of the bow arm away from the bowstring.
3. Lift both arms to shoulder height.
4. Extend the bow arm fully, keeping the bow vertical.
The archer raises the bow in preparation for drawing back the bowstring.
This gives the archer a sense of direction by knowing where the bow is
in relation to the target. While raising the bow, it is important to keep the
rest of the body still.
Step 5: Draw
Pull the bowstring back toward the face. The draw should be seamless
and smooth.
Step 6: Anchor
The archer should pull the bowstring back to a consistent anchor point
every time to maintain accuracy. For beginning archers, the corner of the
mouth is the preferred anchor point.
1. Settle the index finger of the draw hand into the corner of
the mouth.
2. Keep the draw hand relaxed and up against the face.
Step 7: Hold
Move the draw arm elbow slightly behind the arrow to brace the draw
weight of the bow. The tension of holding the bow is now transferred from
the shoulder and arm muscles to the back muscles.
Step 8: Aim
Aim is lining up the arrow
to the target. Simply put,
the arrow will go where it is
pointed. The goal is to focus
equally on the target and the
arrow point.
1. Place the point of the arrow on the intended target area.
2. The eye focus is equally on the arrow point and the target.

cub scout shooting sports guide20
Step 9: Release/Follow-Through
Release occurs when the archer relaxes the tips of the fingers that are
hooking the bowstring, allowing the bowstring to push the fingers out of
the way. Follow-through is the finish position.
1. Relax the fingertips to allow the bowstring
to push the fingers out of the way.
2. Keep the bow arm up.
3. Finish the shot by allowing the draw hand
to fall between the ear and the shoulder.
Level 1, Requirement 5:
On an approved range, demonstrate how to safely retrieve arrows after
the range is clear and the command to retrieve arrows has been provided.
Retrieve Arrows
After all archers have shot their allotment of arrows (usually around six,
if time permits), demonstrate and explain the proper methods to retrieve
arrows from the target and ground.
First, before any archer goes to retrieve any arrows, permission must be
granted by the range officer. The range officer will observe the archers
and indicate when all archers have completed shooting and it is safe to
retrieve arrows.
1. Follow the proper commands to move to the target line.
Archers should walk slowly to the target and watch for arrows on
the ground.
2. Remove arrows by standing to the side of the target and brace it
with the side of the body. Place one hand on the target at the base
of the arrow.
3. Grasp the arrow near the target and pull firmly and slowly straight
back toward the shooting line.
4. Place the arrow on the ground.
5. Remove any others and place them on the ground.
6. After all the arrows have been removed, pick up the arrows from
the ground. Cover the points with one hand and grasp the arrows
near the fletching with the other hand. An arrow buried under the
grass should be withdrawn point first and be completely clear of
the grass before the arrow is lifted.
7. Walk back to the shooting line and place the arrows into the
ground quiver.
8. Move off the range, or prepare to resume shooting,
as commanded.
Refer to the Archery
Shooting Form poster,
found on page 42 of
the appendix.

cub scout shooting sports guide21
Archery Level 2 Requirements
LEVEL 2: SKILL AND KNOWLEDGE
To earn the Level 2 Skill and Knowledge recognition, all Cub Scouts must complete the Level 1 Participation and Knowledge requirements, and do the following:
• Lions must complete S2–S3 from the Lion column.
• Tigers must complete S1–S3 from the Tiger column.
• Wolves must complete S1–S4 from the Wolf column.
• Bears must complete S1–S4 from the Bear column.
• Webelos and Arrow of Light Scouts must complete S1–S4 from the Webelos/Arrow of Light column.
Lion Tiger Wolf Bear Webelos/Arrow of Light
S1
Identify three parts of the arrow
and three major parts of the bow
you will be shooting.
Identify three parts of the arrow
and four major parts of the bow
you will be shooting.
Identify four parts of the arrow
and five major parts of the bow
you will be shooting.
Identify five parts of the arrow
and six major parts of the bow
you will be shooting.
S2
Shoot at least two arrows
at a target on an approved
range; repeat and do your
best to improve your score.
(Shoot at least four arrows.)
Shoot three arrows at a target on
an approved range; then repeat
and do your best to improve
your score. (Shoot a total of six
arrows.)
Shoot five arrows at a target on
an approved range; then repeat
and do your best to improve
your score. (Shoot a total of 10
arrows.)
Shoot five arrows at a target on
an approved range; then repeat
twice and do your best to
improve your score each time.
(Shoot a total of 15 arrows.)
Shoot five arrows at a target
on an approved range; then
repeat three times and do your
best to improve your score
each time. (Shoot a total of 20
arrows.)
S3
Demonstrate proper range
commands, and explain how
and when to use them.
Demonstrate proper range
commands, and explain how and
when to use them.
Demonstrate proper range
commands, and explain how
and when to use them.
Demonstrate proper range
commands, and explain how
and when to use them.
Demonstrate proper range
commands, and explain how
and when to use them.
S4
Tell five facts about archery in
history or literature.
Tell five facts about archery in
history or literature.
Tell five facts about archery in
history or literature.

cub scout shooting sports guide22
Notes on Archery Level 2 Requirements
Level 2, Requirement S1: Parts of the Bow and Arrow
Review the parts of a bow and arrow with Cub Scouts. Determine that
each Cub Scout has identified the number of parts needed to meet the
requirement for his or her rank.
TIP
STRING NOTCH
UPPER LIMB
BACK
FACE
SIGHT WINDOW
ARROWPLATE
ARROW REST
STRING HEIGHT
STRING
RECURVE
GRIP
LOWER LIMB
HANDLE
RISER
SECTION
SERVING
NOCK
FLETCHING
INDEX
FLETCHING
SHAFT
POINT
Arrow: A shaft made of carbon, aluminum, wood, fiberglass, or composite
materials with a point on one end and a nock on the other end. Fletching,
which can be either feathers or plastic vanes, are located on the arrow
near the nock end
Field point: Similar to a target point and has a distinct shoulder, so
that missed outdoor shots are easier to remove from obstacles such
as tree stumps
Fletching: The stabilizing feathers or vanes of an arrow
Index fletch or vane: A different-colored fletch or vane used to indicate
proper arrow positioning in relation to the bowstring or bow
Nock: The plastic attachment or grooved notch at the end of an arrow used
to attach the arrow to the bowstring
Shaft: The main structural element of an arrow
Target Point: Attaches to the front end of an arrow and penetrates
the target
Level 2, Requirement S2
Lion: Shoot at least two arrows at a target on an approved range; repeat
and do your best to improve your score. (Shoot at least four arrows.)
Tiger: Shoot three arrows at a target on an approved range; then repeat
and do your best to improve your score. (Shoot a total of six arrows.)
Wolf: Shoot five arrows at a target on an approved range; then repeat and
do your best to improve your score. (Shoot a total of 10 arrows.)
Bear: Shoot five arrows at a target on an approved range; then repeat
twice and do your best to improve your score each time. (Shoot a total of
15 arrows.)
Webelos/Arrow of Light: Shoot five arrows at a target on an approved
range; then repeat three times and do your best to improve your score
each time. (Shoot a total of 20 arrows.)
Leaders assisting with this requirement should keep in mind the Cub
Scout motto, “Do Your Best,” at all times. The goal is for the Cub Scout
to improve his or her technique and, as a
result, improve their overall performance.
There is NO specific score required for this
requirement, only improvement. This may
mean five misses the first time, and one
hit on a hay bale the second time. While it
is clearly desired that the Cub Scout would
improve to the point of scoring an actual
target and, if there is adequate time, it
would be good to work to that goal, the
requirement only requires improvement.
Cub Scout–level target
scoring should be kept
simple. For Tigers, it may
be just hitting the hay bale
or a large piece of paper
on the bale. As the archers
progress in skill, move
to more structured
scoring methods.

cub scout shooting sports guide23
Level 2, Requirement S3
Demonstrate proper range commands, and explain how and when to
use them.
This requirement is to be completed once for the level 1 award, and again
for the level 2 award, according to the commands and rules practiced on
your approved range.
With assistance from your range master, determine which range
commands will be used. This may mean special archery whistle codes,
or just a version of the BB gun range commands, depending on your
location. This requirement could be partially accomplished off the firing
line for instruction and then demonstrated on the firing line.
Level 2, Requirement S4
Tell five facts about archery in history or literature.
Using the material in this guide or another source, help the Cub Scouts
learn about archery in history or literature.
A Brief History of Archery
The advancement of civilization was enhanced by the use and discovery
of bows and arrows. The bow and arrow provided a much safer way to
hunt and made life easier.
Generally it is thought the spear was the predecessor to the bow.
Spearheads have been discovered from many thousands of years ago.
A recognizable bow was discovered dating back to 6000 B.C. that was
made from yew or elm.
Egyptians, sometime around 3500 B.C. to 2800 B.C., were the first to use
the bow in battle, which gave them superiority over their enemies. This
bow was known as a composite bow.
Around 1500 B.C., Assyrians developed a shorter recurve bow that
provided more power and easier handling. Crossbows were also used in
ancient China, but not until many years later.
Around 1200 B.C., a famous Egyptian pharaoh named Ramses II gave
archery another boost by putting archers on chariots. This mobility
allowed the Egyptians to defeat the Hittite army.
Through the course of history, the wooden bow was made longer. The
British were famous for improving on the bow, which eventually became
known as the British longbow. The most famous battle of the longbow
was the battle of Crécy in 1346. In 1500, crossbows were banned in
England to promote the use of the longbow. In 1595, the army was
ordered to replace all bows with muskets. Still, archery has remained a
popular sport in England.
Around 1000 A.D., bow and arrow technology swept the Americas.
As seen through archeological studies, its use was adopted by most
prehistoric Native Americans.
In 1879 the National Archery Association was founded. The first national
tournament was held in White Stocking Park, Chicago, Illinois, that
same year. The first archery club in the U.S., the United Bowmen of
Philadelphia, was founded in 1928.
In 1900, archery became an Olympic sport, but it was dropped after 1920
because the rules could not be standardized. In 1931, the Fédération
Internationale de Tir à l’Arc (FITA) was founded in Paris, and it
standardized the rules for international competition. Archery returned to
the Olympics in 1972 and is still part of the Olympic program. USA
Archery is the sanctioning body in the United States for archery events.

cub scout shooting sports guide24
Slingshot Level 1 Requirements
LEVEL 1: PARTICIPATION AND KNOWLEDGE (ALL RANKS)
1. On an approved range, demonstrate to qualified leadership good shooting techniques, including eye dominance, breathing, sight alignment, and follow-through.
2. On an approved range, explain the parts of a slingshot and demonstrate how to properly use them.
3. Explain the different types of ammunition that may be used with a slingshot and those that may not be used.
4. Explain the different types of targets that may be used with a slingshot and those that may not be used.
Notes on Slingshot Level 1 Requirements
CAUTION: Slingshot
bands contain natural
rubber latex. Those
who are allergic to
rubber latex should
not use slingshots.
Allergic reactions such
as skin rashes, hives,
or nasal, eye, or sinus
symptoms may occur.
The preferred slingshot for Cub Scouts has
a wrist brace so the shooter’s hand doesn’t
become weak from having to hold the
frame tightly.
Using slingshots is an affordable, fun
activity in council-sponsored camps. Youth
love to shoot slingshots, and many have not
had previous experience with them.
Although exciting and fun, slingshots are
not toys. Scouts must understand that they
must follow the rules when shooting
Slingshot ranges,
equipment, and safe
practices must follow
the guidelines spelled
out in the National
Shooting Sports
Manual. Generally, the
same rules apply for
this activity that would
apply for BB
gun shooting.
slingshots or they will not be allowed
to participate.
Shooting items from slingshots can be
dangerous. For these activities, follow the
same safety guidelines as used for BB
shooting. Always shoot at a range such as
an archery or BB gun range.
Level 1, Requirement 1:
On an approved range, demonstrate to qualified leadership good
shooting techniques, including eye dominance, breathing, sight
alignment, and follow-through.
Good Shooting Techniques
(Instructions are for right-handed shooters. Reverse instructions for left-
handed shooters where applicable.)
1. A range master must be present and there must be a one-to-one
adult-to-Scout ratio.
2. Use a safe shooting range such as a BB gun range or
archery range.
3. Wear protective eyeglasses or goggles.
4. Do not pick up a slingshot until told to do so.
5. Never shoot at anything if you cannot see what is behind it.
6. Do not use a slingshot with a power band damaged by age
or weather.
7. Never shoot up into the air.

cub scout shooting sports guide25
8. Never cross the firing line when shooting.
9. Point your left foot and shoulder directly at the target with the
body turned to the right. Turn the head directly toward the target.
10. Center the ammo in the middle of the leather pouch. Hold the
handle firmly in the left hand and pinch the ends of the leather
pouch together with the thumb and index finger of the right hand,
encompassing the ammo.
11. Hold the left arm out straight and firm. Draw the right hand back
level with the right cheek—NEVER TO THE EYE—while holding the
leather pouch securely between the thumb and index finger of the
right hand.
12. Aim and release the leather ammo pouch to shoot.
13. Always practice courtesy and good sportsmanship!
Eye Dominance
Before shooting a slingshot, the participants should determine which
eye is dominant. Just as people are either right- or left-handed, one eye
is dominant over the other. Discovering which eye a shooter favors is
important because it could determine on which side the slingshot is held.
To find which eye is dominant, have participants extend both arms in front
of them and form a small triangle with their thumbs and index fingers.
Instruct them to look at a distant object through the opening and then
pull their hands back to their face. The eye that is in line with the object is
dominant. (See page 31 in the appendix.)
Breathing
When shooting, stop breathing before firing a shot. Breathing causes the
body to move and makes it difficult to maintain a steady sight picture.
Before firing, relax and get comfortable. Then exhale and stop breathing.
This technique will help shooters aim by reducing the body and slingshot
movement in relation to the target. Do not stop breathing for longer than
8 to 10 seconds while aiming at the target. If you are not able to shoot
within that time, stop, take a breath or two, and repeat the process. The
pouch of the slingshots should be pulled all the way back to your cheek
and released as you breathe out.
Aiming: Sight Alignment
To aim a slingshot, hold it horizontally and aim with the upper fork end.
To shoot correctly, the ammo will need to be centered inside the
slingshot pouch. You will also need to make sure that the slingshot
handle is parallel to the ground and that the fork is 90 degrees to the
upright position.
Follow-Through
The shooter must also master proper follow-through. Follow-through
means continuing to do everything that was being done at the time the
shot was fired. In other words, maintaining aim until the ammunition shot
from the pouch of the slingshot hits the target. The idea is to prevent any
unnecessary movement before the projectile leaves the pouch.
See the Slingshot Range Rules poster on page 45 of
the appendix.
Level 1, Requirement 2:
On an approved range, explain the parts of a slingshot and demonstrate
how to properly use them.
Slingshot Parts
Hand grip and forks. These form the basic slingshot design. The hand grip
can be customized as needed. The forks are made of sturdy metal or other
material which will not bend.
Wrist brace. The wrist brace attaches to the basic slingshot and is used to
stabilize the shooting platform and provide more leverage for the shooter
to apply power.
Bands. Bands are usually made of latex surgical tubing, which stretches to
propel ammunition.
Pouch. The pouch holds ammunition, usually made of leather or other
sturdy material.

cub scout shooting sports guide26
Level 1, Requirement 3:
Explain the different types of ammunition that may be used with a
slingshot and those that may not be used.
Items shot from slingshots are considered ammunition. Generally people
use small rocks or pebbles; however, this is not appropriate for Cub
Scouts. Instead, use softer ammunition such as pinto beans or dog food.
Ammunition such as ball bearings may not be used.
Level 1, Requirement 4:
Explain the different types of targets that may be used with a slingshot
and those that may not be used.
Targets
Targets for slingshots can be made from a variety of materials, including
paper, cans, plastic bottles, and balloons. Paper targets can be homemade
or purchased. Cans are excellent as they make a great sound when hit.
Cans, plastic bottles, and balloons can be hung from strings or attached
to netting. Remember to recycle when finished.
You can also practice using a slingshot on a bull’s-eye target about 2
inches in diameter and with the target 10 feet away; then move the target
out to 25 feet.

cub scout shooting sports guide27
Slingshot Level 2 Requirements
LEVEL 2: SKILL AND KNOWLEDGE
To earn the Level 2 Skill and Knowledge recognition, all Cub Scouts must complete the Level 1 Participation and Knowledge requirements, and do the following:
• Lions must complete S1–S2 from the Lion column.
• Tigers must complete S1–S3 from the Tiger column.
• Wolves must complete S1–S3 from the Wolf column.
• Bears must complete S1–S3 from the Bear column.
• Webelos and Arrow of Light Scouts must complete S1–S3 from the Webelos/Arrow of Light column.
Lion Tiger Wolf Bear Webelos/Arrow of Light
S1
On an approved range, shoot
two shots at a target; then
repeat and do your best to
improve your score. (Shoot a
total of four shots.)
On an approved range, shoot
three shots at a target; then
repeat and do your best to
improve your score. (Shoot a
total of six shots.)
On an approved range, shoot
five shots at a target; then
repeat and do your best to
improve your score. (Shoot a
total of 10 shots.)
On an approved range, shoot
five shots at a target; then
repeat twice and do your best
to improve your score each
time. (Shoot a total of 15 shots.)
On an approved range, shoot
five shots at a target; then
repeat three times and do your
best to improve your score each
time. (Shoot a total of 20 shots.)
S2
Demonstrate proper range
commands and explain how
and when to use them.
Demonstrate proper range
commands and explain how
and when to use them.
Demonstrate proper range
commands and explain how
and when to use them.
Demonstrate proper range
commands and explain how
and when to use them.
Demonstrate proper range
commands and explain how
and when to use them.
S3
On an approved range, try
shooting with your non-
dominant hand.
On an approved range, try
shooting with your non-
dominant hand.
On an approved range, try
shooting with your non-
dominant hand.
On an approved range, try
shooting with your non-
dominant hand.

cub scout shooting sports guide28
Level 2, Requirement S2
Demonstrate proper range commands and explain how and when to
use them.
Generally, these will be the same as BB gun range commands. Consult
with your range master to determine existing range commands, or
develop the actual commands used on the range.
cub scout shooting sports guide43
GENERAL SLINGSHOT RANGE COMMANDS
Load.
Ready on the ring line.
Commence ring.
Cease ring.
LOAD YOUR slingshot.
ALL SHOOTERS ARE READY.
YOU MAY FIRE YOUR slingshot.
STOP SHOOTING.
Level 2, Requirement S3 (Tiger, Wolf, Bear, Webelos only)
On an approved range, try shooting with your non-dominant hand.
Firing a slingshot requires strength in the hand holding the grip and
strength in the hand holding the pouch. Both hands play a role in proper
aiming of the slingshot. You may find that switching hands helps with
coordination or accuracy and may even help you determine which is your
dominant eye. This requirement will be completed once an honest attempt
has been made; there is no measurement for accuracy or scoring.
Notes on Slingshot Level 2 Requirements
Level 2, Requirement S1
Lion: On an approved range, shoot two shots at a target; then repeat and
do your best to improve your score. (Shoot a total of four shots.)
Tiger: On an approved range, shoot three shots at a target; then repeat
and do your best to improve your score. (Shoot a total of six shots.)
Wolf: On an approved range, shoot five shots at a target; then repeat and
do your best to improve your score. (Shoot a total of 10 shots.)
Bear: On an approved range, shoot five shots at a target; then repeat
twice and do your best to improve your score each time. (Shoot a total of
15 shots.)
Webelos/Arrow of Light: On an approved range, shoot five shots at a
target; then repeat three times and do your best to improve your score
each time. (Shoot a total of 20 shots.)
Leaders assisting with this requirement should keep in mind the Cub Scout
motto, “Do Your Best,” at all times. The goal is for the Cub Scout to improve
his or her technique and, as a result, improve their overall performance.
There is NO specific score required for this requirement, only improvement.
This may mean five misses the first time, and one hit on a target the second
time. While it is clearly desired that the Cub Scout would improve to the
point of scoring an actual target and, if there is adequate time, it would be
good to work to that goal, the requirement only requires improvement.

cub scout shooting sports guide29
Appendix 1: Posters
30
General Shooting Range Rules
31
Eye Dominance
32
BB Gun Sighting Chart
33
Parts of a BB Gun
34
If You Find a Gun
35
Suggested BB Gun Range Commands
36
Suggested BB Gun Safety Rules
37
BB Gun Shooting Positions
38
BB Gun Targets
41
Archery Range Rules and Commands
42
Archery Shooting Form
43
Types of Archery Bows
44
General Slingshot Range Commands
45
General Slingshot Range Rules
46
Slingshot Safety Rules
47
Parts of a Slingshot
48
Cub Scout Shooting Sports Tracking Template

cub scout shooting sports guide30
1. This range may be opened only by a qualified
BSA-certified range master.
2. All commands issued by the range master must
be obeyed immediately.
3. Stay behind the firing line. Do not straddle the
firing line.
4. Do not pick up a gun, bow, arrow, or slingshot
unless told to by the range master.
general SHOOTING RANGE RULES
5. Absolutely no running on the range.
6. No horseplay or unnecessary talking on
the range.
7. If in doubt about the rules, ask your leader or range
master for advice or help.

cub scout shooting sports guide31
Eye dominance
Eye dominance is the unconscious preference to use one eye rather than
the other to aim. The dominant eye often corresponds with the archer’s
dominant hand, but not always. There are a number of people who are
“cross dominant,” meaning they may be right-hand dominant and left-eye
dominant, or vice versa.
It is important to understand how to determine eye dominance in the
event a shooter or archer is struggling to aim or hit the target consistently.
Eye dominance needs to be addressed when a shooter or archer is
shooting with their dominant hand, but trying to aim with their opposite
dominant eye. They may try to line up their dominant eye to the target
by tipping their head over the bow or gun, causing their shots to be
consistently left or right of center on the target.
Important Note: It is
not necessary to make
a Cub Scout who is
cross dominant shoot
with the non-dominant
hand. The shooter
may simply choose to
continue shooting with
the dominant hand
and cover or close the
non-dominant eye.
To Find the Dominant Eye
To find which eye is dominant, have
participants extend both arms in front of them
and form a small hole with their thumbs and
index fingers. Instruct them to look at a distant
object through the opening and then pull their
hands back to their face. The eye that is in line
with the object is dominant.
cub scout shooting sports guide32
bb gun sighting chart
PEEP
REAR SIGHT
POST
FRONT SIGHT
PROPER
ALIGNMENT
PROPER SIGHT
PICTURE
PEEP
REAR SIGHT
APERTURE
FRONT SIGHT
PROPER
ALIGNMENT
PROPER SIGHT
PICTURE
OPEN
REAR SIGHT
POST
FRONT SIGHT
PROPER
ALIGNMENT
PROPER SIGHT
PICTURE

cub scout shooting sports guide33
STOCK
SMALL OF
STOCK
REAR
SIGHT
BARREL
FRONT SIGHT
MUZZLE
FOREARM
TRIGGER GUARD
TRIGGER
COCKING
LEVER
BUTT
PARTS OF A BB GUN

cub scout shooting sports guide34
if you nd a gun
STOP!
TELL AN ADULT!
LEAVE THE AREA!
DON’T TOUCH!

cub scout shooting sports guide35
SUGGESTED BB GUN RANGE COMMANDS
Load.
Ready on the ring line.
Commence ring.
Cease ring.
Clear all guns.
LOAD YOUR BB gun.
ALL SHOOTERS ARE READY.
YOU MAY FIRE YOUR BB Gun.
STOP SHOOTING.
Show your bb gun is empty. Lay it down.

cub scout shooting sports guide36
SUGGESTED BB GUN safety rules
1. Always keep the gun pointed in a safe direction.
2. Always keep your finger off the trigger until you
are ready to shoot.
3. Always keep the gun unloaded until ready
to use.
4. Know how to use a gun safely.
5. Be sure the gun is safe to operate.
6. Use only the correct ammunition for the gun.

cub scout shooting sports guide37
BB GUN shooting positions
PRONE POSITION
SITTING POSITION
BENCHREST POSITION FREE-ARM STANDING
POSITION

cub scout shooting sports guide38
TIGER TARGET
1 5 10
_________________________________ ___/___/___ _______
Name Date Score

cub scout shooting sports guide39
WOLF – BEAR TARGET
1 3 5 10
_________________________________ ___/___/___ _______
Name Date Score
WOLF/BEAR TARGET

cub scout shooting sports guide40
WEBELOS–AOL TARGET
10 9 8 7 6 5 4
_________________________________ ___/___/___ _______
Name Date Score
WEBELOS/AOL TARGET

cub scout shooting sports guide41
ARCHERY RANGE RULES AND COMMANDS
Archery Range Rules
1. Always walk on the range.
2. Keep your arrows in your quiver until you are
told to shoot.
3. Only release the bow string when an arrow is
nocked and safely pointed toward the target.
4. Leave dropped arrows on the ground until
instructed to retrieve them.
If there is an emergency on the range, immediately
tell the instructor.
Know the Proper Whistle Codes
Two blasts = Move up to the line.
One blast = Fire the proper number of arrows.
Three blasts = Cease firing. Move to the target.
Retrieve and score arrows.
Five or more whistle blasts = Cease firing. Stay
where you are. This is an EMERGENCY. Officials will
tell the archers what action to take either verbally or
by the whistle code.
Remember there is only ONE command to shoot —
ONE blast of the whistle.
For any command of more than one blast, STOP
shooting. Watch and listen for further instructions.
(From USAA Archery Certification Course – Level 1 manual. Used with permission.)

cub scout shooting sports guide42
ARCHERY SHOOTING FORM
(Right-handed archer. Reverse instructions for left-handed archer.)
Square Stance
• Turn sideways to the target, with left shoulder toward the target.
• Distribute weight evenly on both feet, which are shoulder-width apart.
Nock the Arrow
• Lay the shaft of the arrow on the arrow rest, and nock the arrow
by fitting the notched end of the arrow just below the string’s
nocking point.
• Face the odd-colored feather (cock) away from the bow.
• Grasp the arrow by the nock between the thumb and index finger of
the right hand.
Draw
• Bring the left hand up, turning the hand so the bow assumes a vertical
position at arm’s length.
• With the three fingers of the right hand serving as hooks, start the
draw slowly.
• The index finger will be above the arrow and the middle two fingers
below it.
• At full draw, the right elbow is back and in direct line with the tip of
the arrow.
Anchor
• At the completion of the draw, the relaxed thumb of the right hand
finds an anchor spot under the jawbone.
• Using the jawbone as an anchor, the bowstring will touch the nose
and the center of the chin.
• It is important that the anchor point be the same for every shot.
Release or Loose
• The hand is opened with the fingers moving quickly and precisely off
the nock and the string at the same time.
• Keep the left arm in the same position as for a full draw.
• Relax wrist.
• Keep alignment.
• Avoid tension.
• Keep the bow at the same level that it was at full draw.
Follow-Through
• Keep aiming until the arrow hits the target.
• After release, the fingers should not be more than an inch away from
and behind the anchor point.
• Hold the position until the arrow strikes the target to make certain the
whole process is smooth.
• In a good follow-through, your right hand will be at the back of your
neck and your arm will be lined up perfectly.

cub scout shooting sports guide43
types of archery bows
TIP
STRING NOTCH
UPPER LIMB
BACK
FACE
SIGHT WINDOW
ARROWPLATE
ARROW REST
STRING HEIGHT
STRING
RECURVE
GRIP
LOWER LIMB
HANDLE
RISER
SECTION
SERVING
IDLER WHEEL
AXLE
BUSS
CABLE
UPPER LIMB
LIMB BOLT
RISER
GRIP
LIMB BOLT
LOWER LIMB
SHOOTING
STRING
CAM
CABLE GUARD
CABLE GUARD SLIDE
WINDOW
ARROW REST
SERVING
RECURVE BOW COMPOUND BOW

cub scout shooting sports guide44
GENERAL SLINGSHOT RANGE COMMANDS
Load.
Ready on the ring line.
Commence ring.
Cease ring.
LOAD YOUR slingshot.
ALL SHOOTERS ARE READY.
YOU MAY FIRE YOUR slingshot.
STOP SHOOTING.

cub scout shooting sports guide45
GENERAL SLINGSHOT RANGE RULES
1. This range may be opened only by a certified
Cub Scout shooting sports range master.
2. All commands issued by the range master must
be obeyed immediately.
3. Stay behind the firing line. Do not straddle the
firing line.
4. Do not pick up a slingshot unless told to by the
range master.
5. Absolutely no running on the range.
6. No horseplay or unnecessary talking on
the range.
7. If in doubt about the rules, ask your leader or range
master for advice or help.

cub scout shooting sports guide46
SLINGSHOT safety rules
Always keep the slingshot pointed in a safe direction. Your
range master will tell you what direction is safe. If you
are not sure, ask.
Always keep the bands at rest until you
are ready to shoot.
Always keep the pouch ammunition free
until ready to use.

cub scout shooting sports guide47
PARTS OF A SLINGSHOT
FORKS
BANDS
POUCH
WRIST BRACE
HAND GRIP

cub scout shooting sports guide48
Level1—1
Level1—2
Level1—3
Level1—4
Level2—S1
Level2—S2
Level2—S3
Level2—S4
Level1—1
Level1—2
Level1—3
Level1—4
Level1—5
Level2—S1
Level2—S2
Level2—S3
Level2—S4
Level1—1
Level1—2
Level1—3
Level1—4
Level2—S1
Level2—S2
Level2—S3
BBGUN ARCHERY SLINGSHOT
ToPackAdvancementTeam:
ThisistoinformyouthatCubScout_______________________________________
hascompletedtherequirementsfort heCubScoutShoo�ngSportsAwardasnoted
below.Pleaseawardthepatchesanddevicesatyour nextopportunity.
Rangemaster,pleaseini �altheappropriatebox(es)belowindica�ngcomple�onofthe
award.
TIGER
WOLF
BEAR
WEBELOS/AOL
BBGUN ARCHERY SLINGSHOT
Ifalltherequirementswerenotnishe d,pleaseindicatebelowwhichones
we recompletedwithyourini�als.
LION

cub scout shooting sports guide49
Appendix 2: Additional Activities
Shooting Sports Program Ideas
Shooting sports activities in Cub Scouting are operated by local councils
and districts. The suggestions here are designed for use at council- and
district-sponsored events that provide shooting sports opportunities.
The activities described below can be used with slingshots, archery
equipment, and BB guns. An important practice across all of Scouting is
that we do not use targets that feature human beings or animals.
Targets for BBs, arrows, and slingshots can be made from a variety of
materials, including paper, cans, plastic bottles, and balloons. Paper
targets can be homemade or purchased. Cans are excellent as they make
a great sound when hit. Cans, plastic bottles, and balloons can be hung
from strings or attached to netting.
The distance between the shooter and the target can be varied depending
on the shooter’s level of experience. The distance can be increased as
skills improve.
Fun Target Activities for BB Shooting
Target Squares
Make 8.5-by-11-inch targets with several squares on each. Put a number
in each square. Shooters can see the squares but not the numbers in
them. After firing at the page, the shooter adds up the numbers from the
squares that his or her BBs hit. The highest score is the winner.
Mystery Dots
Place dots on a target, then shoot at the back side of the target. Count the
score from the dotted side.
BB Tic-Tac-Toe
Place three rows of three balloons on a target mat. Divide the group into
two lines and have them stand in a single file 20 feet from the target. At
the signal to shoot, each shooter will shoot one BB and step back. The
second and each succeeding person will shoot one at a time. The first
team to break three balloons in any line is the winning team.
Cracker Shoot
Set up crackers as targets. Have participants shoot at the narrow edges of
the crackers.
Action BB Gun Shooting Course
Set up an action BB gun shooting course using several games or targets
as different stations in the course. Each station could encourage the
shooters to use a different shooting position. One station could be used to
do maintenance work for the BB gun shooting program.
Fun Target Ideas for Archery Shooting
Archery Tic-Tac-Toe
Place three rows of three balloons on a target mat. Divide the group into
two lines and have them stand in a single file 20 feet from the target. At
the signal to shoot, each archer will shoot one arrow and step back. The
second and each succeeding person will shoot one at a time. The first
team to break three balloons in any line is the winning team.
Wand Shooting
Place a strip of 1-inch masking tape over the target face from top to
bottom. A point is scored when an arrow hits the tape anywhere on the
target. Divide the group into two lines, and have them stand in a single
file 20 feet from the target. At the signal to shoot, each archer will shoot
one arrow and step back. The second and each succeeding person will
shoot one at a time. The first team to get two points is the winning team.
Shoot the Monster
Participants shoot at a monster face attached or painted on a one-gallon
plastic bottle, suspended with shock card within a tire. The object is to hit
the plastic bottle. This event can be scored individually or by den or pack.
Spin the Insect
A picture of an insect is glued to a piece of plywood 12 inches square. The
plywood is fastened so it will pivot freely around a centered bar set from
post to post when struck with an arrow.

cub scout shooting sports guide50
Ring the Bell
Participants shoot at bells through the open end of swinging tires. All
tires are swung in unison with a rope tied to the bottom of each tire and
extended to an area beyond the limits of firing on the side.
Football Placekick
A scaled-down goalpost is erected behind a 4-foot-high canvas sheet.
From the firing line the archer can see only the top portion of the goalpost
uprights. An arrow shot between the uprights above the crossbar scores
as a field goal (three points), while an arrow that passes over the canvas
and under the crossbar scores as a touchdown (six points). A raised
platform should be set up adjacent to the shooting positions so an
observer can determine the scoring, since the archer is not able to see the
lower portion of the goalposts.
Archery Practice Fun
Any station set up for youth to practice skills is a fun station for the
Cub Scouts. The program allows limited times to shoot arrows, so the
opportunity to practice at a council camp or event is a great experience
for them. A practice station is a simple, basic archery range, but a very fun
one for the Scouts.
Archery stations could also be set up to practice stringing bows or to
learn how to care for some of the equipment. Helping with some of the
archery equipment could be a rainy day activity.
Action Archery Course
An action archery course could be set up using several of these games
as different stations in the course. A drawing of a sample action archery
course is available in the BSA National Shooting Sports Manual.
Fun Target Ideas for Slingshot Shooting
Feed the Monster
Using a large piece of cardboard, sketch a monster. Cut a hole where the
monster’s mouth is located. Aim to feed the monster.
Tin Can Alley
Hang tin cans from string. Place them at various heights and distances
from the shooting line.
Tire Target
Hang tires (or hoops) at different heights and distances from the
shooting line.
Ring-a-Ding
Hang bells from strings. Shoot to strike the bells.
Chart Paper Target
Create a large target with chart paper. Draw circles of different sizes on
the chart paper. Apply different scores to the circles, with large circles
being worth fewer points.
Slingshot Target Course
A target course could be set up using several of these games as different
stations in the course. A drawing of a sample action archery course
is available in the BSA National Shooting Sports Manual and can be
adapted for a slingshot target course.

cub scout shooting sports guide51
Bikathlon
The bikathlon event is modeled after the winter Olympic biathlon in which
competitors cross-country ski and shoot rifles. In the bikathlon, the Cub
Scouts bike around an off-road course, stop at various points, dismount
from the bikes to shoot targets that fall over when struck, and then
continue along the course. Though the sport requires a certain amount of
strength for the biking portion, the shooting sports activity is the key to
the event.
Setting Up the Course
Make the course approximately one-third of a mile in length, in the form
of a loop so the starting line and a finishing line are in the same position.
One point along the course becomes the firing line—with a separate
position for each racer. Identify each firing point with a color, as assigned
to each participant. Place a bike rack in a safe place with easy access. The
course should not be in a rocky area, and the instructors should walk it to
ensure that all dangerous obstacles have been removed. The course can
be an existing track or laid out with cones or rope guides to make sure
each biker follows the same route.
Running the Race
The bicycle is ridden to the shooting point, the youth dismounts, parks
the bike, and shoots the targets. The biker shoots at each target until it
is hit and knocked over, then remounts the bike and finishes the race. A
limit may be imposed on the number of shots for each target and a time
penalty imposed if the target is not knocked over.
The youth finishing the race in the shortest time is declared the winner.
The key to the event is not only to pedal fast, but also to shoot quickly
and accurately.
Shooting is normally done from the standing position but may be
changed at the range director’s discretion.
Participants are never allowed to ride the course with the gun, arrows, or
slingshots. These items are to remain at the firing point at all times.
Every participant is required to attend a brief orientation on bike safety
and handling the shooting sports materials used on the course before
being allowed to participate in the bikathlon.
Equipment and Materials Personnel
Bikes
Assign adults to the following positions:
• Match director (responsible for the event)
• Jury (three people who are responsible for solving any dispute that
may arise during the match and to ensure compliance of the rules
by participants)
• Range masters (responsible for safety on the range)
• Statistical officer (responsible for tracking participants’ total
lapse time)
• Starter (the official who starts each relay or heat)
• Other personnel needed are timers, first-aid personnel, course
marshals, and repair personnel (for guns, arrows, slingshots,
and/or bikes)
• One staff member at each station
Elbow and knee guards
Safety helmets
Stopwatch or other timing device
Cub Scout Shooting Sports Award certificates
BB approach:
BB guns and BBs at each shooting station
Safety glasses to be worn at the firing line
Archery approach:
Bow and quiver of arrows at each shooting station
Slingshot approach:
Slingshot and ammunition at each shooting station
Alternative:
Use all of the above at different stations

cub scout shooting sports guide52
This safety session should, as a minimum, cover the following:
• Course layout and general rules
• Range procedure and safety
• How the match is scored
• How to operate and load the guns
• Shooting safety and safe gun handling
• Basics of sighting and shooting
• Bicycle use and riding safety
• Hands-on practice as time, personnel, equipment, and facilities allow
AcknowledgmentS
The Boy Scouts of America would like to sincerely thank all volunteers
and professionals that contributed to this project. The dedication of
the Cub Scout Program Development Task Force, USA Archery, and
National Rifle Association is greatly appreciated. In addition, a special
thank you goes out to the 2015 Philmont Training Center staff and faculty
who were invaluable in the pilot of the Cub Scout Shooting Sports
Award requirements.
Photo and Illustration Credits
All photos and illustrations are the property of or are protected by the Boy
Scouts of America.
BSA file—cover, pages 18, 19, 22 (arrow)
Phil Davis—pages 26, 28
Nate Luke Photography—page 23
John McDearmon—page 14 (shooting positions), 17, 22 (bow), 37
Michael Roytek—pages 5, 11, 20, 31
