
Voice Record Pro 7: A guide
for language teachers
By Joe Dale

Introduction
Voice Record Pro is a free app on iOS and
Android which allows language teachers to
promote listening and speaking skills in and out
of the classroom. Students can record
themselves giving presentations and dialogues
then upload the results to the cloud (Google
Classroom, Microsoft Teams etc) or email/
airdrop them to the teacher. Teachers can
import recordings into the app, give written
feedback then send them back to students. The
app also has the ability to transcribe audio into
the target language and there is no time limit for
recordings.
To get started
Go to to the Apple App Store or the Google Play
Store on your mobile device and download the
app.
Tap Record or Start to begin recording. Speak
into the microphone and tap Stop when you've
finished. You can tap Pause too to gather your
thoughts before carrying on recording.
Having launched the app, tap Record.

Having finished recording, you'll see there are
many options for exporting your audio.
For further export options, scroll down the list
and tap on Activities and AirDrop. Tap on Audio.
You could choose Google Classroom or
Microsoft Teams for example.
To trim the beginning and end of your
recording, tap Trim and Effects.

Tap Play to listen back to the recording and
Pause to stop it. Trim the beginning or end of
the recording by dragging the left and right play
head to the place you want the audio to start
and finish. Tap Done.
Tap Yes (Overwrite), Save as new Record or No
(Discard Changes). I would recommend Yes
(Overwrite) as long as you are sure the play
heads are in the right place.
To transcribe the audio, tap Transcription.
Select the language spoken in the audio. Tap
Start Transcription.
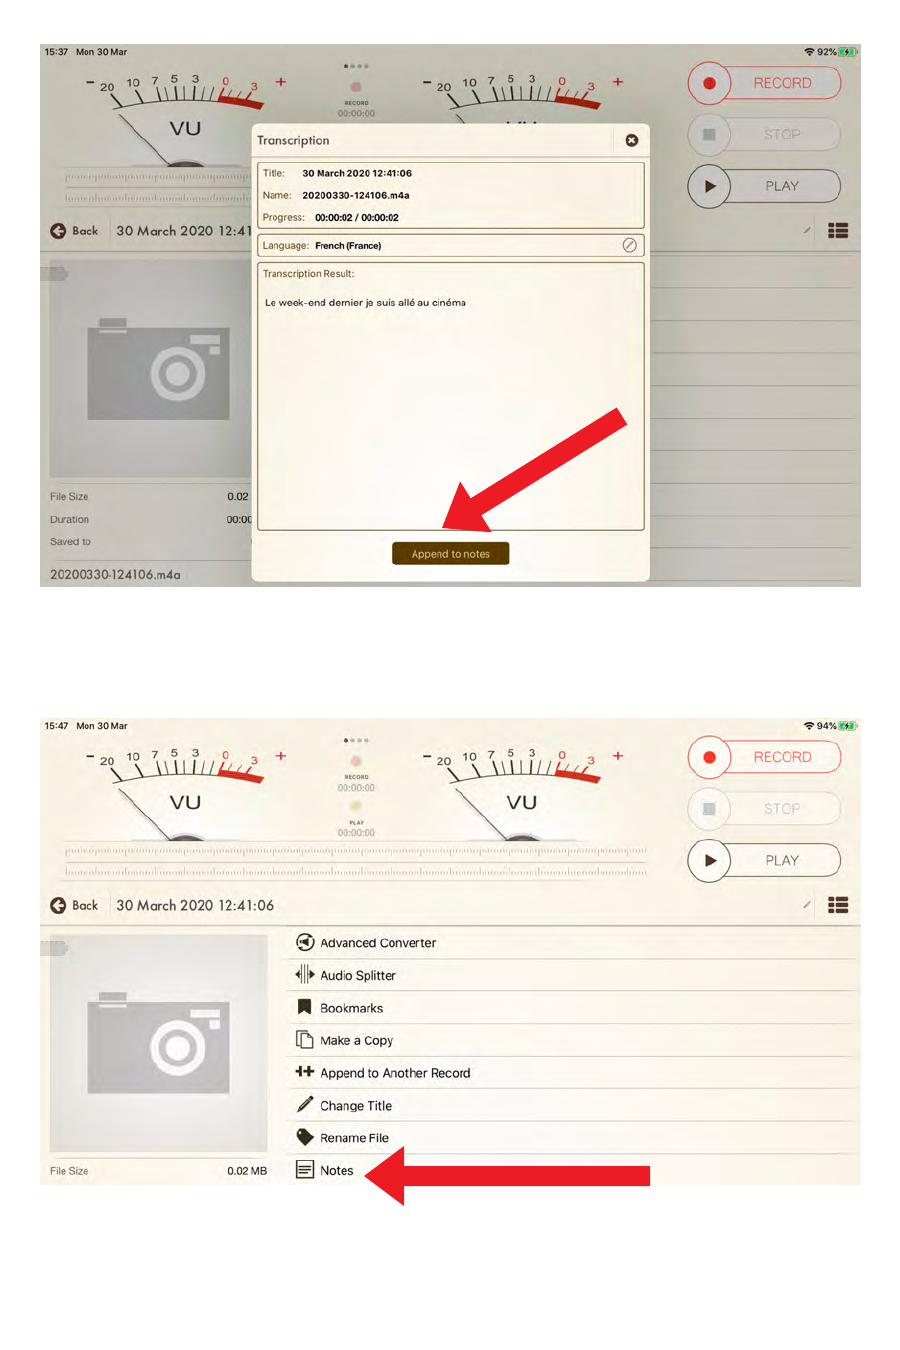
Tap Append to notes.
Tap Notes.
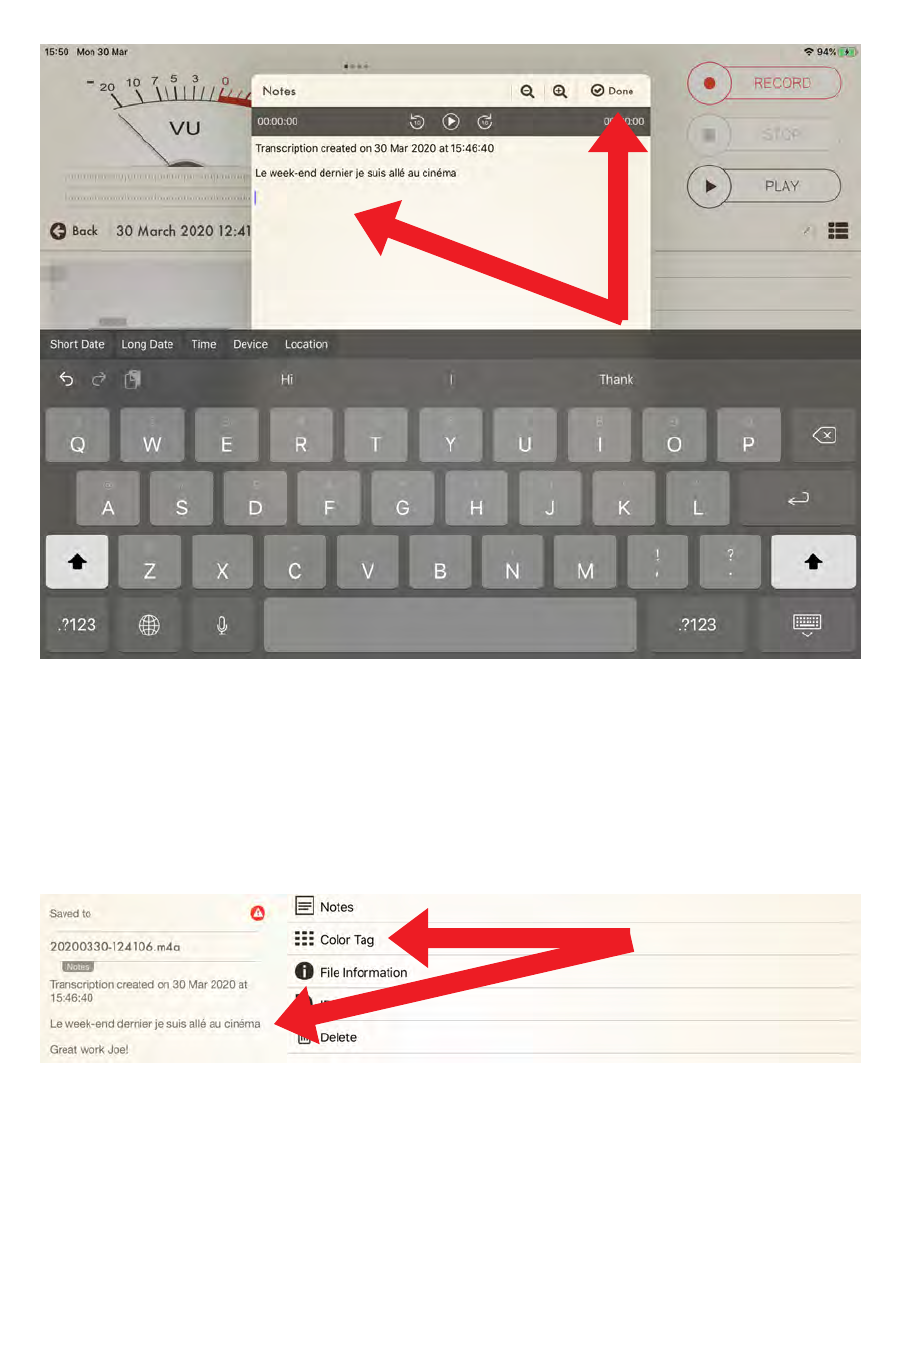
By tapping in the Notes box, you can add written
feedback to the student's recording. Tap Done
when've you finished.
You'll see your notes including transcription and
feedback here. You can add a Color Tag too as
this can be helpful to categorise different
recordings for teachers and students.
Tap Append to notes.
Tap Notes.
By tapping in the Notes box, you can add written
feedback to the student's recording. Tap Done
when've you finished.
You'll see your notes including transcription and
feedback here. You can add a Color Tag too as
this can be helpful to categorise different
recordings for teachers and students.

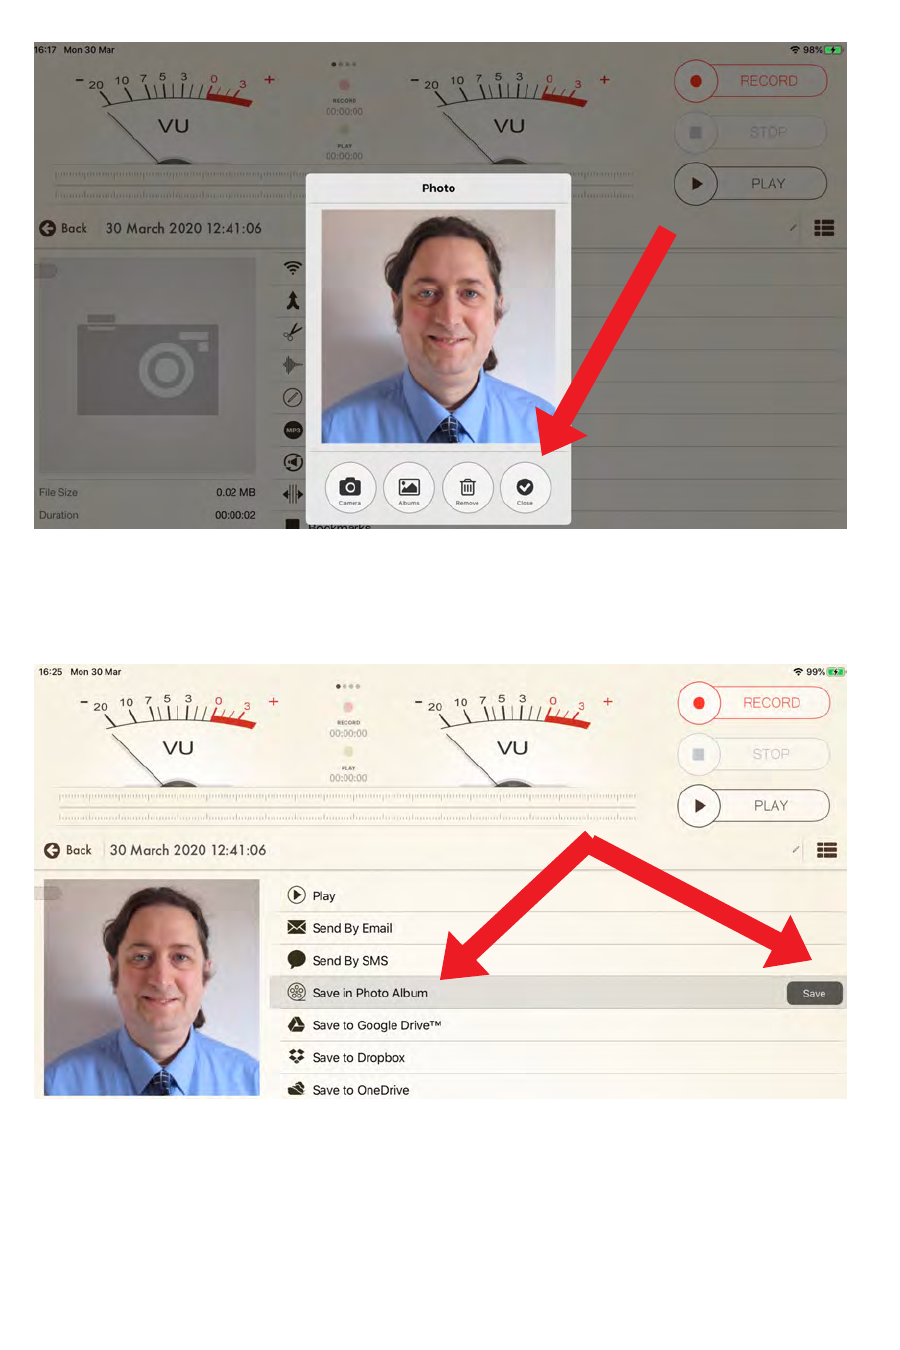
To add a background image to your audio file,
tap on the large camera icon.
Tap Close once you've added a photo.
Tap Save in Photo Album. Tap Save.
Tap Camera or Albums.
To add a background image to your audio file,
tap on the large camera icon.
Tap Close once you've added a photo.
Tap Save in Photo Album. Tap Save.
Tap Camera or Albums.

Choose a template for your audio file by swiping
from side to side. My favourite is Template 12
which shows the date and time of the recording
plus the written notes. Choose the screen size
too. Tap Continue to save your audio file to your
camera roll.
To convert your audio file to mp3, tap Convert to
MP3 and Convert. Tap Back.
To rename your file, tap Rename File.

I hope you've found this guide useful and it's
given you some ideas on how you can use Voice
a Record Pro to promote listening and speaking
skills in your language lessons!
Feel free to send me some feedback via email:
[email protected] or via Twitter: @joedale
Tap on the mp3 or m4a file to export it.
