
5/29/15
Introduction to
Advisors Assistant
Client Marketing Systems, Inc.
880 Price Street
Pismo Beach, CA 93449
800 643-4488 805 773-7985 fax
www.AdvisorsAssistant.com [email protected]
© 2015 Client Marketing Systems, Inc. All rights reserved. Unauthorized use of this material without the
expressed written consent of Client Marketing Systems, Inc. is prohibited.
Page 2
Table of Contents
Table of Contents ......................................................................................................................................................... 3
Getting Started ............................................................................................................................................................. 9
Starting Advisors Assistant ...................................................................................................................................... 10
The Advisors Assistant Menus ................................................................................................................................. 11
Getting Help With Advisors Assistant ...................................................................................................................... 11
Abbreviation Codes ................................................................................................................................................... 13
Advantages Of Using Lists ....................................................................................................................................... 14
Adding Abbreviation Codes ..................................................................................................................................... 15
Modifying Abbreviation Codes ................................................................................................................................ 16
Deleting/Combining Abbreviation Codes ................................................................................................................ 16
Adding Names ............................................................................................................................................................ 19
Exploring the View Screen ....................................................................................................................................... 20
Adding a New Name ................................................................................................................................................ 22
Modifying Name FlexFields .................................................................................................................................... 25
Automating Applications ......................................................................................................................................... 26
Adding Addresses .................................................................................................................................................... 27
Adding Phone Numbers ........................................................................................................................................... 30
Copying an Address to Another Name ..................................................................................................................... 31
Copying a Phone Number to Another Name............................................................................................................ 31
Finding and Modifying Names ................................................................................................................................ 32
Deleting Names........................................................................................................................................................ 33
Notes ........................................................................................................................................................................... 35
Adding Notes............................................................................................................................................................ 36
Scheduling Follow-up Dates .................................................................................................................................... 37
Personal Contact ..................................................................................................................................................... 38
Adding/Modifying Note Topics ................................................................................................................................ 39
Combining/Moving Notes ........................................................................................................................................ 39
Searching Notes ....................................................................................................................................................... 40
Linking Names ........................................................................................................................................................... 43
Linking Names ......................................................................................................................................................... 44
Adding Link Relationship Codes.............................................................................................................................. 45
Households/Groups ................................................................................................................................................... 47
Creating Households ............................................................................................................................................... 48
Page 4
Creating Groups ...................................................................................................................................................... 50
Markets/Areas of Interest ......................................................................................................................................... 53
Associating Files ......................................................................................................................................................... 57
Adding File Associations ......................................................................................................................................... 59
Linking Folders to a Name ...................................................................................................................................... 61
Things That Can Interfere with View Files Functionality ....................................................................................... 61
Printing Reports ........................................................................................................................................................ 65
Printing a Quick View Report .................................................................................................................................. 66
Selection Reports ..................................................................................................................................................... 66
Selection Report Options ......................................................................................................................................... 70
Printing a Current Client Report ............................................................................................................................. 71
The Tagged Names Report ....................................................................................................................................... 71
The Advisors Assistant Calendar ............................................................................................................................. 75
Calendar Views........................................................................................................................................................ 77
Customizing Your Calendar Settings ....................................................................................................................... 80
Adding & Modifying Appointments ......................................................................................................................... 82
Adding & Modifying Projects/Tasks/Phone Calls ................................................................................................... 83
Printing Calendar Reports ...................................................................................................................................... 85
Sending Letters Using The Calendar ....................................................................................................................... 87
Scheduling & Viewing an Associate’s Calendar ..................................................................................................... 88
Viewing Calendar Events ........................................................................................................................................ 90
Messaging ................................................................................................................................................................... 91
Sending Messages .................................................................................................................................................... 92
Replying to a Message ............................................................................................................................................. 93
Message Archiving .................................................................................................................................................. 93
New Business .............................................................................................................................................................. 95
New Business Tracking ............................................................................................................................................ 96
Printing New Business Reports................................................................................................................................ 97
Workflows vs. New Business .................................................................................................................................... 98
Automated Workflow .............................................................................................................................................. 101
Automated Workflows ............................................................................................................................................ 102
Master Workflow Templates .................................................................................................................................. 104
Assigning Active Workflows .................................................................................................................................. 106
Event Templates ..................................................................................................................................................... 109
Workflow Reports .................................................................................................................................................. 110
Workflows vs. New Business .................................................................................................................................. 111
Page 5
The Advisors Assistant Dashboard ........................................................................................................................ 113
The Dashboard ...................................................................................................................................................... 114
Setting Up Your Dashboard ................................................................................................................................... 114
Dashboard Features .............................................................................................................................................. 115
Merging with MS Word for Letters & Emails ...................................................................................................... 119
Printing Letters/Sending Emails ............................................................................................................................ 120
Logging Letters/Emails .......................................................................................................................................... 121
Printing Letters to Selected Names ........................................................................................................................ 121
Setting Up Your Letter/Email in Microsoft Word .................................................................................................. 123
Printing Letters/Sending Emails and Merging the Data ....................................................................................... 124
Printing Envelopes/Labels Using Microsoft Word ................................................................................................ 125
Outlook Synchronization ........................................................................................................................................ 127
Exporting to Outlook ............................................................................................................................................. 129
Exporting Client Notes .......................................................................................................................................... 130
Importing from Outlook ......................................................................................................................................... 131
Saving Criteria ...................................................................................................................................................... 132
Real Time Export ................................................................................................................................................... 132
Archiving Emails ................................................................................................................................................... 133
Autodialing the Phone ............................................................................................................................................. 135
Preferences, Tools & Admin Functions ................................................................................................................. 139
General Preferences .............................................................................................................................................. 140
Outlook Preferences .............................................................................................................................................. 140
Default Preferences ............................................................................................................................................... 141
Form Automation ................................................................................................................................................... 141
Tools ...................................................................................................................................................................... 141
Administrative Functions ....................................................................................................................................... 142
Backing Up Your Data........................................................................................................................................... 145
Restoring Your Data .............................................................................................................................................. 146
Maintenance .......................................................................................................................................................... 146
Event Marketing With Advisors Assistant ............................................................................................................ 149
Appendices ............................................................................................................................................................... 157
Hot Keys ................................................................................................................................................................ 158
Course Objectives
Utilize the Full Power of Advisors Assistant!
In this course you will learn to:
Track your prospects, clients, policies, groups
and more
Print letters, envelopes, and labels
Customize FlexFields
Print great looking reports for your clients
Search client files for new sales
Track follow-up dates
Manage Workflows
Merge with MS Word for letters & emails
Log letters, emails, and phone calls
Schedule appointments, projects and Tasks
Market to current clients and prospects
Build rapport with clients to keep them from
straying to other producers
Synchronize with Outlook for mobile devices
Getting Started
In this chapter you will:
Start Advisors Assistant
Explore the Menu and Status Bars
Identify and access HELP

Abbreviation Codes
Page 10
Starting Advisors Assistant
As with other Windows programs, Advisors Assistant can be
started in two ways. You can either start Advisors Assistant
using the Windows Start Menu, or add a shortcut to Advisors
Assistant on your Desktop.
When you installed Advisors Assistant it will have installed an
icon to your desktop. If you do not have the icon on your desktop
instructions for creating one are below.
How to Start Advisors Assistant
1. Make sure your computer is on.
2. Click on the Start button in Windows.
3. Select Programs.
4. Select the Advisors Assistant program group.
5. Select Advisors Assistant.
How to Add an Advisors Assistant Shortcut to your Desktop
1. Go to your Windows Desktop.
2. Right click on the Desktop.
3. Select New, Shortcut.
4. Click the Browse Button.
5. Click on the Down Arrow next to the “Look In” box.
6. Browse to the following directory: C:\Program Files\Client
Marketing Systems\Advisors Assistant.
7. Highlight the file “AdvisorsAssistant.exe” and click Open.
8. Click the Next Button.
9. Give the Shortcut Icon a Name (i.e. Advisors Assistant).
10. Click the Finish Button.
11. Double click on the Advisors Assistant Icon on your Desktop
to open Advisors Assistant.

Abbreviation Codes
Page 11
The Advisors Assistant Menus
Many of the maintenance and setup tasks you perform in
Advisors Assistant are accessed through the Menu Bar. Below
is a table describing the options available from each menu. For
some menu options more detail will be given in the sections that
apply to those commands.
Menu
Option
Description
File
Preferences: set up your user preferences.
Printer Setup
Exit
Edit
Common edit commands such as Cut, Copy, Paste
and Find which are used throughout Windows
programs.
Lookup
Allows different ways of looking up names, same
as the “binocular” icon in the Sidebar.
Tools
Has several tools to help run Advisors Assistant
Reports
Central listing of all reports in Advisors Assistant
Admin
Performs administrative tasks. (You must have a
security level of Administrator to access this
menu.)
Access
Only visible in MultiProducer Version – allows
users to change the list of names they are
accessing.
Help
Opens the Advisors Assistant Help, which
includes Videos, and has a utility to check for
updates to Advisors Assistant.
Getting Help With Advisors Assistant
Opening Help
Throughout Advisors Assistant there is context-sensitive Help
available at the click of a mouse. In fact there even Tutorial
Vides available in many help topics. If you have a question on
Advisors Assistant, you should first try the online Help before
calling our technical support staff. Most people find the answer
they’re looking for in the online Help, and it’s much quicker than
picking up the phone.
How to open Help
Press the F1 key anywhere in Advisors Assistant or

Abbreviation Codes
Page 12
Click on the Help Menu Item or
Click on the Help Button in the middle of the View Screen or
the bottom of any other screen.
Using Help
Advisors Assistant has context sensitive Help, which means
once you have opened Help you will see the Help topic for the
section of the program you are currently in. When you select
Help from the middle or bottom of the screen you are currently
on, you access the context sensitive Help.
There are also Help Topics in the chapters not assigned to a
screen, such as overviews of a particular topic (i.e. WordMerge
Overview.) So it’s a good idea to go to the Contents Tab in the
help, which is laid out like a book with different chapters
covering different topics.
When you press F1 or use the Help Menu Option, you will be
taken to the main Help Contents. From this point you can select
a topic from the contents list, or search for the specific topic you
need.
Whenever you see a movie icon, that means the help topic has a
Tutorial Video you can view for additional help on that screen.
Just click on the movie icon to play the video. Internet access is
required – if you do not have Internet access to play the videos
contact Client Marketing Systems at (800) 799-4267.
The Help Tabs
Tab
Description
Contents
See a list of all of the help chapters. The Help is
arranged like a manual, which each chapter (book)
containing different topics on that subject. There
are help topics, such as overviews of a topic, that
are not attached to a screen.
Index
Search Help for a keyword
Search
Search Help for a phrase or more than one
keyword
Favorites
Add Help Topics to your favorites list
Abbreviation Codes
In this chapter you will:
Add Abbreviation Codes
Modify Code Descriptions
Delete Abbreviation Codes

Abbreviation Codes
Page 14
Abbreviation Codes
In order to maintain the integrity of the information added to
Advisors Assistant, and to make it possible for you to search on
that information later, many of the fields in the database use
abbreviations. You set up your own abbreviations, so they make
sense to you.
The ability to add or edit abbreviation codes may not be
available to you. If you do not have the Edit List option you can
contact your System Administrator.
Advantages Of Using Lists
Lists save keystrokes and give you consistency of data entry. By
picking abbreviation codes from a list, you are exactly
identifying which code you want. You avoid the confusion of
having information in your database entered several different
ways.
An example best explains how important it is that lists are used.
John Q. Agent entered a type of name as "Client" by
entering the code "CL" in a field. John hires an assistant
who decides that "CLIENT" and "GROUPCLIENT" are
more appropriate entries for other names and enters
several names that way. John agrees, but forgets that
Name Type Abbreviation Code List

Abbreviation Codes
Page 15
"GROUPCLIENT" is being used and he enters several
names as "GROUPCL."
When it comes time to search the database for clients, the
task would be almost impossible because there are now 4
different entries for clients. It would take 4 separate
searches to pull out all the names.
If John Q. Agent Had Advisors Assistant Using Lists
When John first went to put in "CL", he would have been
forced to add "CL" to the list of Name Types as an
abbreviation and would have had to define just what the
code CL meant, such as "Client". Then when any other
person entering data clicked on the Down Arrow next to
the Name Type field, they would have seen John's list and
they would have seen the CL item.
Even if they added their own abbreviation, they could
have gone back later and changed the new abbreviation
into CL automatically without having to find each name
containing the duplicated item.
Each time CL is used, it only needs to be picked from the
list. It doesn't need to be typed every time.
When you do a search for a particular code, you pick the
code from the list, so you know it's already an acceptable
abbreviation to search. You know your searches will be
accurate.
When you’re adding information to Advisors Assistant, keep in
mind that the more information you add to the database the
more useful the database becomes. If you fill out people’s
Occupations, then you’re able to get a list of, for example, all
Business Owners in your database and send them a targeted
mailing.
Adding Abbreviation Codes
Abbreviation codes can be added as you’re adding any
information in Advisors Assistant.
How to Add an Abbreviation
1. Click on the field to which you wish to add an abbreviation,
scroll to the bottom of the list, and select Edit List. You must
have security rights to edit abbreviations.

Abbreviation Codes
Page 16
2. You can view the lists by abbreviation or description by
clicking on the column name.
3. Type in the first few letters of the abbreviation code you wish
to add to make sure it is not already in the list.
4. If the code is not in the list, click on the Add Button.
5. Type in the abbreviation code you wish to add.
6. Type in a description.
7. Click OK when done.
You can also add and modify the abbreviation lists through the
Advisors Assistant Admin Menu.
Modifying Abbreviation Codes
If you have the appropriate security rights, you can modify the
abbreviations at any time.
How to Modify Abbreviation Codes
1. Click on the field to which you wish to modify the
abbreviation, scroll to the bottom of the list, and select Edit
List. You must have security rights to edit abbreviations.
2. Highlight the code in the list, and click on the Modify
Button.
3. Make your changes.
4. Click OK when done.
Deleting/Combining Abbreviation Codes
Advisors Assistant will only allow you to delete an abbreviation
code if it is not in use. Therefore it is usually easier to combine
a code with another code rather than deleting the code. If you
know that a code is not being used in any records, you can delete
the code from the list. If you try to delete a code that is being
used, Advisors Assistant will tell you where the code is being
used so you can change it and then delete it.
How to Delete an Abbreviation Code
1. Click on the Admin menu option.
2. Click on “Maintain Abbreviations.”
3. Select the Abbreviation List you wish to change.

Abbreviation Codes
Page 17
4. Highlight the code you wish to delete and click on the Delete
Button.
5. Confirm the deletion by clicking Yes.
6. Click OK when you’re finished deleting codes.
How to Combine Abbreviation Codes
1. Click on the Admin menu option.
2. Click on “Maintain Abbreviations.”
3. Select the Abbreviation List you wish to change.
4. Highlight the code you wish to combine and click on the
Combine Button.
5. The code you’ve selected will be listed in the “Combine all
occurrences of” field. You need to select the code to which
you’re combining, which would be the code you wish to keep.
You can then decide if you wish to delete the original code
(which is recommended so it is not used again.)
7. Click OK to combine the codes.
Adding Names
In this chapter you will:
Explore the Advisors Assistant View Screen
Add a new name
Modify Name FlexFields
Add Addresses and Phone Numbers
Copy Addresses & Phone Numbers to other
names
Find and Modify a name
Find a name using a phone number
Delete a name

Adding Names
Page 20
Exploring the View Screen
The first screen you see upon opening the Advisors Assistant is
the View Screen. The name on the screen will be the name you
were viewing when you exited Advisors Assistant the last time
you had it open.
The top of the View Screen has the demographic, address, and
phone information for the name you are viewing.
The bottom half of the View Screen has the different Views that
are available. The tabs are color coded to indicate if data has
been added to the view.
In the middle of the screen are several Action Buttons that
perform specific functions.
Action Button
Description
Adds information to the active view.
Modifies information in the active view.
View Name with Workflow

Adding Names
Page 21
Deletes information in the active view.
Quick Report: creates a summary report of the
active view.
Opens MS Word for letters or emails
Exports the data in the active view to Excel.
Dials a phone number if a modem is set up.
Opens the HELP for the active view screen.
On the left is the Sidebar, which gives fast access to some of the
most commonly performed functions in Advisors Assistant.
Sidebar Icon
Description
Opens the Selection Reports.
Selects all of the data for the current name
being viewed and opens the Reports.
Lookup by Name by clicking on the main icon.
Lookup by Tax ID, Phone, Address, Email
Address or Web Address by clicking on the
small black arrow next to the icon.
Opens the Outlook Synchronization Screen.
Opens ReadyDoc™ or Imaging Assistant™
(optional modules) to scan a document for the
currently viewed name.

Adding Names
Page 22
Opens Laser App or Quik! Forms and passes
data for the currently viewed name over to the
application program.
Opens the Advisors Assistant Calendar.
Opens the Advisors Assistant Messenger.
Opens the Advisors Assistant Dashboard.
The Recent Names List is the last item in the Sidebar, and will
show a list of the recently viewed names for quick access to
those names. You can control how many names are tracked
through the User Preferences.
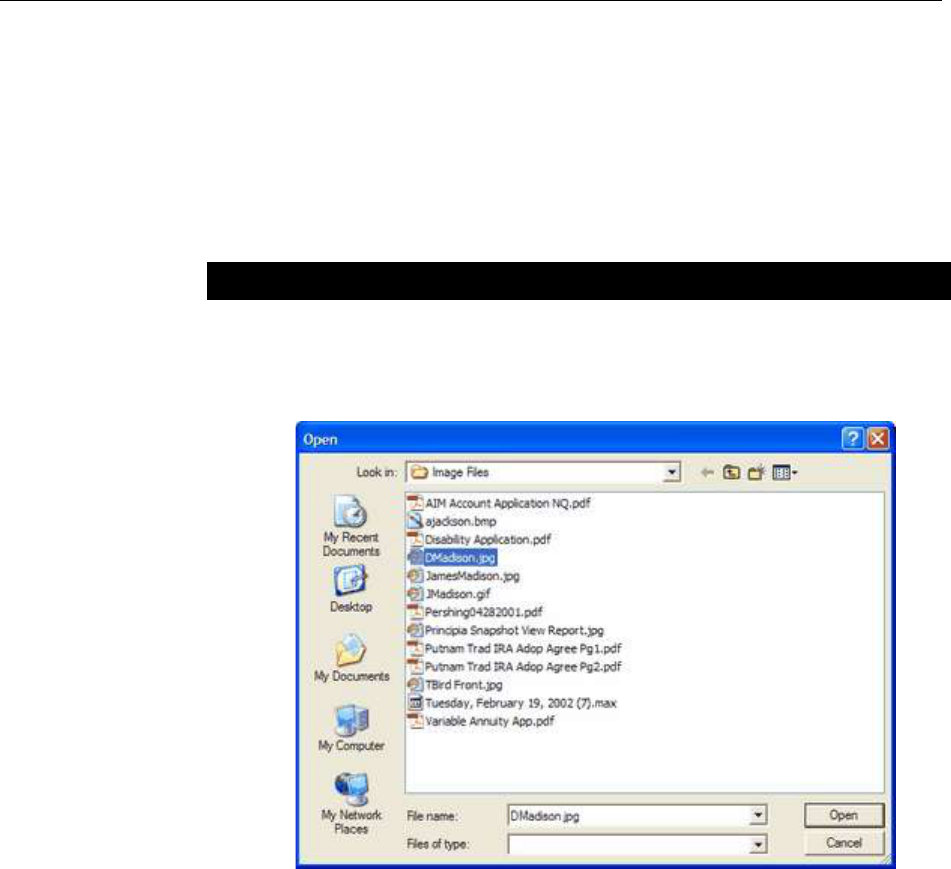
Adding a New Name
Before adding a name in Advisors Assistant, you should check to
make sure the name is not already in the database. If the name
is not in the database, you can quickly add it.
A name may either be an individual or an organization. All
names are entered in the same place in Advisors Assistant -
there is not a separate module for entering
organizations/groups.
How to Add a New Name
1. Click on the down arrow next to the name on the View
Screen
or
Click on the Binocular Icon (Lookup Name) in the Sidebar.
You can also click on the down arrow next to the icon to
lookup names in other ways – such as by email address or
Tax ID
or
Click on the Lookup menu and select By Name or by
another field.

Adding Names
Page 23
2. Type in as many letters of the last name or business name as
you know. For each letter you type you will move further
down the list of names. If there are several names with the
last name you are looking for, press Tab to go to the first
name and type in as many of the letters of the first name
that you know.
You can also click on any column heading, and lookup the
names based on that column. The column with the arrow
next to it is the column you are selecting by.
3. If the name is not in the list, click on the Add Button. (If the
name is in the list, you can modify the name. This is covered
in a later section.)
4. You now have a blank name screen. Enter the information
you have for that person. If the name is an organization, click
on the button “Change to Organization.” (Some of the field
names will change.) Definitions of each field are available in
the HELP.
Looking up a New Name

Adding Names
Page 24
It is recommended that you add your name and any other
producers first. Then you can designate them as the producer
when you’re adding the client names. You may enter as little or
as much information as you need.
What is the Name Type?
The type of name field describes who the person is. It allows you
to store several different “lists” of names in one big database so
you’re not switching between programs.
Some Name Type examples follow:
Client Vendor
Prospect Friend
Group Client Insurance Company
Mailing List Name Church Group Member
Agent Rep
There is a Primary Type for each name, and then you can add
Other Types. The Primary Type should be a broad definition of
the name, such as CLIENT, so you can easily get a list of all
clients. Then the Other Types can be codes such as FRIEND, or
a ranking such as A or B. If you have a Primary Type of Client
and an Other Type of FRIEND, that name will show up on a list
of clients and a list of friends.
Add/Modify Name Screen

Adding Names
Page 25
Modifying Name FlexFields
If Advisors Assistant does not have a field for something you
want to track, you can customize a FlexField to track that
information. Name FlexFields are attached to the Name Type,
so you can have a different set of 30 FlexFields for each Type of
person you enter, ie. prospect, client, vendor, etc. You can also
search on the FlexFields to pull information out of the database.
There are 30 Name FlexFields, and they can store three
different formats of data: text information, date information,
and numbers. You want to be careful when customizing the
FlexFields that you choose the correct format for the information
you will be entering (you don’t want to use a text field for
numerical data or a date.)
How to Modify a Name FlexField
1. As you’re adding the initial name information, you’ll notice
additional tabs across the top of the name entry screen. Click
on the second tab, FlexFields.
2. To change the name of the FlexField, click once on the
FlexField Labels. This takes you into the “Modify FlexField
Title Set” screen. The data entry boxes are now for the field
names themselves instead of the data.
Modifying FlexField Labels

Adding Names
Page 26
3. Choose the field whose name you wish to change. Be sure
you choose the right format for the data, ie. text or date:
FlexField #
Field Format
1-4
Numbers – 2 decimal places
5, 6
Numbers – 5 decimal places
7,8
Numbers – no decimal places
9-12
Text
13-16
Date
17-20
Text
21, 22
Date
23-30
Text
4. Type in the name of the FlexField (i.e. Retirement Date)
and click OK.
Automating Applications
Advisors Assistant will export data to third party application
automation programs, such as Laser App and Quik! Forms
(purchased separately,) to help you save time in filling out forms
and applications.
Basic information, such as name, address, and phone numbers,
is sent to the app program based on the data entered into
Advisors Assistant. But there is also an additional App
Automation screen that allows you to link information such as
dependents and beneficiary information.
How To Add Additional Information for Applications
1. From the Add/Modify Name Screen, click on the
Application Info tab across the top of the screen.
2. Enter the information that you wish to use for the
applications. If you select any of the fields (ie. joint
applicant, spouse) the name has to be entered into
Advisors Assistant so that the birth date, address, etc. can
be used on the application. You can click on the Get
Defaults button to automatically fill in information if you
have set up the relationships through Links. The HELP

Adding Names
Page 27
lists out which relationships can be used with the Get
Defaults option.
3. Additional dependents can be passed to applications using
the Household screen.
Once the information is filled out, you can click on the Export
button to open the application program and have Advisors
Assistant pass the data over. Then the applications can be
selected to print. You can also click on the Forms Icon in the
Sidebar at any time to print applications.
Adding Addresses
Once addresses have been added to Advisors Assistant, you can
right-click on any address on the View Screen and if you’re
connected to the Internet that address will be mapped with
Google Maps.
How to Add Addresses
1. Click on the “+” button in the address box
or
if there are no addresses added yet, click in the empty
address box.
2. Enter the address information. Be sure to select the
appropriate address location.
3. Make sure you designate one of the addresses as the Primary
address by checking the Primary box. The Primary address is
used when printing reports and letters.
4. Click OK when done.
Application Automation Screen

Adding Names
Page 28
Advisors Assistant stores zip codes and the city and county for
that zip code. Once you enter a zip code, if it’s on file the city will
be filled in automatically.
Add/Modify Address Screen

Adding Names
Page 29
Email Addresses
You can add an email address by clicking on the “+” button next
to the email address line. Multiple email addresses can be
entered for each name, and you can designate which email is the
primary address.
Web Site Addresses
You can add a web address by clicking on the “+” button next to
the web site line. Multiple web addresses can be entered for each
name, and you can designate which address is the primary
address.
Web addresses can be actual websites, or other addresses like
Facebook or LinkedIn.
Joint Addresses
If you wish to send correspondence addressed to both the
husband and wife, you can use an address location code named
JOINT.
In the Head Of Household’s name record, add a new address
using the JOINT location. For the greeting, enter both the
husband and wife’s name (ie. John and Mary) so your letters will
read “Dear John and Mary”.
For the Addressee, enter “Mr. and Mrs. John Smith” or how
you’d like the envelope to be addressed. When you send letters,
you will be able to select the JOINT Address Location, and your
letters will use the combined address name.

Adding Names
Page 30
Adding Phone Numbers
How to Add a Phone Number
1. Click on the “+” button in the phone number box
or
if there are no phone numbers added yet, click in the empty
phone number box.
2. Enter the phone number information. Be sure to select the
appropriate phone location.
3. Make sure you designate one of the phone numbers as the
Primary phone number. The Primary phone number is used
when printing reports and letters.
4. Click OK when done.
Add/Modify Phone Number
Joint Address Example

Adding Names
Page 31
Copying an Address to Another Name
When you have more than one name at one address, Advisors
Assistant will save you time by copying the address information
from one name to another.
If you are dealing with members of a household or group, you
can also link addresses to the members. This is detailed in the
Household/Group section.
How to Copy an Address to Another Name
1. Go to the name from which you wish to copy the address.
2. Click on the Down Arrow button next to the address to
open the list of addresses.
3. Highlight the address you wish to copy and click the Copy
To button.
4. Select the name to which you want to copy the address. If
the name is not in the database, add the name from the
Select Name screen.
5. Verify that the information Advisors Assistant filled in
automatically, such as greeting and addressee, are correct.
Turn the Primary check on or off (depending on if this will be
a primary address for the new person).
6. After copying the address, Advisors Assistant returns you to
the first person’s address screen. Click OK if done or copy an
address to another person.
This address has now been added as a new address to the person
you selected. You can look that person up to verify that the
address has been added.
Copying a Phone Number to Another Name
You can also copy phone numbers to other names in Advisors
Assistant without having to add the phone number each time.
If you are dealing with members of a household or group, you
can also link phone numbers to the members. This is detailed in
the Household/Group section.
How to Copy a Phone Number to Another Name
1. Go to the name you wish to copy the phone number from.
2. Click on the Down Arrow button next to the phone number
to open the list of phones.

Adding Names
Page 32
3. Highlight the number you wish to copy and click the Copy
To button.
4. Select the name to which you want to copy the phone. If the
name is not in the database, add the name from the Select
Name screen.
5. Verify that the information is correct. Turn the Primary
check on or off (depending on if this will be a primary phone
number for the new person).
6. After copying the phone number, Advisors Assistant returns
you to the first person’s phone list. Click OK if done or copy
a number to another person.
This phone number has now been added as a new phone number
to the person you selected. You can look that person up to verify
that the phone number has been added.
Finding and Modifying Names
How to Find and Modify a Name
1. Click on the down arrow next to the name on the View
Screen
or
Click on the Binocular Icon (Lookup Name) in the
Sidebar. You can also click on the down arrow next to the
icon to lookup names in other ways – such as by email
address or Tax ID
or
Click on the Lookup menu and select By Name or by
another field.
2. Type in as many letters of the last name or business name
as you know. For each letter you type you will move
further down the list of names. If there are several names
with the last name you are looking for, press Tab to go to
the first name and type in as many of the letters of the
first name that you know.
You can also click on any column heading, and lookup the
names based on that column. The column with the arrow
next to it is the column you are selecting by.

Adding Names
Page 33
3. Once the name you are looking for is highlighted on the
screen, you may:
Press Enter
or
Double click on the name
or
Highlight the name by single clicking and click OK.
4. To Modify information, click on the box with the
information you wish to modify.
5. To Modify an address or phone number not showing on
the screen, click on the Down Arrow next to the address
or phone section. Highlight the address or number you
wish to modify. Click on the Modify Button.
6. Click OK when done.
Deleting Names
When you delete a name, all references to that name and any
additional information such as notes, new business, etc. are
removed from the database. It is always a good idea to Back Up
your database before making large deletions.
How to Delete a Name
1. Find the name you wish to delete.
2. Click once in the Name Information Box.
3. Click on the Delete Button located at the bottom of the
screen.
4. Confirm that you wish to delete the name.
Notes
In this chapter you will:
Add Notes to a name
Modify Notes
Add a Follow Up Date to notes
Add/Modify Note Topics
Search Notes
Combine Notes

Notes
Page 36
Adding Notes
There is no limit to the number of notes you can add to each
name in Advisors Assistant. And each note can have a follow-up
date attached, which adds a Task directly to your calendar (or
another person’s calendar.) Advisors Assistant has free form
notes, so you can write as much or as little as you want.
Note Topics and Note Entries
In Advisors Assistant there are note topics and note entries.
Note Topics are designed to enable you to organize similar notes
together. In the View Notes Screen, you see 7 “Note Topics”, and
each of those Note Topics can have unlimited Note Entries.
How to Add a Note to a Name
1. Make sure you are viewing the name to which you want to
add the note.
2. Click on the Notes Tab at the bottom of the View Screen.
3. Highlight the Note Topic to which you wish to add a new
note and click on the Add Action Button. If you do not have
any Note Topics added to the name yet, the first time you
View Client with Notes

Notes
Page 37
click on the Add Action Button you’ll be asked to setup a
Topic before you can add the note entry.
4. Advisors Assistant automatically tracks the create date,
time, and the initials of the person adding the notes. If you
have the correct security access you can change the create
date, or add a Private Note. Begin typing your notes. You
can spell check your notes by clicking on the Spell Check
Button.
5. Click OK when done.
You can also add new notes at any time from the View Notes
Screen.
The View Notes Screen is opened any time you add or modify a
note.
To add a new note from the View Notes Screen, highlight the
Note Topic from the top of the screen to which you wish to add
the note entry, and click the Add Note Button.
Scheduling Follow-up Dates
Follow-up dates can be attached in many areas of Advisors
Assistant: Notes, Phone & Letter Logs, New Business Actions,
Add Note Screen

Notes
Page 38
and Markets. Once a follow-up date has been filled in, a Task is
added to your calendar. You can edit the follow-up to move the
Task to another person’s calendar.
How to Add a Follow-up Date
1. Add a new note to a name.
2. Enter a follow-up date. (Click on the down arrow next to the
date to pop up a calendar.)
3. Click OK to add the note. A Task is added to your calendar.
To add the Task to another person’s calendar, click on the
Edit Follow-up Button under the date. The Task window
will open with some of the fields filled in for you
automatically: the date, the description, and the notes. Use
the Calendars box to choose to whose calendars the Task will
be added.
4. Click OK to add the follow-up to the calendar. Then click OK
to add the note.
Personal Contact
Many producers wish to insure that they have a Personal
Contact with their clients or prospects (or top clients and
prospects) at least once every 60 or 90 days (or any time period
you specify.) The Personal Contact Checkbox is designed to help
View Notes Screen

Notes
Page 39
you track when you've had a personal contact with a client or
prospect, so that you can get a list of clients or prospects who
you haven't had personal contact with. The definition of
Personal Contact is up to you, but it would typically be a face-to-
face appointment or an actual phone conversation.
When you're adding a note that resulted from a personal
contact, you can check the Personal Contact Box. Advisors
Assistant then has a Personal Contact Wizard (under the Tools
Menu) that will allow you to print a report or even add a
Calendar Task to the people who haven't had a Personal Contact
within the time period you specify.
Adding/Modifying Note Topics
When you add the very first note to a name, you will first need
to add a Note Topic. After the first note topic is added you’ll
need to add or modify additional topics from the View Notes
Screen.
How to Add/Modify a Note Topic
1. From the View Client With Notes Screen, click on the Modify
Action Button.
2. Click on the Add Topic Button in the top left of the View
Notes Screen to add a new note topic. Highlight an existing
topic and click on the Modify Topic Button to modify the
topic name.
Combining/Moving Notes
There are two ways of moving notes:
Moving a single note from one topic to another:
1. From the View Notes Screen, highlight the note entry you
wish to move.
Note Topic Section of View Notes Screen

Notes
Page 40
2. Click the Move Notes Button at the bottom of the screen.
3. Highlight the new Note Topic to which you wish to move this
note.
4. Click OK to move the note.
Combining one entire Note Topic into another Note Topic:
1. In the top left Topic Section, highlight the Note Topic you
wish to combine.
2. Click the Combine Topics Button in the topic section.
3. Highlight the Note Topic to which you wish to combine these
notes.
4. Click OK.
Searching Notes
You can search through the notes within Advisors Assistant to
find notes containing a specific keyword, or written within a
date range by a specific user.
You can search within just one client’s notes, or you can search
globally across all notes within the database. Performing a
global notes search can take some time.
How to Search a Client’s Notes
1. From the View Notes Screen, enter the criteria on which you
wish to search in the top right corner of the screen.
Select if you wish to search within just one topic, or all
topics.

Notes
Page 41
Select if you wish to search for notes written by just
one user, or all users.
Enter a date range if you wish to limit the notes found
to those written within a date range.
Enter a keyword(s) to find notes containing the
word(s).
2. Click on the Apply Filter Button to see the notes that match
the criteria in the grid.
3. Once the notes are selected you can print the list of notes by
clicking on the Print Notes Button at the bottom of the View
Notes Screen.
4. Click the Clear Filter Button to clear the search criteria
and enter another search.
5. Click the View All Button to view all notes on the screen.
How to Globally Search Notes
1. Click on the Tools Menu at the top of any View Screen.
2. Select Search All Notes.
Select if you wish to search for notes written by just
one user, or all users.
Enter a date range if you wish to limit the notes found
to those written within a date range.
Enter a keyword(s) to find notes containing the
word(s).
6. Click the Apply Filter Button.
7. Once the notes are selected you can print the list of notes by
clicking the Print Notes Button, or highlight a note and
click the Go To Client Button to go to that client’s view
screen.

Notes
Page 42
Linking Names
In this chapter you will:
Link two names together
Add a new Link Relationship Code

Linking Names
Page 44
Linking Names
Advisors Assistant allows you to link names to each other so
that you can track different relationships between names in
your database. You can link family members together, link
employees to their company, and track the sources for your new
clients and prospects. Once two names are linked together, you
can easily switch back and forth between the name records.
Each link you add must have a Relationship. When you connect
one client to another, you must designate what that connection
is - their relationship. Examples of relationships are attorney,
accountant, or source of referral. You can link family members
together and use relationships like spouse and child, but you
might wish to add these names to the Household rather than
linking them.
Links are a great way to track referrals. In the sample screen
above, you can see that Jim was originally referred by George
Washington (Source of Referral) and that Jim referred Sam
Adams (Referral.)
The Reciprocal Relationship is the relationship of the person or
company to whom you're linking, back to the person being
linked. Each link relationship can only have one reciprocal code
– it’s a one to one relationship. So if you track other professional
View Client with Links

Linking Names
Page 45
relationships, you could use a relationship of “Accountant” and a
reciprocal of “Client of Accountant.”
How to Add a Link to a Name
1. Go to the View Screen for the person to which you want to
add a link.
2. Click on the Links Tab at the bottom of the screen.
3. Click on the Add Action Button.
4. Click on the Linked To Field to choose from the list of
names in your database.
5. Enter the person's last name or the organization's name. If
the person is not yet in your database, you can click on Add.
Click on the name to select it when it comes into view.
6. Back on the Add Link Screen, click on the Relationship
Field.
7. Select the relationship from the list. If the relationship is not
on the list already, and you have the appropriate security
rights you can click on Edit List to add a new relationship
code to the list.
8. If you’re adding a family link, such as a spouse or child, you
can also tell Advisors Assistant to add that person to the
Household by checking the Add Linked Name To
Household Box. The name to which you’re adding the link
must be marked as a Head Of Household.
9. Click OK.
Adding Link Relationship Codes
The link relationship code is an abbreviation code like all other
codes in Advisors Assistant, but there is one extra field for the
link relationship called the reciprocal code. You must have the
appropriate security access to edit codes.
When you’re adding links Advisors Assistant links two names
together, and the two names are linked together using the
reciprocal relationship codes. Since the reciprocal relationship
controls the two names being linked, it is important that the
link relationship codes be added with the reciprocal.
Since link relationship codes have a reciprocal code also, adding
new link relationship codes becomes a 3 step process. We will go

Linking Names
Page 46
through the steps of adding the two link codes of Brother and
Sister. Details on adding abbreviation codes are listed in the
Abbreviation Codes chapter of this manual.
How to Add link relationship codes
1. Add the first new link code, BROTHER. Leave the Reciprocal
field blank. Click OK to add the first code.
2. Click on the Add button again to add the second code,
SISTER. For the code sister, enter a reciprocal code of
BROTHER. Click OK to save the code.
3. Modify the code Brother by highlighting the code and clicking
the Modify button. Select the code SISTER for the reciprocal
code of Brother. Click OK to save the Brother code.
While the example of Brother/Sister is used to show how to add
link codes, a code of SIBLING is much better for designating
family relationships because it can be used for brother/sister,
brother/brother, and sister/sister.
Adding Link Relationship Codes
Households/Groups
In this chapter you will:
Create a Household in Advisors Assistant
Create a Group in Advisors Assistant

Households/Groups
Page 48
When you add an individual to Advisors Assistant the tab on the
View Screen says Household. When you add an organization to
Advisors Assistant the tab on the View Screen says Group.
Creating Households
The View Client With Household Screen allows you to group
members of a household together. These Households can then be
used for combined reporting, and it gives you quick access to the
other names just by double-clicking on the member's name.
How To Create A Household
1. Decide who will be the Head Of Household. Modify that
name and check the box “Head Of Household.” Enter the
Household Name.
2. From the View Client With Household Screen, click the Add
Action Button.
View Household Screen
Add Household Member

Households/Groups
Page 49
3. You can add a new member to the household by either
clicking on the Browse Button and selecting a name already
added to your database, or by adding a new name directly
into the Modify Household Screen. Select which option you’re
using to add the household member and click OK.
4. At the top of the Modify Household Screen select if you’d like
to have a specific Name Type added to each member of the
household.
5. Select if you’d like to have an address and/or phone number
linked to each member of the household. When you link an
address or phone number to household members, you only
have to change the address or phone number at the Head Of
Household’s record and it will be changed on each member’s
record.
The member has been added to the household, and you can add
new members directly from the View Household Screen.
You can also use the Dependent and Relation to HOH features
to expand the data that is sent to application automation
programs like Laser App. Check the Dependent box and select
the relationship.
Modify Household Screen

Households/Groups
Page 50
Creating Groups
If you add a company to Advisors Assistant, you can use the
Group feature to group the employees of the company together
for reporting purposes.
How To Create A Group
1. Modify the organization’s name and check the box “Group.”
Enter the Household Name.
2. From the View Client With Group Screen, click the Add
Action Button.
3. You can add a new member to the group by either clicking on
the Browse Button and selecting a name already added to
your database, or by adding a new name directly into the
Modify Group Screen. Select which option you’re using to add
the group member and click OK.
4. At the top of the Modify Group Screen select if you’d like to
have a specific Name Type added to each member of the
group. For example you could have all members of the group
have a Name Type of Group Participant.
5. Select if you’d like to have an address and/or phone number
linked to each member of the group. When you link an
View Group Screen

Households/Groups
Page 51
address or phone number to group members, you only have to
change the address or phone number on the company’s record
and it will be changed on each member’s record.
The member has been added to the group, and you can add new
members directly from the View Group Screen.
Modify Group Screen
Markets/Areas of Interest
In this chapter you will:
Add Markets/Areas of Interest to a name

Markets
Page 54
Markets/Areas of Interest
A unique feature of Advisors Assistant is the Markets or Areas
of Interest. Markets/Areas of Interest can be used for tracking:
Markets - products a person may be interested in like an
IRA, Universal Life or Term Insurance.
Producers - products the producer specializes in.
Areas of Interest - add codes for hobbies, clubs, or other
demographics you’d like to track. Some Areas of Interest
could be golf, Rotary Club, or their favorite sports teams.
Mailings – flag names for newsletters, holiday cards or gifts,
etc.
Ad campaigns – add markets for the different ads you’re
running, and track how well the ads are performing.
Markets work similar to an abbreviation list and allow you to
add as many Market codes as you’d like. The Markets area is
completely searchable, so you can pull out people who are
Prospects with a Market of ROTH IRA.
How to Add a Market/Area of Interest to a Name
1. Go to the View Client Screen for the name to which you wish
to add a Market.
2. Click on the Markets Tab.
View Client with Markets

Markets
Page 55
3. Click on the Add Action Button.
4. Click on the down arrow next to the Market Field to get a
list of markets already added. Highlight your choice and
click OK. As with other abbreviation code lists in Advisors
Assistant, if the Market is not on the list and you have the
appropriate security rights you can add the Market by
selecting the Edit List option.
5. Enter a Follow-up Date if you wish a Task to be added to
your calendar to follow-up on this Market.
6. Click OK when finished.
The Market/Area of Interest is now added to the name record,
and you will see it listed whenever you view the Markets.
You can select a list of people with the same Market using the
Selection Reports, and print a report, send an email, or print
letters and envelopes/labels.
Adding Markets
Associating Files
In this chapter you will:
Add a new File Association to a name

Attachments
Page 58
The View Client With Files Screen gives you the ability to
associate files from anywhere on your computer or network to a
client or prospect stored in Advisors Assistant. You can then
double click on that file to open the program and file you have
associated.
With File Association you can:
Use a document storage program to scan documents and
then associate them with your clients and view them from
inside Advisors Assistant.
Store pictures of your clients
Store letters created with your word processor. Mail
Merge letters can not be stored unless the letter has been
merged and saved with the name information.
Store presentations and spreadsheets
Store proposals in Adobe Acrobat .PDF format
Store Morningstar Principia portfolios and open Principia
directly from Advisors Assistant, going right to that
client’s portfolio (Principia must be purchased separately.)
View Client With Files Screen
Attachments
Page 59
Adding File Associations
Advisors Assistant stores the path to the file that you are
associating. Once the file is on the client’s list, you can double
click on the file and Advisors Assistant will load the application,
which Windows associates with the file extension, and tell the
application to view or edit the file.
How to Add a File Association to a Name
1. From the View Client With Files Screen, click on the Add
Action Button.
2. Browse to the location of the file on your computer or
network. Before associating files, please read the section
in this chapter regarding file locations and network
environments.
3. Enter a Description and Category:
Description: allows you to further describe what is
contained in the file in the event the file name is not
enough of a description.
Category: designed so you can assign tags, such as
Application, Photo, or Letter. Then when you sort by
Category by clicking on the column heading, all of your
applications will be listed together.
Selecting the File to Associate

Attachments
Page 60
From the Add Associated File Screen you can click on the
Add Button to add another file, but it will have the same
Description as the first file. If you wish to add a new file
with a different description, click OK to add the first file
then click the Add Action Button from the View Screen to
add another file.
4. Click OK to save the file association.
How to Modify File Information
1. Highlight the file you wish to Modify.
2. Click on the Modify Action Button. You can then change
the Description or Category displayed. Don’t use this to
change the actual file. To change the file, double click on
the file to load the associated application.
How to Delete A File From The List
1. Highlight the file association you wish to delete.
2. Click on the Delete Action Button. Decide if you wish to
just remove the reference to the file in the Advisors
Assistant database, or if you wish to delete the file itself
from your computer or network.
Entering the Description and Category

Attachments
Page 61
Running An Application With The Referenced File
When you click on the file, if Windows contains an association
for the file extension, that application will load and run with the
file you clicked. In a network environment, each workstation
must have the application installed to view the file. For
Instance, if a .pdf file is associated with a name, each
workstation must have Adobe Acrobat Reader installed to open
and view that .pdf file.
Sorting The File List
To sort the list of files, just click at the top of the column. By
sorting on Category, you can list all of the forms, applications,
etc. together based on the categories you have assigned.
Linking Folders to a Name
Rather than associating a single file with a contact, you can also
associate a folder on your computer with that contact.
From the View Client With Files Screen, right-click on the Add
Action Button. You can then select the location of the folder.
Things That Can Interfere with View Files Functionality
Renaming, Moving, Or Deleting Files
Advisors Assistant stores the path to the file you have
associated, not the actual file itself. The list of files stored in
Advisors Assistant does not know when you move or delete the
actual file on your computer. Therefore, if you move, rename, or
delete a file, using Windows Explorer or another program, the
original reference will remain in Advisors Assistant. If you
double click on the file, you’ll get a message that the file cannot
be found.
Reassigning or Remapping Drive Letters
In a network environment, the C drive on one computer can be
"mapped" to a different drive letter when accessed by another
computer.
If you add a file to a client and it is referenced on Drive K from
the workstation and someone comes along and changes the drive
mapping to Drive Q, then as far as Advisors Assistant is
concerned, the file should be on K, and it will not be able to find
it.

Attachments
Page 62
Storing Files On Drive C
If you’re on a network, or ever expect to be on a network, DO
NOT reference files on Drive C. The reason is that each station
will have its own Drive C. If your Drive C ends up on a network
as "Station 1" and Station 2 is also running Advisors Assistant,
when Station 2 tries to double click on the file, Windows will
look on Station 2’s drive C, not Station 1’s drive C. Drive C is
always the local workstation drive.
Why You Should Not Reference Documents On Your C Drive
Your C drive is the ONLY drive that cannot be accessed from
another computer on the network as drive “C”. It can be
accessed as another drive letter, through drive mapping, but
another computer cannot click on a file associated with your C
drive and load the file. The reason is because the other
computer on the network has its own C drive and it will look on
its own C drive for the file.
What To Do If You Are A Single User, or Not On A Network Now, But May Be
Later
If you are on a single user system, you should still use a drive
other than drive C because someday you may want to network.
This is easily accomplished by creating another drive partition,
such as drive D or drive F on the same disk. Software, such as
Partition Magic, can do this easily and safely. Partition Magic is
available anyplace business software is sold.
Tips and Hints
Map Drives
Map the drive(s) you refer to with a drive letter. That way, if
you move the drive or the folders to another computer, you
simply have to map that drive with the same drive letter.
If you use the Universal Naming Convention, such as
\\MikesComputer and Mike leaves or his computer gets
renamed, then all of your file pointers in Advisors Assistant will
be looking for a computer that does not exist.
Map Drives Consistently
When you map drives, it’s very important to reference all drives
with the same drive letter.
For example: If you install a new hard drive to hold your
document scanning files, have all computers on the network

Attachments
Page 63
refer to the drive with the same mapped drive letter. In our
office we use Drive S (for Scan). All computers refer to the drive
with the documents as Drive S.
Printing Reports
In this chapter you will:
Print a Quick View Report
Select a list of names using the Selection
Reports
Print a report using the selected names
Save frequently used Selection Reports
Print Current Client Reports
Select names using the Tagged Names Report

Reports
Page 66
Printing a Quick View Report
At the click of a mouse button, you can quickly print a report for
the information you are viewing on the screen. If you are
viewing notes, it prints a summary of the notes. If you are
viewing Markets, it prints a summary of the Markets.
The Report Action Button in the middle of the screen will print
reports for one person at a time – the person on your View
Screen. The Selection Reports Icon in the Sidebar prints reports
for many people at a time, or one person.
How to Print a Quick View Report
1. Put the information you want on your report on the View
Screen.
2. Click on the Report Action Button.
3. The report will be generated and you’ll first be viewing it on
the screen. To print the report click on the printer icon at
the top of the screen.
4. To close the report without printing it, click on the Exit
Button at the bottom of the window.
Selection Reports
The power of a database is in not only storing your information,
but also making it easy for you to sort that information for
marketing purposes. Advisors Assistant has made data
retrieval easy through our Selection Reports.
The Selection Reports allow you to go into Advisors Assistant
and select data based on the criteria you specify. The
combinations of selections are limitless, and you can save sets of
selections that you run on a frequent basis. The Selection
Reports are also a powerful feature of Advisors Assistant that
will help you increase sales.
You can use Selection Reports to search for:
Birthday Lists
People in specific age ranges or income levels to tell about
certain products you sell
Clients investing in a particular security, category, or sector
(if you’re using the Advisors Assistant Investment Module)

Reports
Page 67
Clients with a specific type of insurance for contacting about
a new benefit (if you’re using the Advisors Assistant
Insurance Module)
Prospects that you have coded with a certain market to
contact them regarding that market
Anniversary Date reports
Clients turning 70 who have an IRA (using either the
Investment Module or Markets)
and much more
Once you have “selected” the names, you can then print reports,
print letters, labels, or envelopes, or send emails to the group
you’ve selected.
How to Run a Selection Report
We’ll run a selection report on Clients who have a birthday in
June.
1. Click on the Selection Reports Icon in the Sidebar.
You will now see the main Selection Reports Screen. The
Name Selection Screen

Reports
Page 68
first set of information you see is the name information.
There are additional Tabs on the bottom of the screen that
allow you to navigate through the selection screens and
select on the Name Flex Fields, and depending on which
modules you own the Investment and Policy information.
2. First click on the empty box or arrow next to Type of Name to
select the type of person we’re looking for, in this case Client.
Select the Client abbreviation from the list and click OK.
3. Then click on the empty box or arrow next to Birth Month,
select June, and click OK.
4. Click Search to start the search once all your selection
criteria have been entered.
After you click OK Advisors Assistant will begin searching
through all of your records to find names that match the
criteria you just entered. Once the search is done, you will be
on the Report Selection Menu Screen. The number of names
that have been selected is in the top right hand corner of the
screen. From this screen you can print reports, send the data
to Microsoft Word to print letters and envelopes or send
emails, or export the data to use it with another program.
Report Selection Menu

Reports
Page 69
Include All Investment Data or Include All Insurance
Data: When you’re searching for names based on investment or
insurance information, Advisors Assistant does not select every
product the client has unless you tell it to – only the product you
are telling Advisors Assistant to search for would print on the
report. If you want all of the investments or policies to be
printed on the report, the Investment and Insurance Selection
Screens have a box you can check to include all products. You
can also use the Current Client Report Icon in the Sidebar to
select all of a single client’s products for reports.
Printing Reports using Selected Names
Once you’ve searched for the names you want, you can print
reports for those names. As you’ll see from the Report Selection
Menu Screen, there are many reports to choose from. The best
thing is to print them out at some point to see which reports you
like best.
How to Print Reports Using Selected Names
1. Run your search for the names you want to select.
2. Highlight the report you wish to print. Click the Report
Button at the bottom of the screen or double click on the
report.
You are now in the view report screen. You can move around
the report while viewing it, or just print or save the report.
3. Click on the Printer Icon to print the report or the Floppy
Disk Icon to save the report to another format, such as a PDF
file.
4. Click Exit to return to the Report Selection Menu Screen,
New Search to run another search, or Add To Search to save
the names you’ve just selected and add a new list of names to
the first list.
5. Click Finished to return to the Advisors Assistant View
Screen.
Saving Frequently Used Selection Reports
You may find yourself running some selection reports on a
monthly, weekly or even daily basis. Rather than entering the
Selection Criteria in each time you need to run the report, you

Reports
Page 70
can save that selection report and load it whenever you need to
run it.
Advisors Assistant also automatically saves the last Selection
Report that was run. If you’ve exited Selection Reports and
decide you need to run the same search again, you can load the
previous search (see “How To Load Selection Reports” below.)
How to Save Selection Reports
1. Open Selection Reports.
2. Enter the criteria you wish to select. Be sure to include any
Product or Flex Field information.
3. Click on the Save Button.
4. Give the saved selection a name.
5. Click OK.
How to Load a Saved Selection Report
1. Open Selection Reports.
2. Before entering any criteria, click on the Load Button.
3. Highlight the saved Selection Report from the list and click
OK.
4. The criteria you saved will appear on the screen. Click OK to
start the search.
Selection Report Options
Once your names have been selected, you have other options
available. The following buttons are available across the bottom
of the Report Selection Screen:
Exit: exit out of Selection Reports
Report: run the highlighted report (you can also just double-
click the report.)
Export: export the selected names to another file, such as an
excel spreadsheet.
Word: send the selected names to Microsoft Word to print
letters or send emails. This function is described in detail in the
“Merging With MS Word” chapter.

Reports
Page 71
Manage: take the names you’ve selected and perform a function
with all of the names. For example, you can add a market to all
of the names selected or change the producer name for all of the
names selected.
Subset: take the names you’ve selected and work only with
those names from the main View Screen. When you create a
subset your View Screen will be yellow to indicate you’re
working within a subset of names. You can turn off the subset
just by unchecking the box in the bottom left corner.
New Search: open a blank selection criteria screen.
Add to Search: put the list of names you’ve selected aside, and
add a new list of names to the first list. You can keep adding
new names by using the Add To Search Button again after your
next search. This performs an “OR” search. For example, you
can build a list of people that have the Market golf OR the
Market boating.
Footnote: if you have security rights to edit report footnotes,
clicking this button will take you to the report footnotes so you
can edit them.
Printing a Current Client Report
At the click of a mouse button, you can quickly access all of the
reports in Advisors Assistant for the name you are viewing on
the screen.
How to Print a Current Client Report
1. Make sure the name for which you’re printing reports is on
the View Screen.
2. Click on the Current Client Reports Icon in the Sidebar.
3. All of the contact and product information for that name will
be selected, and you’ll be taken to the Report Selection Menu
Screen to select the report you wish to print.
The Tagged Names Report
The Tagged Names Report works similarly to the Selection
Reports. Instead of filling out the criteria for what you’re
searching on, you can just go down the list of names in the
database and “tag” them to select them.
When you “tag” a name, the name is moved to the bottom half of
the screen to show that it has been selected. Once you have
selected all your names, you will move to the Reports menu and

Reports
Page 72
have all the same options available as you do through the
Selection Reports.
How to “Tag” Names
1. From any View Screen, click on the Tools menu at the top of
the View Screen.
2. Select Tagged Names Report.
You are now on a screen similar to the Lookup Name Screen.
There are a few ways to find the name you want to select:
You can click on any column tab to sort the list by that
column. If you’re sorting by last name, type in the last name
and then first name in the boxes at the top of the screen (just
like when you’re looking for a name in the database.)
Advisors Assistant will narrow down the list as you put more
letters in, and the names will appear in the grid.
To go through the complete list, you can use the arrow keys
on your keyboard to scroll through the list. Then you can tag
the names as you look through the list.
3. Once you’ve found the name you want to “tag”, there are
three ways to actually “tag” the name which moves the name
to the bottom half of the screen:
Double click on the name
Tagging Names For Selection Reports

Reports
Page 73
Highlight the name and press Enter
Highlight the name and click the Blue Arrow Button in
the middle of the screen
4. When you’re finished tagging all of your names, click on the
OK Button to move to the Reports menu. From the reports
menu you can print reports with those names, or merge with
a word processor; just as with other Selection Reports.
The Advisors Assistant Calendar
In this chapter you will:
Customize your calendar settings
Schedule appointments
Schedule Tasks and Phone Calls
View your calendar
Print your calendar
Schedule and view an associate’s calendar

The Advisors Assistant Calendar
Page 76
The Advisors Assistant Calendar
The Advisors Assistant calendar is fully integrated with the
main database, so you can set up appointments with any person
you have in the database and have all of their information
available at your fingertips. Follow-up dates are also
automatically carried over into the calendar when you add them
to a note, market, or new business action.
Advisors Assistant Calendar Features
The calendar opens in its own window, so it can stay open
throughout the day while you work in Advisors Assistant.
Each person in your office who is a user of Advisors Assistant
can have his or her own calendar. You can also set up “office”
calendars.
The Main Calendar Screen

The Advisors Assistant Calendar
Page 77
You can keep your calendar private or selectively give rights
to others to view your calendar and add appointments and
tasks.
You can transfer blocks of tasks, phone calls, or
appointments from one calendar to another.
Any follow-up dates you enter for notes, Workflows, letter
logs, phone logs, markets or new business comments will
automatically create Tasks and be copied to a calendar note.
Tasks can roll forward if they are not completed.
You can be notified of pending calendar events.
You can set up recurring events, such as calling a client for a
review on the first Monday of every June for the next 3 years.
You can print various schedules.
You can see a graphical depiction of your entire office's
calendar quickly and easily.
Calendar Views
You can view your calendar by week, month, year, or day.
Weekly Calendar View

The Advisors Assistant Calendar
Page 78
Weekly View
To see a weekly view of your calendar, click on the word Week
at the top of the screen.
You can add an event by double clicking in an empty time period
on the screen, or you can modify an existing event by double
clicking on the event. You can change the length of an existing
appointment by single clicking to highlight the appointment,
and clicking and dragging the bottom or top border of the
appointment.
You can change weeks by using the right and left arrow buttons
at the bottom of the screen. You can always change back to the
current day by clicking on the Today Button at the bottom of the
screen.
Monthly View
To see the current and next month’s calendar events, click on
the word Month at the top of the screen.
Monthly Calendar View

The Advisors Assistant Calendar
Page 79
You can move to different days in the month by clicking on a
new day, and then clicking on the word Day at the top of the
screen. You will then be looking at the day you just selected.
You can change months by using the right and left arrow
buttons at the bottom of the screen. You can always change back
to the current day by clicking on the Today Button.
Yearly View
To see the year and change between months and years, click on
the word Year at the top of the screen.
You can change years by using the right and left arrow buttons
at the bottom of the screen. You can always change back to the
current day by clicking on the Today Button.
Associate’s Schedules
To see the times other users have available in their calendars,
click on the word Schedule at the top of the screen.
Viewing Associate’s Schedules

The Advisors Assistant Calendar
Page 80
You will see all of the calendars to which you have access for the
current day you are viewing. You can double-click on any events
to modify the event.
Customizing Your Calendar Settings
Before you start using the calendar, you should set up the
calendar options. Your settings are saved under your initials,
and every time you log into Advisors Assistant it will
automatically bring up your calendar settings.
How to Set Up Your Calendar Options
1. From any View Screen, click on the Calendar Button in the
Sidebar.
2. The first time you enter the Calendar, you will be prompted
to customize your settings. If you have already bypassed this
screen, click on the Setup Button at the bottom of the
Calendar screen.
3. Enter your preferences:
Select the users you want to have access to your calendar.
Click on the “+” Button and select who you wish to have
access to your calendar.
Select whether you want your tasks to automatically roll
over to the next day if they are not completed.
Select if you wish to have your Monthly View show
Saturday and Sunday in different boxes, or grouped
together.
Select whether you would like to be alerted when an
appointment/task comes up. If you want to be alerted,
you need to set how long before the appointment or task
you want the alert. If you opt to be alerted you can select
if you wish a sound to play with the alert and if so which
sound.

The Advisors Assistant Calendar
Page 81
Select if you wish to always have a “With” name selected
in your calendar events. This will allow you to only add
events for a name that is in Advisors Assistant.
The last section is for the calendar defaults. You can set a
default event time and priority, and you can set the
default colors for appointments, calls, and tasks. These
defaults automatically appear when you add a new
appointment or task. You can also change the color that
appears on the two calendars indicating you have an
event on a particular day.
4. Click OK when you’re finished.
To change your calendar settings at any time, click on the Setup
Button at the bottom of the calendar screen.
Calendar User Setup Screen

The Advisors Assistant Calendar
Page 82
Adding & Modifying Appointments
How to Add Appointments
1. From any View Screen, click on the Calendar Button in the
Sidebar.
2. Select the day of the appointment, and double click on the
time slot to which you would like to add the appointment.
3. Enter the details of the appointment:
Date. The date you originally selected will be filled in, but
you can change it.
Beginning and ending time. Check the box if it’s an all
day appointment or over multiple days.
The Sub-type of the appointment. You can set up sub-type
codes to group calendar events together for reporting.
Your System Administrator can also link colors to specific
Sub-types.
A description and notes
Appointment Screen

The Advisors Assistant Calendar
Page 83
Who the appointment is with. Click on the “+” Button in
the With Box to choose the names from the database.
On whose calendar the appointment will be. If you do not
select a name the appointment will automatically be
added to your calendar. Click on the “+” Button in the
Calendars Box to choose the user names. Be sure to
select your name also if you wish the appointment to be
on your calendar as well as the other calendars.
How often the appointment will recur. Once you select
how often the appointment recurs you’ll be able to select a
recurring pattern.
The color you’d like to have appear next to the
appointment
4. Click OK when you’re finished entering the appointment
information.
Your appointment has been added, and will now show up on
your schedule with the time blocked off.
How to Modify an Appointment
1. Open the calendar.
2. Double click on the appointment you wish to change.
3. Enter your changes.
4. Click OK when you’re finished.
How to Delete an Appointment
1. Open the calendar.
2. Double click on the appointment you wish to delete.
3. Click on the Delete Button.
4. Confirm the deletion.
Adding & Modifying Projects/Tasks/Phone Calls
Projects, Phone Calls, and Tasks are considered similar entries,
and are entered into the same area of the calendar.
When you’re looking at the Daily View, you can Right-Click on
the Task/Call and move directly to the name record the Task is
with.

The Advisors Assistant Calendar
Page 84
How to Schedule a Project/Task/Phone Call
1. From any View Screen, click on the Calendar Button in the
Sidebar.
2. Click on the Add Button at the top of the Task/Call list. You
can also double click on the daily schedule where the
appointments are listed, and change the Type to Task or
Call.
3. The event will default to Task, which can also be a project
you define in the Description. To separate phone calls change
the Type to Call.
4. Enter the details of the Task/Phone Call. The fields are the
same whether you have selected a Type of Task or Call:
Beginning and Due date and time. Tasks and Calls will
show as overdue after the due date.
The Sub-type of the event. You can set up sub-type codes
to group calendar events together for reporting.
A description and notes
Task Screen

The Advisors Assistant Calendar
Page 85
Who the event is with. Click on the “+” Button in the
With Box to choose the names from the database.
On whose calendar the event will be. If you do not select
a name the event will automatically be added to your
calendar. Click on the “+” Button in the Calendars Box
to choose the user names. Be sure to select your name also
if you wish the event to be on your calendar as well as the
other calendars.
5. How often the event will recur. Once you select how often the
event recurs you’ll be able to select a recurring pattern. Click
on OK when you’re finished.
The Task/Call has been added to your list of tasks. You can sort
your tasks by any of the columns listed. When the event has
been marked completed, a YES appears in the completed
column. Uncompleted events can be rolled over to the next day
until they are completed. The roll over option is part of the
initial Calendar Setup.
To mark a Task/Call as completed, you would modify the event.
How to Modify a Task/Call
1. Open the calendar.
2. Double click on the event you wish to change.
3. Enter your changes.
4. Click OK when you’re finished.
How to Delete a Task/Call
1. Open the calendar.
2. Highlight the event you wish to delete.
3. Click on the Delete Button.
4. Confirm the deletion.
Printing Calendar Reports
You can print calendar reports by day, week, and month and for
appointments, Tasks, Phone Calls, or all events. The calendar
reports are great reports to run in the morning to see what you
have planned for your day.

The Advisors Assistant Calendar
Page 86
The calendar reports work similar to other reports in Advisors
Assistant. First you select which data you’d like on the report,
then you select the report format.
How to Print a Calendar Report
1. Open the calendar.
2. Click on the word Reports at the top of the screen.
3. Enter the criteria you wish to use to select the calendar
events for your report.
Select what Type of calendar events you’d like on your
report: all, just appointments or Tasks or Calls, or a
combination
Select if you’d like to limit the events selected by other
fields such as sub-type, only completed events, or priority
Select the date range you’d like on the report – you can
enter any date range from a day to a couple years
If you only want to see calendar events that have been
changed recently, enter the change date range
Calendar Reports

The Advisors Assistant Calendar
Page 87
Select the one name you’d like to see calendar events for,
or you can print it for all names
You can print just one user’s calendar, or you can add
users to the list and also print their calendars on one
combined report (use the + sign in the Search Calendars
section to add users). If you wish to have separate reports
for each user, only select one user at a time, print their
report, and then select another user to print their report.
If you’re printing letters to people regarding calendar
events, you can select to only pull calendar events that
have a name in the “with” field. This will keep you from
getting letters with blank addresses.
4. Click on the Search Button to see a list of the calendar
events you have chosen on the screen before printing them.
Click on the Report Button to select a report format or print
letters.
5. Once you have selected your report, click on the Printer
Icon on the toolbar at the top to print the report.
Sending Letters Using The Calendar
With the Advisors Assistant Calendar, you can select a group of
events (such as all appointments next week) and send a letter to
the people with whom you have those events. Printing letters
with the Calendar works the same as printing letters using the
Selection Reports, you’re just selecting different data and the
data file sent to Word has Calendar Event information instead
of just name information. For details on Merging Letters with
MS Word, please see the Wordmerge section in this manual.
How To Send Letters Using The Calendar
1. Open the Calendar.
2. Click on Reports at the top of the calendar screen.
3. In the Filter Options section, fill in the criteria to search for
the clients to which you wish to send letters.
4. Click on the Display Button to see the events you selected.
5. Click on the Report Button to bring up the Calendar
Reports Screen.
6. Click on the Word Button at the bottom of the screen and
choose the letter you want to merge.

The Advisors Assistant Calendar
Page 88
NOTE: To avoid merging blank names, make sure you check the
box for “Has Name in With Field” in the Filter Options section.
Scheduling & Viewing an Associate’s Calendar
If another Advisors Assistant User has given you rights to their
calendar, you can schedule appointments and tasks for them.
There are two ways to schedule for an associate. You can view
their calendar just like you view yours and add an appointment
or task, or you can copy an appointment you’re making in your
calendar to their calendar.
How to Schedule an Associate’s Calendar
1. Open the Calendar.
2. Click on the arrow next to your name at the top right hand
corner of the screen. Select the associate’s name for the
calendar you’d like to view.
3. Add an appointment or task to their schedule the same way
you would add one to yours (see Scheduling an Appointment
above.)
If you are unable to add the appointment, you must not have
rights to their calendar. Ask your associate to give you rights.
How to Copy an Appointment/Task to an Associate’s Calendar
1. Open the Calendar.
2. Add an appointment to your calendar as described above.
3. In the Calendars Box, click the “+” Button and select the
associate’s name from the list. Be sure to select your name
too if you wish to have the event on your calendar.
4. Click OK.
If you are unable to add the event, you must not have rights to
their calendar. Ask your associate to give you rights.
How to View All Associate’s Schedules
If you’re trying to set up an appointment with several associates,
you can view their schedules to see when they have free time.
1. Open the Calendar.
2. Click on the Schedule Button.

The Advisors Assistant Calendar
Page 89
You will see a graph of the calendars to which you have access,
and the times they have blocked off for that day.

The Advisors Assistant Calendar
Page 90
Viewing Calendar Events
The calendar allows you to view your calendar events on a day
by day basis. You can also view all of the events that are
associated with a particular name.
With the View Perspectives, you can view All of a names’
calendar events (appointments and Task’s), just Pending events,
just Completed events, or those calendar events that are
scheduled for Today. Calendar Events can also be added,
modified, and deleted through the View Client With Events
Screen.
How To View Calendar Events
1. Select the name for which you want to view events.
2. Click on the Events Button to move to the Events View.
3. Select the Perspective you wish to view.
View Calendar Events Screen
Messaging
In this chapter you will:
Send a message to Advisors Assistant users
Reply to a message sent

The Advisors Assistant Messenger
Page 92
Sending Messages
With Advisors Assistant, you can send a message to other
Advisors Assistant Users. If you are on a network, the message
will be sent to the computer that User is logged onto. If you are
using the system Single User, the message will be sent to that
User and they can retrieve it when they log onto the system.
How to Send Messages
1. Click on the Messaging Button from the Sidebar.
Sending Messages
Advisors Assistant Messenger

The Advisors Assistant Calendar
Page 93
2. Select the User(s) you are sending a message to. The users
currently logged into Advisors Assistant are indicated with
an asterisk (*). Check “All Users” to select all users in the
database.
3. Type in your message.
4. Click Send.
Replying to a Message
To reply to a message, highlight the message and click on the
Reply Button. Advisors Assistant defaults to including the
previous message in your reply (Quote In Reply option.)
Click the Send Button to send your reply.
Message Archiving
Messages you’ve received will stay on your main Messenger
screen until you archive them. Messages can be deleted
permanently from your Messenger from the Archive. You can
also view messages you’ve sent in the Archive.
Messenger Archive – Sent Messages

The Advisors Assistant Messenger
Page 94
To view your archived messages, click the View Archive
Button.
To view the messages you’ve sent, click the Sent Button.
To permanently remove messages from the Messenger,
highlight the message and click the Remove Button.
New Business
In this chapter you will:
Add New Business Actions
Print New Business Reports

New Business Tracking
Page 96
New Business Tracking
With Advisors Assistant you can track New Business Action
Items to make sure that specific tasks are being completed for
prospects and clients.
For prospecting, New Business can be used to track which stage
of the sales process a prospect is in.
The New Business section allows you to add action items to a
contact's name and even assign follow-up tasks relating to the
action item. You can then print reports of all outstanding new
business actions, and have a history of what actions have been
completed.
How to Add a New Business Action
1. Go to the View Client With New Business Screen.
2. Click on the Add Action Button.
3. Click on the Action Field to select a New Business Action
from the abbreviation list. The Description of the action is
carried down to the Description field, but you can edit it. The
Description field shows on the screen and prints on reports.
4. Select a Priority.
View Client With New Biz

Automated Workflow
Page 97
5. Select a vendor name from the list of names in the database,
if applicable.
6. The Requested Date is automatically filled in with the
current date. You may change this date if you’d like.
7. Enter a Follow-up Date to have the Follow-up added to your
calendar.
8. Enter Notes.
9. Click OK when done.
When the Action is completed, you can Modify the Action and
enter a Completed Date.
Printing New Business Reports
You can print several reports for the policies you have in
Underwriting. The Completed Date controls whether a policy is
in Underwriting or not; if the Completed Date is left blank,
Advisors Assistant considers the policy to be in Underwriting.
Once you fill in the Completed Date, Advisors Assistant removes
the policy from the Underwriting Reports.
How to Print New Business Reports
1. Open the Selection Reports.
Add/Modify New Business Action

New Business Tracking
Page 98
2. Click on the New Business Tab across the bottom of the
screen.
3. Select the New Business Type of Contact New Business.
4. Click on the No Completed Date Box if you wish to only see
action items that have not been completed.
5. Enter any other criteria you wish to search on. You can also
include criteria from the name selection screens.
6. Click Search to run the search.
7. Once the search is completed and you have the list of reports,
be sure to select the Report Type of New Business to see the
new business specific reports. Double click on the report or
highlight the report and click the Report Button.
Workflows vs. New Business
Both the Advisors Assistant Workflow feature and the New
Business feature track processes. However they are both
different and complementary.
The Workflow Concept
New Business Reports Selection Criteria

Automated Workflow
Page 99
Workflows are step-by-step events that are both fixed and
predictable. They tend not to vary in both the steps taken and
the order of those steps.
For example, during the sales order processing it would be rare
for a new requirement to immerge in the middle of the
processing that could not be predicted. If you have the product,
you package then ship. If you don't have the product, you order
it, put it on back order, contact the customer, then package
when it comes in, and ship. The packaging is not going to
change based on some non-controllable outside force that will
force an entire new, unpredictable set of steps.
The New Business Concept
With New Business, the steps and events are not so predictable.
They can be controlled by outside influences that are unknown
at the time the goal is established.
For example, the task of getting the approval of a life insurance
policy between the time the application is sent to underwriting
and the issued policy is placed or delivered to the client. You
have no idea of the complete health history, and cannot predict
which and how many doctors' statements will be required, what
additional tests will be required, the time between each task, or
even what those tasks will entail. One day the underwriter may
ask to have the blood pressure checked on 3 separate days, and
a week later they may ask for a doctor's report from a doctor
which was not on the application.
The New Business process must be both flexible and fluid. The
time frames are usually rushed and "as soon as possible" and
there is no predictability of the steps. This requires a different
process.
Complementary Concepts
Often a Workflow will be followed by a New Business process.
The workflow may take client up to the point of sale as various
fixed processes were performed to set up meetings and generate
proposals.
At that point, the process may become fluid when a product is
sold and it must be tracked through an additional process, such
as underwriting a policy which is not predictable.
The New Business process may then be followed by a Workflow
that will deliver the product and set up the next client meeting.
Automated Workflow
In this chapter you will:
Create Master Workflows
Add & Modify Workflows
Create Workflow Templates
Print Workflow Reports
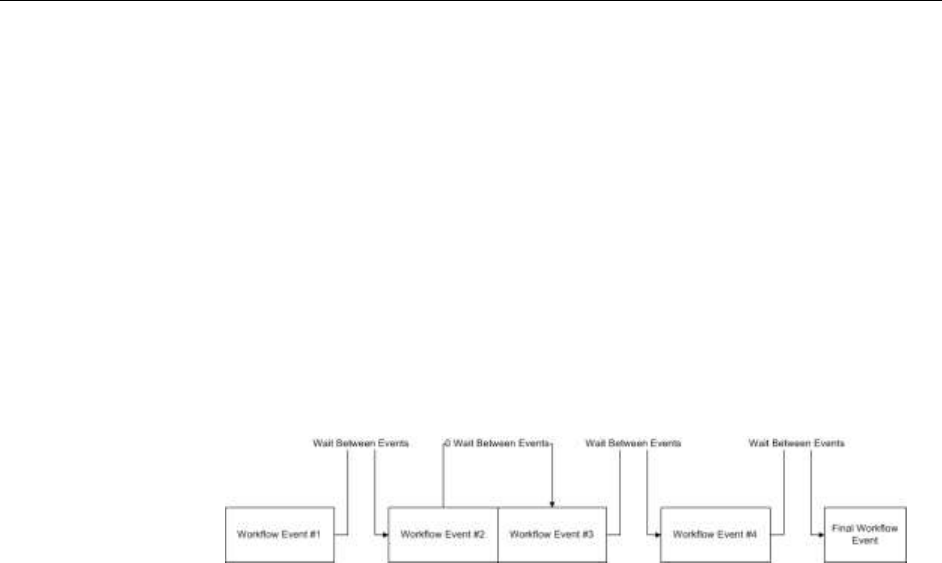
Automated Workflow
Page 102
Automated Workflows
A workflow is a series of functions (workflow events) to be
performed in a sequence designed to accomplish a particular
business process or objective.
Each event is one step of the workflow. An event appears in the
Advisors Assistant calendar as a task. When the event or the
task is completed, the calendar item is deleted, but the event
history remains and can be viewed in the View Client With
Workflows Screen.
Example Of A Workflow Sequence
How Workflows Operate
When you set up an active workflow, the first workflow event
becomes active and a task with a due date is placed in the
calendar for the person assigned the execution of the event.
As the assignee executes the event, based on the instructions
included in the event, they can make notes.
Once the event is completed, the person marks it as complete by
assigning a completed date and who completed the event.
When an event is completed, the task is automatically removed
from the calendar and the next event's task is placed in the
calendar for the person assigned to that task. However, if there
are several events due on the same day, the next event is not
assigned until the last task for that day is completed.
Once the final workflow event is completed, a workflow is
considered completed.
Workflow Setup Step-By-Step
Advisors Assistant has streamlined setting up workflows
through the use of Workflow Event Templates and Master
Workflows.

Automated Workflow
Page 103
Step 1: Outline Each Function Of The Process
The first step in setting up an effective workflow is to
gather the people who perform the business function and
dissect each step (event) of the process.
For example, outline the process on a white board or use
post-its so that you can move the steps as the
stakeholders in the process suggest how each step should
be accomplished.
Only after you have analyzed the steps of your workflow
process are you ready to enter it into Advisors Assistant.
Step 2: Create Master Workflows
Workflows are designed for processes that are repeated in
your business. Creating a Master Workflow will allow
you to simply copy the master to a name and assign the
people who should execute the various events.
Workflow Masters do not have begin and end dates. They
have durations and wait days between their events. The
actual dates are calculated when the master is copied to a
name.
Step 3: Assign An Active Workflow to a Contact
Active Workflows are associated with an individual
contact.

Automated Workflow
Page 104
Master Workflow Templates
Master workflows are designed to save time. A master workflow
is designed as a template which can be copied to a contact every
time this particular sequence of events is needed.
Setting up workflow masters is controlled by the role based
security, so the database administrator controls who can set up
master workflows.
Workflow Library
Advisors Assistant has created a Workflow Library from which
you can import Master Workflow Templates. You can access the
Workflow Library from Advisors Assistant’s Resource Library –
from inside Advisors Assistant click on the HELP Menu at the
top of the screen, then select the Resource Library. You’ll see
the Workflow Library listed in the Resource Library.
How to Setup a Master Workflow
1) Click on the Tools Menu or the Admin Menu at the top of
the screen.
2) Select Workflow | Maintain Workflow Masters.

Automated Workflow
Page 105
3) Click on the Add Button.
4) From the Add/Modify Master Workflow Screen, select a
Workflow Type and enter a Description for your
Workflow.
5) Click the Add Button to add a Workflow Event.
a. Event Type: this is a predetermined list setup by Advisors
Assistant of specific types of events used in workflows.
b. Description: enter the description of this workflow event.
c. Duration: this is the number of days allocated to
accomplish the event. The duration cannot be less than 1,
and the current day is considered day 1 of the duration.

Automated Workflow
Page 106
d. Wait Days: This is the number of days AFTER the
completion of the event before the next event should start.
This number cannot be less than 0.
When the next event is to be executed during the same
time as the current event, use 0 wait days. This should
only occur when the next event is to be executed by a
different user than the current event.
e. Revenue Step: check this box if revenue is expected to be
generated by this step. An additional field will appear on
the Active Workflow Screen so that the amount of revenue
can be entered.
f. Default User: you can assign a default user name to the
event, which is the calendar to which this event will be
added. If you leave the user name blank at the master
level it can then be assigned when you add the workflow
to a contact.
g. Instructions: this is an important field because it allows
the person who owns the Workflow Master to provide
details about how they expect the event to be executed. It
will help prevent mistakes and streamline training.
h. Templates: templates are described in further detail later
in this chapter. You can use templates to save time in
adding workflow events.
6) Click OK to add the first event.
7) Click the Add Button to add another event, or the Modify
Button to modify an existing event.
8) Once the steps have been added you can highlight an event
and use the Move Up and Move Down Buttons to change
the order of the events.
9) Once the events are complete, click OK to add your Master
Workflow.
Assigning Active Workflows
Once your Master Workflows have been created, you can then
assign an Active Workflow to a contact record.
How to Assign an Active Workflow
1. From the View Client With Workflows Screen, click on the
Add Action Button.

Automated Workflow
Page 107
2. Select the name of the Master Workflow from the list.
3. Enter a Begin Date and Priority.
4. Select a primary User. This user name will be used for any
event step that did not have a default user selected.
5. Click the Next Button.
6. The workflow events will be listed out with each begin and
due date. At this point you can double-click on any individual
event to make changes. You can also make changes in the
future. If you change the Due Date of any individual event

Automated Workflow
Page 108
you will need to confirm that each begin date of all future
events will also shift.
7. You can enter a Reference, and/or click on the Account or
Policy Buttons to link this workflow to an account or policy
number for that contact.
8. You can select a name to be notified when the workflow has
been completed, or if it is terminated (such as a manager’s
name.)
9. If there is a revenue step, you can double-click on that event
that is the revenue step and enter the revenue amount to
track the revenue.
10. Click OK to save the Workflow to the contact.
Workflow Notes
Once the workflow is added to the contact name, you can double
click on each individual event to edit the event as you’re working
through the workflow.
Notes can be added to each workflow event to track the progress.
The F2 key can be used to date each individual note entry, F3
can be used to add a date and time to the notes.
You can also read any notes that have been entered under
previous steps using the “Other Notes” tab.

Automated Workflow
Page 109
All notes added under Workflows are also available under the
View Client With Notes Screen.
Event Templates
Event Templates make your Workflow Events reusable as you
set up your Master Workflows. Set up a template when you will
be using the same event with the same instructions in several
Master Workflows.
Since these templates are used over and over, care should be
taken to make sure they are complete, especially in the
Instruction Note.
How to Add an Event Template
1. Click on the Admin Menu at the top of the screen.
2. Select Workflow | Workflow Event Templates.
3. Click on the Add Button to add a template.
4. Enter the fields for this event. Remember this is a template
that can be used with multiple Master Workflows. So you’re
not entering detailed information.
Once your templates have been added, when you’re adding an
event to a master you can use the Load From Template
Button to add an event from a template.

Automated Workflow
Page 110
Workflow Reports
There are many reports available to track the progress of your
Workflows, as well as charts that are available through the
Advisors Assistant Dashboard.
How to Print Workflow Reports
1. Click on Reports at the top of the Advisors Assistant Screen.
2. Select Workflow Reports.
3. The Workflow Selection Criteria Screen is set up to
automatically select all Active and Overdue workflows. But
you can also use the criteria screen to target specific
workflows by filling in the fields depending on what type of
workflow you’d like to select.
4. Once you’ve entered your criteria, click Search.
5. The next screen will give you a list of pre-formatted reports
to choose from that will list out the workflows that have been
selected based on the criteria you’ve entered.

Automated Workflow
Page 111
Workflows vs. New Business
Both the Advisors Assistant Workflow feature and the New
Business feature track processes. However they are both
different and complementary.
The Workflow Concept
Workflows are step-by-step events that are both fixed and
predictable. They tend not to vary in both the steps taken and
the order of those steps.
For example, during the sales order processing it would be rare
for a new requirement to immerge in the middle of the
processing that could not be predicted. If you have the product,
you package then ship. If you don't have the product, you order
it, put it on back order, contact the customer, then package
when it comes in, and ship. The packaging is not going to
change based on some non-controllable outside force that will
force an entire new, unpredictable set of steps.
The New Business Concept
With New Business, the steps and events are not so predictable.
They can be controlled by outside influences that are unknown
at the time the goal is established.
For example, the task of getting the approval of a life insurance
policy between the time the application is sent to underwriting

Automated Workflow
Page 112
and the issued policy is placed or delivered to the client. You
have no idea of the complete health history, and cannot predict
which and how many doctors' statements will be required, what
additional tests will be required, the time between each task, or
even what those tasks will entail. One day the underwriter may
ask to have the blood pressure checked on 3 separate days, and
a week later they may ask for a doctor's report from a doctor
which was not on the application.
The New Business process must be both flexible and fluid. The
time frames are usually rushed and "as soon as possible" and
there is no predictability of the steps. This requires a different
process.
Complementary Concepts
Often a Workflow will be followed by a New Business process.
The workflow may take client up to the point of sale as various
fixed processes were performed to set up meetings and generate
proposals.
At that point, the process may become fluid when a product is
sold and it must be tracked through an additional process, such
as underwriting a policy which is not predictable.
The New Business process may then be followed by a Workflow
that will deliver the product and set up the next client meeting.
The Advisors Assistant Dashboard
In this chapter you will:
Configure your Dashboard

Dashboard
Page 114
The Dashboard
The Advisors Assistant Dashboard is a place where data is
summarized in a format which is easy for you to read and
understand. It’s made up of different widgets, and you can
decide which widgets you wish to have show up on your
Dashboard.
The type of widgets you have available for your Dashboard
depends on which modules you are using with your Advisors
Assistant.
You can open your Dashboard at any time by clicking on the
Dashboard Icon from the Advisors Assistant Toolbar. You can
also have the Dashboard open as the first screen you see every
time you open Advisors Assistant by checking the “Show
Dashboard On Startup” box at the bottom of the Dashboard
Screen.
Setting Up Your Dashboard
To select the widgets you wish to appear on your Dashboard
you’ll need to setup your Dashboard.
How to Setup your Dashboard
6. Click on the Dashboard Icon to open the Advisors Assistant
Dashboard.

Dashboard
Page 115
7. Click on the Setup Button at the bottom of the Dashboard
Screen.
8. The list of widgets that are available is on the right. You can
add and remove widgets from the Active Widgets section
using the Add and Remove Buttons.
a. Sample widgets are sent with Advisors Assistant, so if
you have no open space available click on a widget and
it will be highlighted in blue. Then click on the
Remove Button and it will move it back to the
Available Widgets list.
b. Highlight the name of the widget in the Available
Widgets list, and click the Add Button to add the
widget to your Dashboard. Hovering over the name of
the widget will provide additional information about
that widget.
i. Pie Chart widgets get placed on the right side of
the Dashboard in the square boxes.
ii. List and Bar Chart widgets get placed in the left
side of the Dashboard in the rectangular boxesx
c. Some widgets require additional setup. Highlight the
widget, and click the Setup Button to customize your
settings.
d. Click the Exit Button once you’re finished.
Dashboard Features
The Dashboard is very interactive, and has additional
features you may find helpful for the data you’re viewing.

Dashboard
Page 116
The features that are available depend on the widget you’re
viewing.
Icon
Description
Zooms in to a closer look at the chart you’re
viewing
Takes you directly to reports for the data you’re
viewing
Exports the data you’re viewing to an Excel
spreadsheet
Refreshes the data in the widget
Chart Hover Reports
When you hover over a section of a bar chart or pie chart, you’ll
notice that it pulses. If you click on just that one section of the
chart, you’ll be taken to reports for that type of data. The reports
will only include the data for that section of the chart you
clicked.
RSS Feeds
RSS stands for Really Simple Syndication. It's a way to deliver
up to date information, but takes a special "RSS Reader." Your
Dashboard has an RSS Reader built in. It can provide up to 3
different RSS Feeds.
RSS Feeds are topics that you can click on to read the
underlying news article. Clicking on the RSS Topic on the
Dashboard will take you to the article on the web.
Use the Setup Button to put the RSS Reader on your
Dashboard. You can see more about how to set up the feeds in
the setup help for the RSS Reader.
How to Setup an RSS Feed
1. Go to a web site such as www.WSJ.com. Use your browser.

Dashboard
Page 117
2. Look for a topic about RSS Feeds. In the case of the Wall
Street Journal, search for "RSS" by pressing Ctrl-F and
typing RSS. It's at the bottom of the page.
3. Click on RSS Feeds on the page and then click on the feed
you want to monitor. For Example WSJ Markets. Then pick
the feed from the Market Feeds. In this case, click on Get
Feed.
4. Copy the link shown by highlighting it and pressing Ctrl C.
Paste the link into the Address 1 field.
5. Click Ok, then Click Exit. Advisors Assistant will go and get
the headlines as long as you have Internet access.
Note: Use the Refresh Button to refresh the feed. The RSS
Reader does not constantly interrogate the web site for the
latest feed.
Merging with MS Word for Letters &
Emails
In this chapter you will:
Merge Advisors Assistant data with Microsoft
Word to print a single letter or a mass mailing
Merge Advisors Assistant data with Microsoft
Word to send a single or broadcast email

Merging with Microsoft Word
Page 120
Writing Letters/Sending Emails with Advisors Assistant and Microsoft Word
Advisors Assistant will automatically merge the information
from your database into letters, emails, and other documents in
Microsoft Word. This means that any information you’ve stored
in Advisors Assistant can be inserted automatically into your
letters and emails. No longer will you have to type names and
addresses into your letters – let Advisors Assistant do the work
for you.
When you click on the Word Button from the View Screen or
Selection Reports, Advisors Assistant will send your information
to Word in a format it can read, and open Word for you. You just
need to pick the letter you’re sending from the list (or create a
new one), make any changes you want to the letter, and print it.
And this process works the same whether you’re sending one
letter or hundreds of letters.
Printing Letters/Sending Emails
There are two main areas in Advisors Assistant where you can
instantly link to Microsoft Word and transfer data over: from
any View Screen and from the Selection Reports. You can also
print letters from the Calendar.
Sending a quick letter or email to one person in your database is
extremely easy with Advisors Assistant.
How to Print a Quick Letter/Email to One Person
1. Put the person you’re printing a letter to or sending an email
on the View Screen. Make sure you check that the phone and
address you want in the letter is also on the screen.
2. Click the Word Action Button.
3. Select the document you want to print from the list. Advisors
Assistant defaults to the My Documents\Advisors
Assistant\Word Merge subdirectory as described above. The
AA Master Letter and AA Master Email documents are
designed as templates to help you write new letters and
emails.
4. Advisors Assistant will build your data file and open
Microsoft Word for you.
You can also send one letter or email to several or even
hundreds of names in your database. This is a great prospecting
tool, and can help with your marketing efforts.

Merging with Microsoft Word
Page 121
Logging Letters/Emails
Every time you print a letter or send an email using Advisors
Assistant, you can add a letter log to the name record. You can
also attach a follow-up date to the letter log, and insure that you
are following up on any prospect letters you send.
Letter logs can be added whether you send a document to a
group of selected names or if you just send a document to one
name. The Letter Log pops up after you close the letter or email
and return to Advisors Assistant.
How to Add a Letter Log to a Name
10) Click on the Word Button in Advisors Assistant and open
your letter or email in the word processor you’ve chosen to
use.
11) Print your letter or send your email.
If you want a copy of the whole letter in the letter log, click on
the ABC Button to view the name, highlight the complete letter
(CTRL-A) and copy it into the clipboard (use Edit Copy or click
on the Copy Icon) so you can paste it into the letter log.
12) Close the word processor and return to Advisors Assistant.
13) The Letter Log window is now up on the screen. Enter who
signed the letter and a summary, and you can also store the
name of the document if you wish.
14) Click the OK Button.
If you’ve sent this letter to a group of selected names, each
person will have the letter log added to their record. In this
instance, though, the letter log does not allow you to add notes
and a follow-up date to each record. This saves you from
inadvertently giving yourself hundreds of phone calls in your
calendar. You can always print out a short list of names of the
people the letter was sent to, and add one follow-up to your
calendar to call those people.
Printing Letters to Selected Names
To “mail merge” a direct mailing, you would first select out the
names you want to send letters to using our Selection Reports.
Advisors Assistant then has a direct link from the Selection
Reports to Microsoft Word.

Merging with Microsoft Word
Page 122
How to Print a Letter to Selected Names
1. Run your selection for the names you’re sending letters to.
2. Click on the MS Word Button at the bottom of the Selection
Reports screen.
3. Select the address, phone, and order you wish to use for the
letters. If you’ve selected product data, be sure to check the
appropriate box to include the products in the letters. If you
select a particular Address Type like HOME, and a name
does not have a HOME address, the PRIMARY address will
be used.
4. Select the letter you want to print from the list. The AA
Master Letter is designed as a letter template to help you
write new letters.
5. Advisors Assistant will build your data file and open
Microsoft Word for you.
Sending Letters & Envelopes/Labels to a Joint Address
If you have two spouses in your database and they are both
clients, you will often wish to send just one letter to the house
that addresses both clients/spouses. To do this you use a
combination of the “Head Of Household” field and the Joint
Address.
First you’ll need to make sure that one of the spouses is marked
as the “Head of Household”. Single clients and prospects should
be marked as Head Of Household Field.
In the Head of Household record you can add an additional
address with a location of JOINT (you’ll need to add the JOINT
location to your list of Address Location Codes.) This Joint
Selecting an Address for Merging with Word

Merging with Microsoft Word
Page 123
Address can have a greeting and addressee that includes both
spouses:
Greeting: James and Dolley
Addressee: Mr. and Mrs. James Madison
When you are doing a mailing, on the selection reports criteria
screen make sure you select “Only The Heads of Household.”
And when you perform a Mail Merge make sure you select the
Joint Address for the address to mail to.
Setting Up Your Letter/Email in Microsoft Word
When you click on the Word Button, Advisors Assistant will
open Microsoft Word for you, and you will then have the
letter/email you selected from the list open on the screen.
You will notice some new toolbars and menu options in Word,
which Advisors Assistant set up for you automatically to make
merging easier. The Mail Merge Toolbar will be showing on your
screen with your other Toolbars, and we added a Mail Merge
Menu Option.
Adding Merge Fields to Your Letter/Email
You can insert as many Merge Fields to your letters and emails
as you’d like to customize and personalize your documents.
How to Add Merge Fields to your Letter
1. Position your cursor to the exact location where you want the
field.
2. Click on the Insert Merge Field Icon.
3. Double-click on the Merge Field you want inserted into your
letter. Close the Insert Merge Field window.
The Merge Field will be put in your letter or email at the point
where your cursor was. To see the data instead of the Merge
Field Name, click on the View Merged Data Button.
If you insert an Investment or Policy Merge Field but no product
data shows in the letter, you either did not select on any product
data in Selection Reports or you were not Viewing the product in
Advisors Assistant before you clicked on the Word Button to
open your letter.

Merging with Microsoft Word
Page 124
Printing Letters/Sending Emails and Merging the Data
Your letter or email is finished and ready to print or send, and
now you need to tell Word to merge the data and either print a
letter or send an email. If you’re printing a mass mailing, you
should do a test merge print to verify that everything is printing
correctly before printing all of the letters.
How to Print Your Letters with Merged Data
There are three ways you can print your letters and merge the
data.
1. When printing a single letter, if you have already clicked the
View Merged Data Button and are looking at the name
itself on the screen rather than the Merge Field Names, just
click your Word Printer Icon from the standard Word
toolbar. This will send the letter directly to the printer
without allowing you to change printers, copies, or print just
one page. This only applies to printing a single letter.
2. If you want to change printers or other printer settings, you
can click the Merge to Printer Icon. First select if you wish
to print to all names or select a record number range. This
option will merge the data whether you are viewing Merge
Fields or Data on the screen. You always need to use this
option to print a mass mailing (more than one name.)
If you are printing a mass mailing you should choose print
option #2 and tell it to print records from 1 to 3. This would give
you a test print run.
How to Send Emails with Merged Data
When sending emails, click the Merge To Email Icon from the
Merge toolbar. Enter a subject. This will send the emails directly
to Outlook into the Outbox.
After your letter/email(s) print and you exit Word, you will
return to Advisors Assistant. A Letter Log window will be up on
the screen. You can enter your Letter Log information and a
Follow-up date if you have merged a letter to just one person, or
click the Cancel Button to exit the Letter Log. Advisors
Assistant will not allow you to add a follow-up date to the letter
log if you have done a mass mailing – you wouldn’t want to have
100 To Do’s created from a Letter Log follow-up.

Merging with Microsoft Word
Page 125
Printing Envelopes/Labels Using Microsoft Word
Advisors Assistant has some label formats set up on the
Selection Reports menu. If you need a different label format, you
can create your own labels using Microsoft Word and merging
the data from Advisors Assistant.
Advisors Assistant also sets up a #10 Envelope with your master
document templates.
Due to the changes in merging with different versions of MS
Word, if you wish to create more label or envelope documents
please contact technical support.
Where are my documents stored?
Advisors Assistant creates a directory (folder) where it saves all
of your word processing documents. Each Workstation has its
own folder. This is the directory Advisors Assistant defaults to
when opening and saving documents, but you can always move
documents to other folders just like with other Windows
programs. The directory created is:
My Documents\Advisors Assistant\WordMergeDoc
Your Advisors Assistant will come with some documents already
set up, such as the Master Letter and Master Email. These have
some merge fields set up in them already, and can be used as
document masters for other letters and emails you write.
How Do I Know What Information is Sent to Word?
When you’re printing a quick letter or sending a quick email to
one person, the information that is put into the data file depends
on what you have on the View Screen.
If you are looking at the name information, only the name
information will be put into the Data File. If you have more
than one phone number or address for that person, the phone
number and address that is currently being viewed will be
sent to Word. (The fax and mobile numbers are always sent.)
If you are looking at the policy or investment information for
a contact, that product information will be sent along with
the name information.
If you are printing letters or sending emails from Selection
Reports, the same rules apply as with printing reports. If you
select only on name information, only the name information is
sent to Word. If you select on product information, the product
data will be sent to Word also.

Merging with Microsoft Word
Page 126
Outlook Synchronization
In this chapter you will:
Synchronize Advisors Assistant data with
Microsoft Outlook
Setup the Email Archiver

Outlook Synchronization
Page 128
Advisors Assistant has a direct link with Microsoft Outlook
(2003 or later only,) Outlook 365, or Exchange that can be used
to combine the power of Advisors Assistant with MS Outlook.
You can use Outlook to synchronize your Advisors Assistant
calendar and contacts with your mobile device or for auto
archiving your email correspondence to your contact’s notes.
Advisors Assistant’s Outlook Integration will do all this and
more with ease.
Since Advisors Assistant integrates with Outlook, it will work
with any mobile device that synchronizes with Outlook. Almost
all mobile devices on the market, including smartphones,
synchronize with Outlook. You may have to check with your
manufacturer for instructions on how to synchronize your device
with Outlook.
You must be using Outlook 2003 or later to synchronize
Advisors Assistant with Outlook.
Advisors Assistant can synchronize both Contact and Calendar
data with Outlook. You choose the data that is synchronized
with Outlook - contact data, calendar data, or both. You can also
turn on the "Real-time Export" for Advisors Assistant Calendar
Events with Outlook.
Contacts
Advisors Assistant will synchronize Contact data with Outlook,
including 3 addresses, 4 phone numbers, 3 email addresses, 1
web address, birthdates, wedding anniversary dates, categories
(with the Name Type field in Advisors Assistant,) and notes.
If you send birthdates and anniversary dates to Outlook,
Outlook will set up an event in the Outlook Calendar for those
dates. You can opt not to send these dates to Outlook. If you
send these dates your synchronization can take a long time and
you may not be able to use your Outlook until it is finished.
Advisors Assistant only synchronizes with the main Contact List
in Outlook. When you import from Outlook, all Contacts will be
imported unless you specify just one category to import.
Calendar
Advisors Assistant can synchronize Appointments and Tasks.
You get to choose to synchronize Appointments and/or Tasks
each time you synchronize.

Outlook Synchronization
Page 129
There are 3 options for transferring data between Advisors
Assistant and Outlook.
Export from Advisors Assistant to Outlook
Update Outlook with additions or changes from Advisors
Assistant.
Import from Outlook to Advisors Assistant
Update Advisors Assistant with additions or changes from
Outlook.
Both Export and Import
Advisors Assistant will be updated by Outlook changes and
Outlook will be updated by Advisors Assistant in one easy step.
You do not actually have to use Outlook in order to synchronize
it with Advisors Assistant. Outlook must be open, but it can be
used to just hold the data from Advisors Assistant so that the
PDA can grab it.
Exporting to Outlook
Advisors Assistant will export any data you select directly to
Outlook.
Outlook Export Options

Outlook Synchronization
Page 130
How To Export To Outlook
1. Click on the Outlook Icon in the Sidebar.
2. The Outlook Synchronization Screen will appear. Select the
synchronization direction of Export from the drop down
options.
3. Select the information you want to export:
Export Calendar: Select which calendar events you wish to
export to Outlook. Uncheck this box if you do not want to
export calendar events to Outlook.
Export Contacts: Select which contact data you wish to export
to Outlook. You can narrow the list of names exported using
the Type Field or Markets. Uncheck this box if you do not
want to export any contacts.
Export Birthdays/Anniversaries: lets you export the dates of
birth and wedding anniversary dates. Outlook will convert
them to reminders in the Outlook Calendar. Your device
may treat them differently.
4. Click the OK Button to begin the Export.
The export to Microsoft Outlook is very dependent on your
computer’s speed and memory. You can watch the progress by
switching over the Synchronization Window.
Exporting Client Notes
Advisors Assistant will export notes that you have entered for
your names. Due to the notes limitations in Outlook and the
mobile devices, though, Advisors needs to know which notes to
export. Only one set of notes can be sent back and forth to
Outlook.
To export notes to Outlook, create a new note for the name in
Advisors Assistant called Outlook Notes. Any notes entered
into this note called Outlook Notes will be exported to Outlook.
Any notes you want to export must always be added to this set
of notes. The name of the note is not case sensitive, so you can
call it outlook notes without caps if you prefer.
Subsequent Exports
Advisors Assistant tracks all the records exported. If you update
a record in Advisors Assistant and export it again, Advisors
Assistant will change the record in Outlook that will
subsequently change it on your mobile device.

Outlook Synchronization
Page 131
Importing from Outlook
If you’ve made changes to the information in your mobile device
while you were out of the office, you can import those changes
back into Outlook and then update the names you’ve changed in
your Advisors Assistant.
Advisors Assistant will import all of the names in the main
Contact Folder in Outlook. If there are some names in your
Contact Folder you do not wish in Advisors Assistant, you
should move them into another Contact Folder in Outlook.
How To Import From Outlook
1. First make sure you have synched your mobile device
with Outlook so that all the changes are in Outlook before
you import them into Advisors Assistant.
2. Click on the Outlook Icon in the Sidebar.
3. The Outlook Synchronization Screen will appear. Select
the synchronization direction of Import from the drop
down options.
Outlook Import Screen

Outlook Synchronization
Page 132
4. Select the information you want to import:
Import Calendar: Select which calendar events you
wish to import from Outlook. Uncheck this box if
you do not want to import calendar events from
Outlook.
Import Contacts: Select which contact data you
wish to import from Outlook. Be sure to select a
Producer Name and if you wish to only import one
Outlook Category. Uncheck this box if you do not
want to import any contacts.
5. Click the OK Button to begin the Import.
6. The names and calendar will automatically be updated in
Advisors Assistant based on how they are in Outlook. If
you added a note to your mobile device and that name did
not have a note called Outlook Notes already, a new note
will be created called Outlook Notes.
Both Import and Export
If you wish to perform both an import and export in one step,
select this option from the drop down list. Then enter the
criteria for both the import and export.
Saving Criteria
You can save the criteria you’ve entered so that when you click
on the Outlook Icon, the main function you perform will
automatically be setup.
Enter your criteria. Click the Save Criteria Button. The next
time you open the Outlook Synchronization Screen this criteria
will already be filled out for you.
Real Time Export
You can tell Advisors Assistant to automatically send any
additions or changes to calendar events to Outlook.
How To Setup Real Time Export
1. Click on the File Menu, and select Preferences.
2. Click on the Outlook Tab at the top of the screen to open the
Outlook Preferences.

Outlook Synchronization
Page 133
3. Click on the radio button to turn ON Real Time Export for
Calendar Events.
The Real Time Export only sends calendar events added by you
to your calendar over to Outlook. Due to Outlook Security, if
another user adds or edits events to your calendar you’ll need to
perform a full export to have all of your calendar events
exported to Outlook.
Archiving Emails
The Email Archiver is an optional tool that you can turn on if
you're using Outlook (2003 or later only) as your email program,
and you wish to archive incoming and/or outgoing emails to the
contact's Notes in your Advisors Assistant Database.
You must be using Outlook 2003 or later to archive emails
in Advisors Assistant.
The Advisors Assistant Email Archiver will archive all incoming
and outgoing emails that are sent through Outlook if the
contact's email address is in your Advisors Assistant Database.
The text of the email is saved in the contact's Notes in a read-
only Note Topic called Archived Emails.
Outlook Preferences Screen

Outlook Synchronization
Page 134
Before you begin using the Outlook Email Archiver you must
turn it on through your Preferences.
How To Setup Email Archiving
1. Click on the File Menu, and select Preferences.
2. Click on the Outlook Tab at the top of the screen to open the
Outlook Preferences.
3. Enter your preferences:
Email Account To Monitor: enter the email account
you wish to monitor for capturing emails. Advisors
Assistant will monitor one email address unless you’re
using an Outlook Exchange Server in which case you
would select the first option. Be sure to check the
boxes to turn on archiving for incoming and/or
outgoing emails.
Forward Email Account: if your broker dealer has an
email account they monitor for compliance, you can
enter that email address and Advisors Assistant will
automatically forward a copy of emails to that email
address.
Process Email Received: This is a look back feature
which is especially valuable the first time you do the
email archive. It tells Advisors Assistant how far back
to look for emails when you begin archiving. If you
want Advisors Assistant to look back 3 months, you
could set 90 days and then change the number of days
to Today or Since Yesterday once the first archiving is
complete.
4. Click OK to save your preferences. The next time the
Send/Receive function begins in Outlook the email archiver
will start.
Depending on how far back you are looking through Outlook to
archive emails, it could take some time. Daily archiving does not
take noticeable time.
Autodialing the Phone
In this chapter you will:
Dial the phone using the Advisors Assistant
Autodialer

Outlook Synchronization
Page 136
Dialing the Phone with Advisors Assistant
Advisors Assistant uses the Windows TAPI dialer to take
advantage of all the features that come with some of the new
modems. So instead of having a setup for your dialer preferences
in Advisors Assistant, you actually set up your dialer
preferences through Windows.
How to dial the phone using Advisors Assistant
1. Go to the name you want to dial.
2. Click on the Dial Action Button.
3. Highlight the number you want to dial, and click on the Dial
Number Button or SKYPE Button at the bottom of the
window. You need to set up with SKYPE, and Internet phone
system, to use the SKYPE Button.
4. Click the Disconnect Button from the Windows dialer at the
top of the screen to disconnect the modem from the phone
once it has dialed the number. This does not hang up the
phone.
5. A Phone Log will automatically open with the number you
dialed, or you can add the note to a different Note Topic. You
can enter a phone log for the person at this time, and attach
a follow-up date to the log. Click OK when done or Cancel if
you don’t want to add a phone log.
The Phone Log is being timed while you have it open, so
when you click OK the total time is entered into the note.
The Phone Log will be added under the Notes Tab on your View
Screen, along with Letter Logs and other Notes.
Autodialing with Advisors Assistant

Outlook Synchronization
Page 137
Preferences, Tools & Admin Functions
In this chapter you will:
Explore User Preferences
Explore Tools
Explore Administrative Functions
Update your database
Back up your database
Perform Database Maintenance

Preferences, Tools, and Admin Functions
Page 140
General Preferences
User Preferences are available from the File Menu and can be
set independently for each user.
Recent Names List
You can select how many names you’d like Advisors Assistant to
track in your recent names list. 7 names will show in the list,
and a scroll bar will become active if you choose to list more than
7 names.
Name Lookup Screen To Use
If you have a large database, you can choose to show only a
partial list of names in the Name Lookup Screens to load the
screen faster.
Selected List Item Color
If your Windows Display is set to a darker color for selected list
items, you may not be able to read the view screen items easily.
So you can change the color that is shown in Advisors Assistant.
Sort and Locate List Items
When looking at abbreviation lists, choose if you wish to sort the
list by abbreviation code or description. This effects what you
would type in to find an abbreviation on the list.
Outlook Preferences
Advisors Assistant to Outlook Sync
If you wish to synchronize with Outlook, you must first turn on
the synchronization.
Real Time Export for Calendar Events
Select if you wish to have additions and edits to calendar events
automatically sent to Outlook.
Archiving and Forwarding
If you wish to turn on the Email Archiver in Advisors Assistant,
you need to set up the email address you’ll be monitoring and
turn on the archiver.

Preferences, Tools, and Admin Functions
Page 141
Default Preferences
Default Address Location
You can set a Default Address Location so that every time you
ADD a new address the location defaults to your choice.
Default Phone Location
You can set a Default Phone Location so that every time you
ADD a new phone number the location defaults to your choice.
Default Producer
Select the Producer Name you would like to be entered as the
default when you add a new name to Advisors Assistant.
Form Automation
You would only need to visit this option if you have installed
both Quik! Forms and Laser App to your computer.
Tools
The Tools Menu contains many features that are also available
through the Sidebar Menu. These features have also been added
to the Tools Menu for use with voice recognition software.
Additional tools are also available:
Change Password
Allows you to change the password you use to log into Advisors
Assistant.
Search All Notes
Allows you to globally search the notes within Advisors
Assistant based on keywords or date ranges.
Personal Contacts Wizard
If you’re using the Personal Contact option in the Advisors
Assistant Notes, this wizard will walk you through finding
names that have not had a personal contact within a date range
you specify.

Preferences, Tools, and Admin Functions
Page 142
Combine Names
When you find you have two duplicate names in the database,
you can use the Combine Names utility to combine the two
names together. You’ll need to decide which name will be
remaining in the database (the surviving name) and which
name will be deleted, and all data from the deleted name is
added to the surviving name.
Advisors Assistant is unable to add data to the General Name
Information Screen, so be sure your surviving name has all of
the data from the name you’ll be deleting.
Tagged Names Report
This report is detailed in the Reports Chapter of the manual. It
is opened through Tools.
Administrative Functions
The Admin Menu is only available to users who have Admin
access. If you do not have an Admin menu, you do not have
Admin access. Figure out who has Admin access in your office
and have them perform the appropriate function.
Activate Advisors Assistant & Modules
These sections are for activating the main Advisors Assistant
after Trial Period, and for activating any optional modules you
have purchased.
Maintain Users
This feature is used to Add, Modify, and Delete users to the
database. A user is defined as a person who is able to log into
the database using their given ID and Password.
Maintain Security Roles
When a user is added to the database, they are given a “role.”
The security roles control what a user is and is not able to do in
the database. You can set up as many security roles as needed
for your office.
Maintain Calendars
When a User is added to Advisors Assistant, a calendar is
automatically added for that User. But you can also add “Office

Preferences, Tools, and Admin Functions
Page 143
Calendars” to Advisors Assistant that you can give the complete
office access to, such as a Conference Room calendar.
This section also allows you to delete calendars, or move
calendar events from one user’s calendar to another. The user
must be deleted from the database before their calendar can be
removed.
Maintain Producers
Advisors Assistant has a Producer List that it maintains so you
can add producers to names in the database for reporting
purposes. You can add people to the Producer List through this
feature, and additional third-party id’s and passwords can also
be stored for producers under their name.
Maintain Access Rights
For MultiProducer and Enterprise systems, Advisors Assistant
has additional security that limits the list of names a user can
see based on the Producer attached to the names. This feature is
used to set up to which producer lists a user has access.
Maintain Reports
Advisors Assistant has a Basic Report Designer that allows you
to create your own basic custom reports. Through Maintain
Reports you can add new reports, or copy basic reports and edit
them.
Maintain Master Pages
To use the Pages feature in Advisors Assistant, you must first
add a Master Page through this menu option.
Maintain Abbreviations
If you have the appropriate security access, you can edit
abbreviation lists directly from the field in the database. This
feature allows you to delete and combine abbreviation codes (for
duplicate codes.)
Maintain Postal Codes
When you install Advisors Assistant, the complete list of US
Postal/Zip Codes is also installed. The Postal Codes are sent
with Advisors Assistant so that when you add an address and
enter the Postal/Zip Code, the City, State, and County fields are
filled in automatically.

Preferences, Tools, and Admin Functions
Page 144
Advisors Assistant will update the Postal Code list periodically,
but you may need to make a change to a Postal Code before the
list is updated by Advisors Assistant. You can make changes to
Postal Codes at any time.
Maintain Area Codes
When the phone company changes an area code in your area,
you can have Advisors Assistant go through your database and
automatically change everyone who had that old area code to the
new area code.
Phone numbers are made up of three parts: the area code, the
prefix (the first three digits of the phone number), and the line
number (the last four digits of the phone number.) When an area
code is changed, it is changed for specific prefixes in your area.
You can get a list of the prefixes that have changed from the
phone company.
Maintain FlexField Labels
You can edit FlexField Labels directly from the modify screens,
or you can use this feature to edit the labels.
Maintain Mailing Lists
Advisors Assistant will allow you to import any comma
delimited (CSV) file into your database. This feature walks you
through importing the list, which entails “mapping” fields so
that Advisors Assistant knows where to put the data that is
being imported from your list.
Only basic name, address, and phone data can be imported.
FlexFields can also be used for the import. A list of the fields
available during the import is available in the Advisors
Assistant Help.
Reports
Administrative reports such as process logs and database
statistics.
System Preferences
There are some system-wide preferences that you can set, such
as “Strong Passwords.” They’re available through this feature.

Preferences, Tools, and Admin Functions
Page 145
Backing Up Your Data
Computers break! It’s a fact. Your computer will break. If you
are not backed up, you will have a 100% probability of losing all
your data sooner or later. You need a “Backup Strategy”. Here’s
what we suggest. It doesn’t matter whether you use floppy
disks, tapes, CDs, DVDs, or USB Drives to backup.
Backup Strategy
1. Backup at the end of each day. If you use our built in
backup, it will only take a few minutes, even on the largest
database.
2. Never, never backup on the same set of disks/usb drives each
time. Your data will become worth thousands of dollars.
Invest in a set of disks/drives. We recommend 5 to 10 sets of
backups. When you rotate through the last set, start back on
the first one.
3. Label your backup sets Monday, Tuesday, Wednesday,
Thursday, Friday, Week 1, Week 2, Week 3, Week 4 and
January through December (one disk for each month.)
4. Take your weekly and monthly backups home or to another
site.
Only a user who has Administrator rights to the server or
computer on which the database is installed can Back Up
Advisors Assistant. This is for security purposes. You don’t
want just anyone to backup your data and take the backup
away.
How to Backup Advisors Assistant
1. From the computer to which the SQL Database was
installed, go to Start | Programs | Advisors Assistant
|Database Maintenance/Backup/Restore.
2. Click on the Backup Database Button.
3. Select the location to which you are backing up.
Advisors Assistant will automatically name the file with the
date in the name, but you can change the name if you’d like.
4. Click Save.
You can set a default backup path and encryption level through
the Backup Preferences. Click on the Preferences Button on
the same screen as the backup routine.

Preferences, Tools, and Admin Functions
Page 146
Restoring Your Data
If your hard drive crashes, or you get a new computer, you will
transfer the Advisors Assistant data to the computer by
restoring the backup you made.
When you restore your data to Advisors Assistant, it will
overwrite anything that is in the current database. If you have
existing data in that database, and it is different than the data
you are restoring, you will lose the information in the existing
database. Restoring puts an exact duplicate of the data from the
backup into the existing database.
How to Restore Advisors Assistant
1. From the computer to which the SQL Database was
installed, go to Start | Programs | Advisors Assistant
|Database Maintenance/Backup/Restore.
2. Click on the Restore Database Button.
3. Select the location where your backup file is located.
4. Confirm that you wish to restore the data. Remember, this
will overwrite all data in the Advisors Assistant to
which you are restoring.
Maintenance
Database Maintenance is important. Maintenance compresses
and reindexes the database and should be performed on a
regular basis. If you use notes often, file maintenance will also
reduce the size of your notes file.
Before File Maintenance is performed, Advisors Assistant will
be backed up. You do not need to do a separate backup the same
day you perform File Maintenance.
If you are on a network, no one else may be in Advisors
Assistant while you are performing Maintenance.
How to Perform Maintenance
1. From the computer to which the SQL Database was
installed, go to Start | Programs | Advisors Assistant
|Database Maintenance/Backup/Restore.
2. Click on the Maintain Database Button.
3. Since a backup is created before maintenance is performed,
select the location to which you are backing up. Advisors

Preferences, Tools, and Admin Functions
Page 147
Assistant will automatically name the file with the date in
the name, but you can change the name if you’d like.
4. Click Save.
Event Marketing With Advisors Assistant
Advisors Assistant can be used to implement and
track any type of event marketing program by
performing the following functions:
Record all the events held and the agent
responsible for holding them.
Enter prospects who sign up for the event
Write a series of pre-event letters using Advisors
Assistant’s link to Word or its built in word
processor.
Track the source of each signup.
Create call lists to remind signups of the event.
Change the category of prospects from Signup to
Attendee for those signups who attend.
Write post event letters to attendees.
Record areas of interest for attendees who
complete the event form for marketing of future
events and products.
Contact non-attendees about future events.
Change the category of an attendee to a client
when business is written.
Use Advisors Assistant to market future events
and products to the established client.

Event Marketing
Page 150
Tracking Events with Advisors Assistant
Advisors Assistant can be a powerful tool in tracking the event
and seminar process. The steps outlined in this document focus
mainly on events held to gain prospects, such as seminars. But
the same steps can be used for tracking client appreciation
events.
If the goal is to only market to each person once, Advisors
Assistant will only make the process more efficient. If the goal is
to build a database of signups, attendees, and clients, then
Advisors Assistant can put enormous marketing power at your
fingertips.
This document gives an overview of how you would track events
in Advisors Assistant. For details of how to perform the different
steps referenced here, please refer to the Advisors Assistant
Help. Not described here is the process of reading mailing lists
into Advisors Assistant, printing letters and envelopes, and
adding teasers to envelopes that will encourage them to be
opened. This will cause mailings to pull more replies than just
putting labels on envelopes.
Recording The Event
The event is entered into Advisors Assistant as a name with a
Type of Name equal to Event or Seminar. The event is entered
Seminar Record Set Up

Event Marketing
Page 151
as an “organization” vs. an “individual.”
The View Screen above shows how a seminar record provides
convenient information to refer to for address and phone
information. You can use FlexFields to record additional
information about the seminar or event, and you can use the
addresses and phone numbers to store the contact people that
are helping to set up the seminar or event.
Entering Signups
As prospects sign up for the seminar or event, it’s important to
enter their name into the database. This will build a database
of names that can be used for marketing later.
As shown on the View Screen, only a few data fields need to be
entered at the signup level. However, every attempt should be
made to get the address and phone number. “Please give me
your address so we can send you the ticket and confirmation
letter” can be used.
Tracking The Source Of Each Signup
To track how the signup heard about the seminar, you can use
the Markets/Areas of Interest (as shown on the screen above.)
Initial Signup Record Only Needs Name, Address, Phone & Type

Event Marketing
Page 152
When you are entering the seminar signup into the database,
add a Market to their name to show how they heard about the
seminar.
Using Selection Reports, all names that responded to invitations
(or any other source) can be selected from Advisors Assistant
and invitations to other seminars can be sent to them. Or you
can use Advisors Assistant to give you the number of clients who
resulted from Seminar Invitations and compare them to the
number of clients who resulted from newspaper advertising. You
can get a total number who resulted from a particular source,
and you can narrow it down to how many heard about a
particular seminar through each source.
You’ll be able to track which of your advertising campaigns
worked best and is worth the investment.
It is very important that each respondent be asked where they
heard about the seminar.
Link The Signup To The Seminar
Once the Signup’s name is entered, it’s important to establish a
permanent link between the Signup’s name and the Seminar’s
name.
Linking the Seminar to the Signup

Event Marketing
Page 153
The View Screen shows how the signup is linked to the seminar.
The relationship is “Seminar”. This maintains a permanent link
even if the type of name changes to Attendee or Client, you can
always get a list of all Signups using this link.
Sending a Confirmation Letter
Click on the Word Icon on the signup’s screen to send a
confirmation letter just after the person is entered into the
database.
Creating Call Lists
Prior to the event, all Signups can be called. By using the
Selection Reports and searching for the “seminar signups,” you
can print a report with phone numbers.
Of all the fields on the Selection Screen, you only need to fill in 2
fields. You want all those people linked to the seminar name
who have a relationship of Seminar Signup.
Once the selection of names is complete, print one of the lists of
names that contains phone numbers.
Tracking Attendees
After the event, working from a list of attendees, simply change
the Name Type for each person who attended from Signup to
Attendee.
Selection Report Screen Showing Signup Search

Event Marketing
Page 154
By making this change, you can get a list of people who attended
the seminar for follow-up, and you can get a list of people who
signed up for the seminar but did not attend it. You can send a
letter to the people who did not attend letting them know of
future events.
Note: We can still track all the signups for any one seminar or
signups for all seminars even though we change the Name Type
to Attendee. We linked each signup to the particular seminar
they signed up for, so by using Selection Reports and searching
on the Relationship of “Seminar Signup”, we can always retrieve
the original signup list.
Writing Post-Seminar Letters To Attendees
Previously we demonstrated setting up the selection report
search for Signups. By searching for Name Type of Attendee vs.
Signup, you will get a list of Attendees for the event or seminar.
Searching for a list of Seminar Attendees

Event Marketing
Page 155
After performing the search, you can write a letter to all
Attendees using the MS Word button at the bottom of the report
list.
Recording Areas of Interest for Attendees
Have attendees fill out a Workshop Questionnaire indicating
their interests and return it to the agent or rep. These interests
can then be converted to “areas of interest” in Advisors
Assistant and tracked in the Markets.
You can use the Selection Reports to search on various Markets
immediately after the event or for future mailings. You’ll know
exactly what each attendee is interested in.
Contacting Non-Attendees about Future Events
The type of name for any signup who did not attend the seminar
remains “Seminar Signup.” Only the Attendees are changed to
“Seminar Attendee.”
By using the Selection Reports and searching based on Name
Type of “Seminar Signup” linked to the seminar, you will get a
list of all of the Signups who were not changed to Attendees.
Recording Areas of Interest from Workshop Questionnaire

Event Marketing
Page 156
Changing Name Type To Client When Business Is Written
The Name Type progresses on to Client when a policy is written
or investment sold. The original source of the name (ie. event
ad) and the original event are retained through the links and
markets established earlier.

Appendices
Page 157
Appendices
Included in this chapter:
Hot Keys

Appendices
Page 158
Hot Keys
There are many “Hot Keys” throughout Advisors Assistant.
These keys are shortcuts that allow you to perform functions
with just a couple keystrokes. To use the hot key commands, you
hold down the key(s) listed (i.e. ALT) on your keyboard and
press the second key.
Description
Hot Key
Name Lookup
Alt+Q
Phone Lookup
Alt+P
Scan File
Alt+Shift+S
View Scanned/Stored File
Alt+Shift+V
Store File
Alt+Shift+Z
ACTION BUTTONS
Ctrl+Alt+
Add
A
Modify
M
Delete
D
Report
R
Word
W
Excel
E
Dial
I
VIEW CLIENT SCREENS
Alt+
Investments
V
Insurance
I
New Biz
B
Notes
N
Markets
M
Links
K
Group / Household
O

Appendices
Page 159
Files
L
FlexFields
X
Pages
G
Events
S
OTHER HOT KEYS
Copy
Ctrl+C
Paste
Ctrl+V
Cut
Ctrl+X
Modify A Telephone Number
Ctrl+T
Modify An Address
Ctrl+R
Modify A Contact Name
Ctrl+N
Insert your cursor at that
point
Single Left Click
Highlight an entire date or
numeric field
Double Left Click
